Encompassing more than 700,000 acres of wilderness with 800 miles of developed trails and world-class climbing routes that shouldn’t be missed, Yosemite is one the most famous national parks in America for good reason.
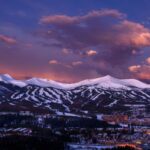
When I rolled around the bend for my first look at that iconic Tunnel view, well to put it plainly I had no words. My passenger, a friend who was easily triggered into humming and whomping the Jurassic Park theme song on annoying demand but who had nonetheless become behind my wheelled pal once again many years later.
Enormous domes of glacially polished granite soared into the air like the fossilized husks of long dead beasts. Waterfalls dropped thousands of feet from high cliffs and a dense, inexhaustible green forset surrounded the valley.
The size of everything was humbling. It was artwork itself, in the highest form.
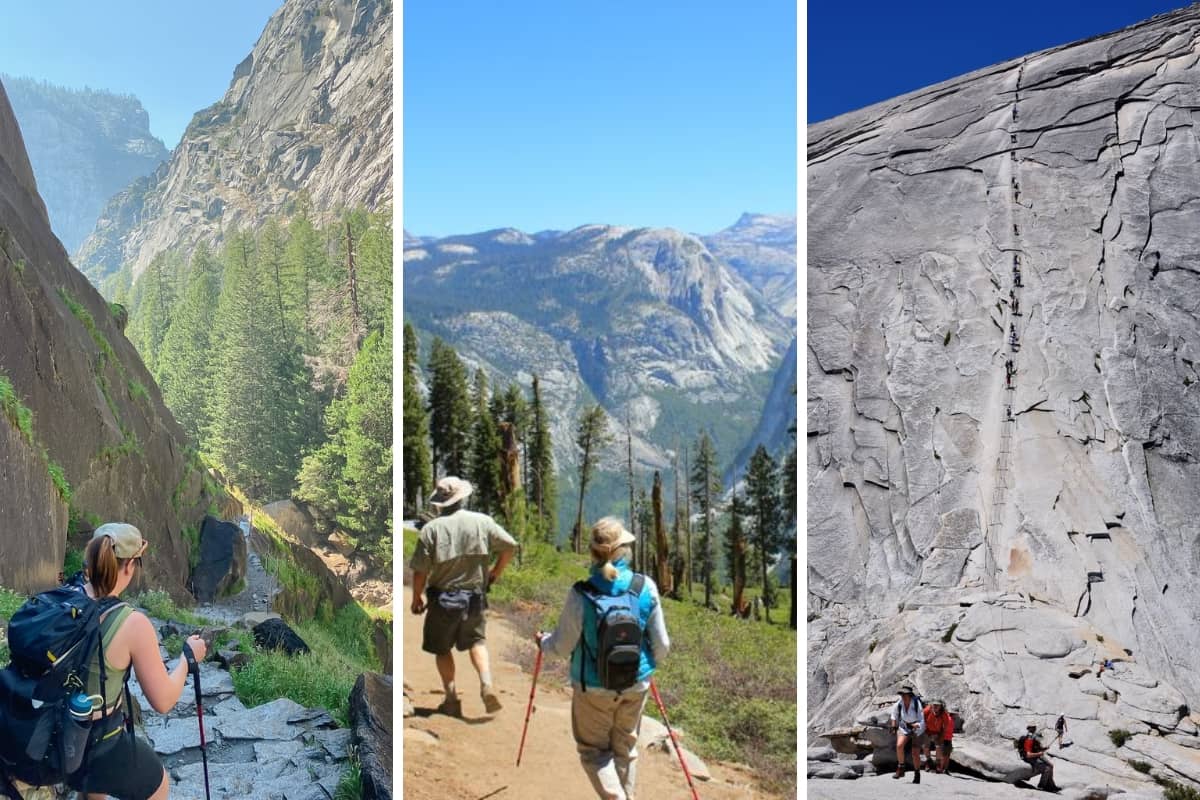
Exploring Yosemite: A Guide to Multi-Day Backpacking Adventures
This is just a part of what Yosemite National Park camping brings and if you are one who truly loves to enjoy the panoramic view that most remarkable landscape can provide, then having more than 1 day for your stay would probably lead into shorter tours or you could also consider taking (hiking) backpacking trips – an experience like no other assisting in discovering some brain draining sights ever! It is an equally great way to get away from people as a majority of the park visitors never makes it this far off trail.
This and much more is what Yosemite has to attract its visitors – all the way from the photo-buffs attracted by valley into solemn hikers thirsty of height solitute. This is your list of the best overnight backpacking trips to get you started.
1. Glacier Point Loop
Why you should go: A two-day adventure offering a condensed experience of Yosemite’s top natural wonders.
Distance: 18.25 miles
Elevation Gain: 5,214 feet (total)
Difficulty: Challenging
This is a perfect single loop to take for the serious hiker who wants to cover an abundance of ground in as little time possible. Grab a wilderness permit from either Glacier Point or Happy Isles to Little Yosemite Valley, lace up your boots and get ready for serious elevation. Then we take off on the historic Glacier Point Trailhead, your first steps lead you to expansive views of Yosemite Valley and within minutes nearly every stepon of siirra.
“Great trail, definitely worth the work,” wrote visitor Briana Cruz on AllTrails.
The clockwise route drops you down the countless switchbacks of the Four Mile Trail, through a typical Valley scene (the most crowded part), intersects with John Muir’s trail at Happy Isles and ascends up to Thundering Nevada Falls where you camp in Little Yosemite Valley. Day one—11 miles, 2,628 feet of elevation gain
The day after a hard first leg, the hike is more moderate at 7 miles up and an elevational gain of 2,586 feet. The views are killer, with Half Dome looming large as you hike past it only to loop back around Liberty Cap and cross Nevada Falls all over again before finally spewing out onto Panorama Trail. Be sure to bring your cameras as this trail provides some of the most iconic views of Half Dome.
You get your 1st view of the impressive Illilouette Falls soon before hitting up and launch into a few more exposed switchbacks as return to the car. Reward yourself with an ice cream bar at the Glacier Point store and enjoy that wonderful view, you deserve it.
2. Ten Lakes Loop
Why you should go: This 2-3 day high-altitude adventure is a paradise for lovers of alpine lakes.
Distance: 20 miles
Elevation Gain: 4,922 feet (total)
Difficulty: Moderate (three days), Challenging (two days)
In turn Ten Lakes is a perennial favorite among both novice backpackers and seasoned hikers.
The trail starts out up and over the Pine fragrant forest of lodgepole pine for a couple miles from Tioga road near Porcupine Flat until dropping down through more greenery at Half Moon Meadow. It then goes up to 9671′ at Ten Lakes Pass where you will have some of the best views into Upper Ten Lake Valley. Fortunately there are many good camp sites in the area and with a bit of effort one can find even better, though less defined camping spots among nearby lakes.
This is where hikers can either turn back to complete a standard two day hike, or go the long way around another 13.5 miles to finish in style on an equally gorgeous but much less traveled final stretch of trail that completes this one-of-a-kind loop.
It leads to a stupendous overlook of the Grand Canyon of the Tuolumne and crosses another high pass at one end beneath Tuolumne Peak. For anyone fatigued by mile 11, tranquility awaits at Polly Dome Lakes. But if you can stomach it, the last 3 miles to Tioga Road is doable for those wanting a quick walk back to their car.
When done, catching a ride back to the trailhead is generally both allowable within many national parks and common practice with hikers.
Pro tip: Make a side trek to May Lake if you have the extra time.
3. Cathedral and Sunrise Lakes Loop
Why you should go: Experience the rugged beauty of Cathedral Peak’s summit and enjoy camping at a serene alpine lake on this two-day weekend adventure.
Distance: 19.5 miles (without Clouds Rest)
Elevation Gain: 3,675 feet (total)
Difficulty: Moderate
Begin at the John Muir Trail, Southbound of Tuolumne Meadows and wave hello to delirious on-track hikers as you ascend up towards Cathedral Lakes.
The views of Tuolumne’s famous domes get better and bettter as you ascend. Beyond Tuolumne Meadows period, the jagged summit of Cathedral Peak das a fitting visual land marl to were and hikers as they climbed 1K feet in only 2.5 Miyamoto’s up.
Now, this trail will have you around Columbia Finger as well but then drop it into a lush gorgeous meadow before climbing through Sunrise High Sierra Camp. This could be a good place to camp, but for some privacy try another mile and you’ll see Sunrise Lake 3.
The good news is Campfires are allowed below 9,600 feet so just enjoy the ride and find yourself a nice lakeside location with an existing fire ring.
For the more adventurous, a side trip to Clouds Rest can be tacked on from here prior descending towards Tioga Road. You can then catch the shuttle, hitchhike or hike along side trail to your car left in Tuolumne Meadows.
4. High Sierra Camps Loop
Why you should go: A breathtaking six-day loop through Yosemite’s high country, complete with meal and tent cabin options for the refined adventurer.
Distance: 49 miles
Elevation Gain: 6,100 feet (cumulative)
Difficulty: Moderate
First constructed between 1916 and the early 1960s, these camps in Yosemite offer an alternative backcountry experience with a nod to history. A cushy option for the budget-savvy hiker, and a great choice if you don’t want to tote gear into the high country.
The more popular option for hikers is to reserve “glamping” tent cabins and breakfasts that range over 49 miles loop including starting in Tuolumne Meadows Lodge, going through Glen Aulin, May Lake, Sunrise Camp and Merced Lake before reaching Vogelsang then back to with a circular path ending at the same place started.
Day hikes run 6.8 to 9.5 miles each, ascending over mountain passes in excess of 10,000 feet and through verdant alpine meadows punctuated by the sharp blues of numerous high-altitude lakes – many fishable at every turn. General: A remarkable six-day walk any serious rambler should have in their bucket list.
5. Hetch Hetchy Loop
Why you should go: For solitude. As John Muir once said, “Hetch Hetchy is a grand landscape garden, one of nature’s rarest and most precious mountain temples.”
Distance: 29 miles
Elevation Gain: 7,759 feet (cumulative)
Difficulty: Moderate (four days), Challenging (three days)
Hetch Hetchy Before it was dammed in 1923, this towering valley—one of John Muir’s favorite spots in Yosemite and every bit as fetching as the better-known Yosemite Valley to its south. ehike San Francisco gets its water from the O’Shaughnessy Dam these days, but it is walled off—both physically and bureaucratically—from Yosemite Valley to all those looking for a respite from crowds.
Most people get it done in 3-4 days. The trail starts at the O’Shaughnessy Dam and circumnavigates Hetch Hetchy Counterclockwise. The first day is tough, featuring 3,527 feet of elevation gain so an early start to beat the heat and camp at Laurel Lake.
Day two, press on to Lake Vernon for your extended camping options and circle past Mount Gibson before dropping down the switchbacks towards our 2nd falls Rancheria Falls. Return to the dam again, completing a full loop of the reservoir.
For backcountry lovers and fans of waterfalls willing to head away from the crowds, this trail hits all the right notes for a Yosemite National Park adventure.
6. Pohono Trail to Glacier Point
Why you should go: Capture stunning views of Yosemite Valley while enjoying a peaceful overnight hike away from the crowds.
Distance: 14 miles
Elevation Gain: 5,622 feet (total)
Difficulty: Challenging
After parking in the lot next to famous Tunnel View, you will lace those boots up and be ready for a quick climb! The Pohono Trail starts with some shady forested switchbacks right away. In no time at all, you will be pretty much on your own miles away from the photographers below competing for that perfect shot.
Panoramic views of Yosemite Valley and Bridalveil Fall are the highlights, so look for side trails to Old Inspiration Point, Stanford Point, Crocker Point and Dewey Point. A little over 7.5 miles in, you’ll walk across a small bridge that goes over Bridalveil Creek and this is where many people choose to camp for the night.
Day two of the trail, meanwhile, paints a series of incredible pictures: Taft Point; Yosemite Falls; and Half Dome. Your journey terminate at Glacier Point, which is the best place to have a nice ice pop and see some amazeball views.
There are few logistical considerations to take into account, so be sureto inquire with rangers about water and camping policies at the time you hike. Seeing as the trail comes nowhere close to where it starts, you will need to make return arrangements of some sort (whether that be shuttling cars back and forth between spots on SR 41 or taking a bus from Yosemite Lodge). Alternatively, one can always hitchhike their way back up Tunnel View.
7. Young Lakes Loop
Why you should go: This high-altitude trek offers a journey through alpine lakes, wildflowers, and campsites beneath the towering summits of Ragged Peak and Mt. Conness.
Distance: 16 miles
Elevation Gain: 3,136 feet (total)
Difficulty: Moderate
Hiking to Young Lakes is one of the best ways to see Yosemite’s high-alpine environment in all it’s glory.
Embarking up the trail north towards Dog Lake, you can also do a side trip to Lembert Dome rustically perched on its mini-summit for fantastic vantage views of Tuolumne. Once you have taken in the view, head back and follow a use trail leading down granite slabs to Dog Lake below where snowmelt water beckons.
From there, the trail meanders through a field accented with yellow monkeyflower and red paintbrush, sprinkled with dainty purple lupine. You will press on up and over a ridge that extends from Ragged Peak, through this grove of whitebark pine species. Why not camp at the first lake or proceed on to the second and third lakes if you wish for a more private experience.
At the junction, keep to the right on your return to close up the loop. The descent traverses through rocky alpine meadows, a tantalizing glimpse of the Pacific Crest Trail and Soda Springs (with its faint bubbling odor) before you’re reunited with your vehicle.
8. Cathedral Lakes
Why you should go: A short out-and-back hike to a pair of breathtaking glacial lakes beneath the towering Cathedral Peak.
Distance: 9 miles
Elevation Gain: 1,738 feet (total)
Difficulty: Easy (but high altitude)
Cathedral Lakes are a great option for novice backpackers who want to explore the high country of Yosemite. The trip is one of the easiest and shortest with a backcountry permit, but that doesn’t make any fewer in views during it.
Begin at the Cathedral Lakes Trailhead and go south. Through the thick green forest, you will soon come to a point where there is no other way than arriving at this imposing north face of Cathedral Peak.
You will quickly come out into a beautiful alpine meadow. Look for a sign that points to Lower Cathedral Lake. If you are camping and building a fire, turn right in here to find an established fire ring. Or, tack on this extra mile to your hike and visit both!
Solitude-seekers and serious Cathedral Peak fans can keep on down the John Muir Trail to Upper Cathedral Lake, where you’ll be alone (for now) beside a tiny aquamarine tarn with an even better view of the peak. Scale a couple of boulders and watch one of the best sunsets at Black Rock.
If you decide to turn around, go back the way your came and make it safely back to the trailhead.
9. Big Oak Flat Road to Yosemite Falls
Why you should go: Avoid the crowds, camp atop El Capitan, and enjoy a bird’s-eye view of Yosemite Valley on this two-day mini thru-hike.
Distance: 18 miles
Elevation Gain: 6,247 feet (total)
Difficulty: Challenging
The true star of this hike isn’t Alex Honnold, but El Capitan. If you watched and loved Free Solo like me, THIS is the loop trail that circles around it.
At the Old Big Oak Flat Road Trailhead, you start your journey with a climb into a pine-scented forest. Soon the loud, congested traffic of Yosemite Valley becomes but a distant hum, replaced by a peace and stillness verging with every step upward.
Water watch: creeks can and do dry up in late summer.
At Ribbon Meadow just below the summit of El Capitan, pitch your tent and get up before dawn for a sunrise that will catch first light in slow motion as it works its way down across the valley — coffee at the ready.
Those looking for more can make the strenuous final push to magnificent Eagle Peak before returning via the 5 miles of unrelenting descent on Falls Trail. When all finished, either hitch a ride or take the bus back to the base of El Capitan to fetch your vehicle.
10. Grand Canyon of the Tuolumne Loop
Why you should go: Experience the best of Yosemite’s high country with cascading waterfalls, alpine lakes, granite towers, and the roaring Tuolumne River on this 4-6 day loop.
Distance: 47 – 55 miles (starting at White Wolf or Tuolumne)
Elevation Gain: 9,631 feet (cumulative)
Difficulty: Moderate
Keeping that much granite in one spot? Unreal!” You will be pinching yourself more than once during this stretch to confirm that it is not a dream! This multi-day loop can originate from White Wolf or Tuolumne Meadows—select your start, but snag a permit first.
If you begin at Tuolumne Meadows the moderately graded dirt trail to Glen Aulin is only a five-mile hike. There’s a small High Sierra Camp with pit toilets there, but you should continue just a few more miles down the trail to have an even better site alongside the river. Don’t forget to verify fire restrictions, especially in the late season if heading out at lower elevations.
Turn left and head toward Pate Valley, paralleling the swift azure waters of the Tuolumne River for 16 miles This hike offers towering granite cliffs, plus not one but several great waterfalls including California Falls, LeConte Falls and Waterwheel. Stop on the many swimming places in cool of a frosty plunge, In Shade.
Day three sees most hikers tackling a brutal 3,500-foot ascent (if beginning in Tuolumne) that is able to be broken up for camping near Morrison Creek. If you are lucky, they might even get a spot with the view of Hetch Hetchy!
At this point, you can choose to add the final steps of your trip at WP or hike a shaded forested roadway up towards Ten Lakes. While the 12-mile one-way trip up Morrison Creek to the first of its lakes is a bit grueling, especially after going over Drift Peak (13100′), you’ll have something special if hanging out until sunset in this beautiful alpine basin.
The last mile is mostly downhill over meadows full of wildflowers, around Tuolumne Peak and through a beautiful forest back to Glen Aulin. Polly Dome Lakes. Several excellent campsites lie just 5 mile off the route: Best for cutting around this section of the journey
From here reverse the loop and head back south on the Pacific Crest Trail, descending to Tuolumne.
A Note on Wilderness Permits
The beauty in being laid out like a limitless selfie zone is that acquiring a wilderness permit for Yosemite may be the hardest part. In order to maximize your shot at hiking the trail you want, it is a good idea for your trip months in advance so as not to have any permit issues.
You can find more information here, but essentially permits are distributed by an online lottery system 168 days (or whatever it might be) before your hiking start date. To make a reservationApril through November: Reservations are required year round.
Need to head out on a whim this weekend into dear John Muir’s valley? It has 40% of all permit available first come, first served at the trailhead if it fits within a day before your hike.
Choosing a weekday might increase the odds of landing one for those top tier trailheads, but only if you are lucky and have flexibility in your schedule.
Remember Your Bear Canister
There is one distinct feature that attracts millions of visitors each year to Yosemite — its wildlife, which provides filmmakers and photographers excellent subject opportunities due much in part because many animals have become accustomed human activity.
Due to these creatures natural behavior, bear canisters (which are available for rent) are mandatory when overnighting in Yosemite National Park. And when you go to bed, put all of your food in the canister along with anything that smells or resembles trash and make sure it is at least 100 feet away(at night) from where you are sleeping.