Meadows, and Ancient forests. One of the best ways to experience this natural beauty is by hitting the trails.
With over 250 miles of trails winding through the park, it can be tough to decide which hikes to prioritize. Whether you’re looking for a short walk through the forest or an intense, all-day adventure, this guide will help you find the right trail to match your experience level.
Here, I’ve compiled a list of the 25 top hikes in Mount Rainier National Park, from leisurely paths that offer easy access to the park’s stunning views to longer, more demanding trails that push you to new heights. I’ll also share useful tips on what to expect before you head out, so you can be well-prepared for your journey.
By the time you finish reading, you’ll feel equipped and excited to embark on your first hike in this iconic national park.
Exploring the Regions of Mount Rainier National Park
Before you embark on your adventure, it’s helpful to understand the layout of Mount Rainier National Park. The park is divided into five main regions, each offering a distinctive experience. Knowing which areas align with your interests will allow you to plan your time wisely.
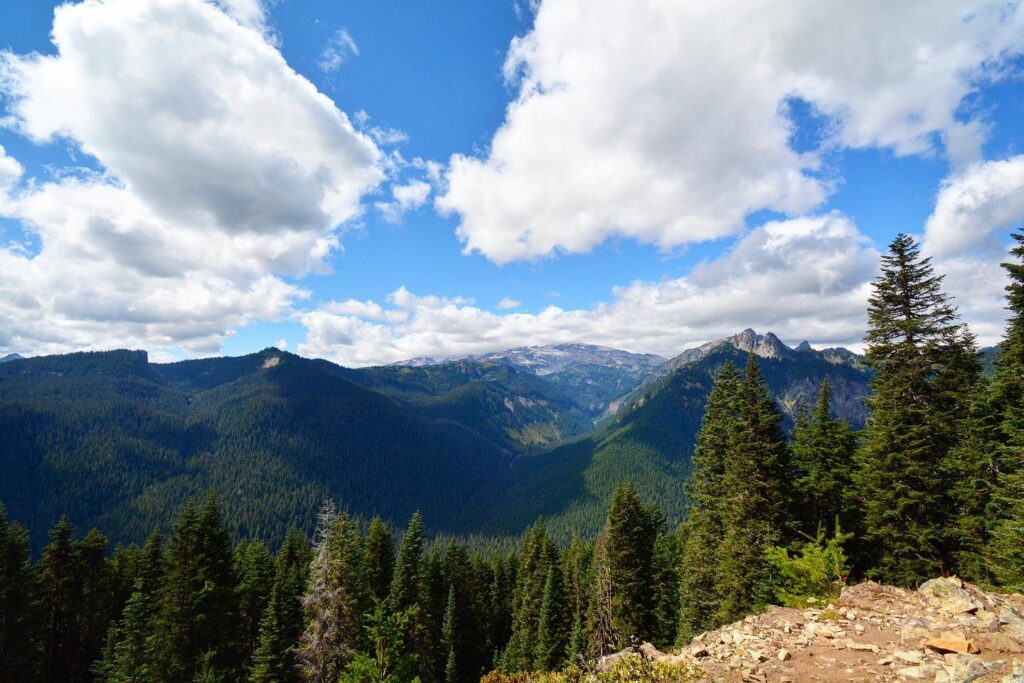
- Sunrise: Located on the northeastern edge of the park, Sunrise offers some of the best mountain views in the region. As the highest point in the park accessible by car, it provides a dramatic perspective of Mount Rainier and the surrounding peaks. The hiking trails here are challenging, with steep climbs that reward hikers with sweeping vistas of glaciers, wildflower-filled meadows, and rugged terrain.
- Ohanapecosh: Situated in the southeastern part of the park, Ohanapecosh stands out for its lush, temperate forests. The area resembles the landscapes of the Olympic Peninsula, featuring trails through old-growth trees, soothing hot springs, and the Ohanapecosh Visitor Center. This is a quieter part of the park, perfect for those seeking a peaceful connection with nature.
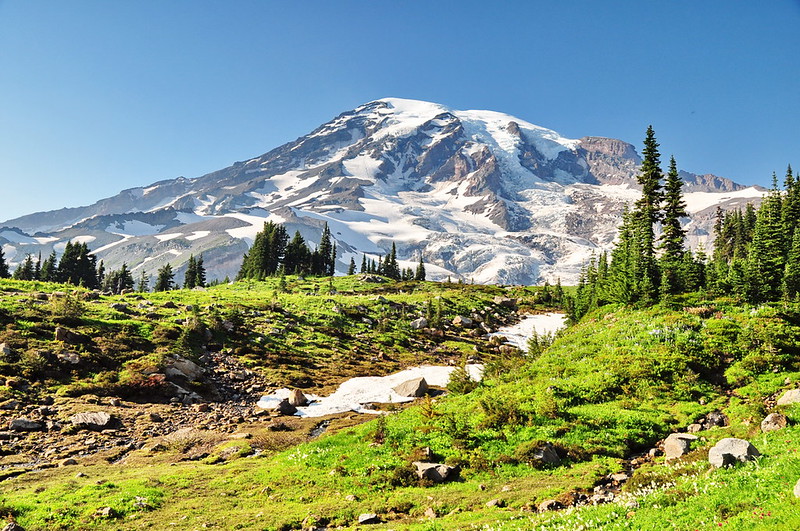
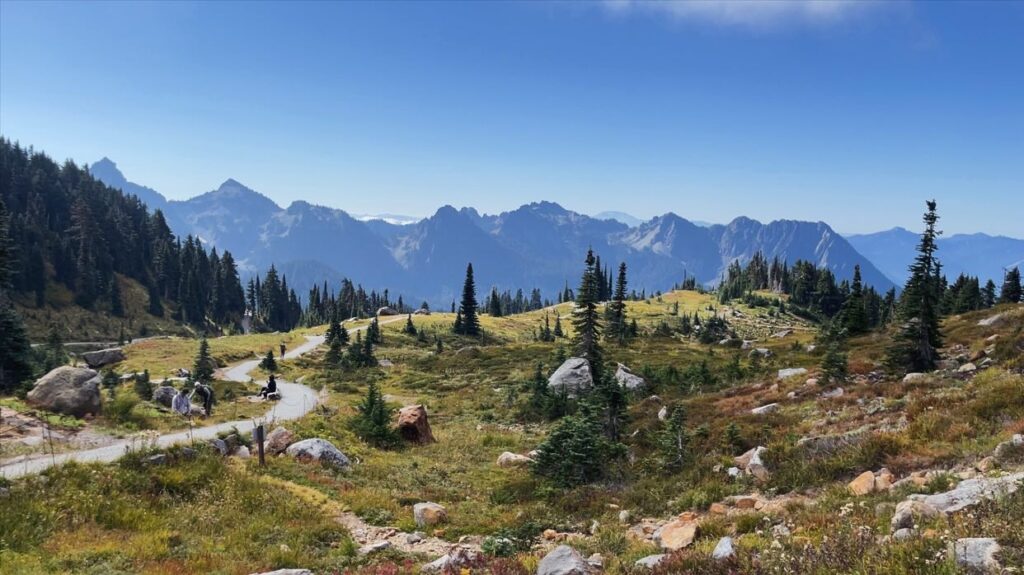
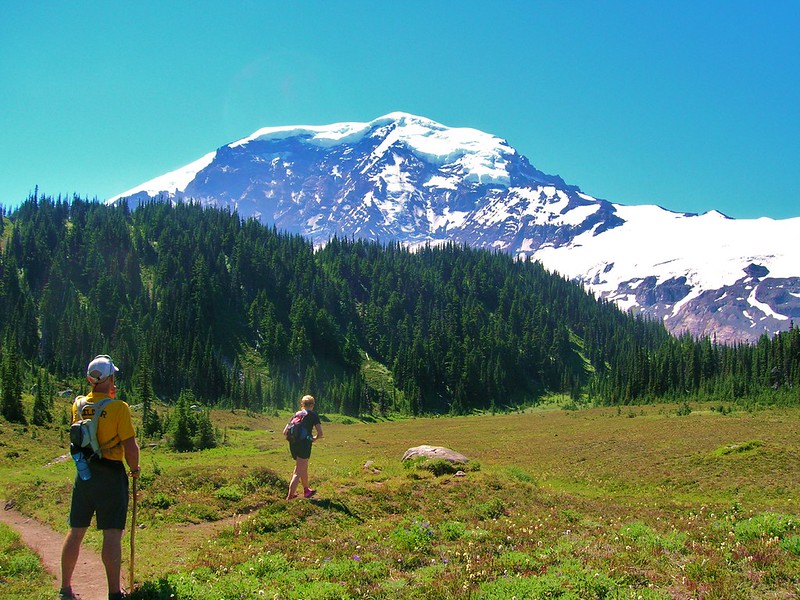
- Paradise: Paradise is one of the most beloved regions of Mount Rainier National Park. Known for its expansive meadows bursting with wildflowers in the summer, Paradise also boasts magnificent views of glaciers and waterfalls. It is home to the famous Skyline Trail, offering hikers the chance to explore some of the park’s most scenic spots, making it a must-see destination for visitors.
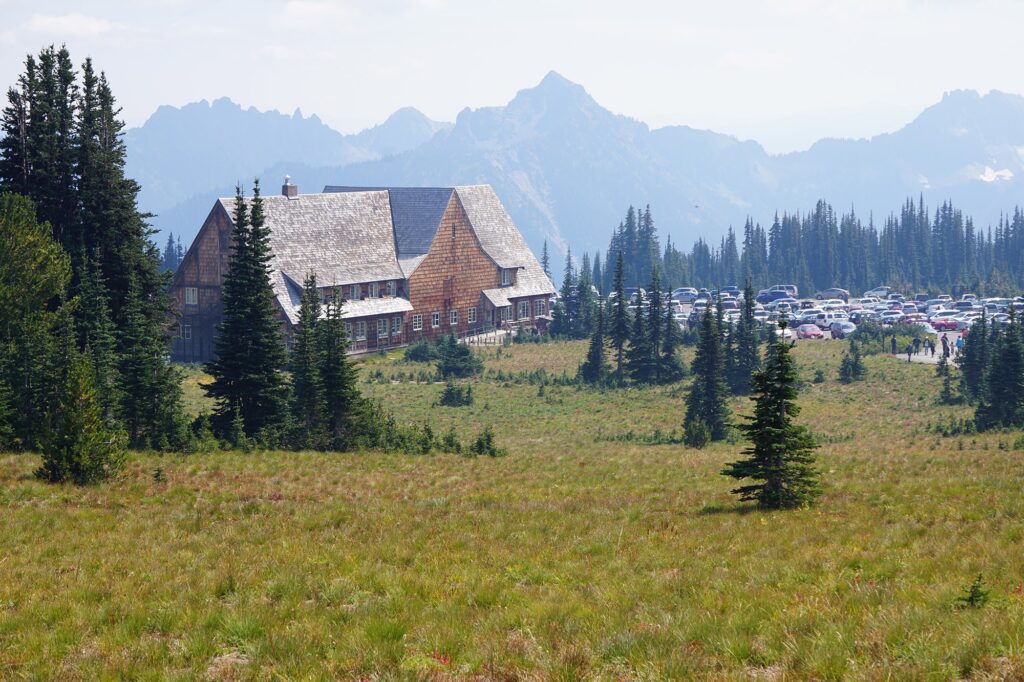
- Longmire: The historic Longmire area, located on the southwestern side of the park, gives visitors a chance to step back in time. The Longmire Museum and surrounding trails offer a slower pace compared to other regions. With its rich history and accessibility, Longmire is perfect for those looking to blend nature with cultural exploration.
- Carbon River / Mowich: On the northwest side of Mount Rainier, the Carbon River and Mowich region remains one of the more remote sections of the park. Reaching this area requires navigating a 20-mile unpaved road, making it less crowded and ideal for those who want to escape the more popular parts of the park. With great hiking and camping options, this region offers a peaceful, secluded experience.
The two most frequently visited regions, Paradise and Sunrise, each offer incredible hikes, with Sunrise providing dramatic, high-altitude views and Paradise being known for its iconic landscapes. Access to the park is through the Nisqually Entrance, which remains open year-round, or the White River Entrance, which is only accessible in the summer.
Getting to Mount Rainier National Park

Beautiful Mount Rainier National Park is located about 2 hours out of both Seattle and Portland. For those out of state fair goers, Seattle-Tacoma International Airport (SEA) or Portland International Airport (PDX) is usually your best bet.
The bannister or groos family is required to get here, A could be finest choice that numerous modes of ground transportation yet nobody proper. If you are going to explore a few of Washington’s national parks, think about renting an RV. I had a wonderful time taking Noma Vans through outdoorsy in Washington while cross country road tripping and this credit made it seamless to visit the national parks.
Driving times from nearby major cities:
- Seattle to Paradise: 107 miles, 2 hours 30 minutes
- Seattle to Sunrise: 96 miles, 2 hours 15 minutes
- Portland to Paradise: 156 miles, 3 hours
- Portland to Sunrise: 184 miles, 3 hours 45 minutes
A car is virtually your only way to reach the trailheads in park, as there are absolutely no shuttles. All of the areas can be reached with 2WD vehicles, provided you are faniliar and prepared to use a gravel road if headed for Carbon River/Mowich Lake region. Since it’s in the backcountry, less people go to this spot; perfect for social distancing!
Mount Rainier is big, and depending on where you are in the park it can take a while to drive from one end to another. Key Areas (counterclockwise):
- Mowich Lake to Longmire: 2 hours 45 minutes, 85 miles
- Longmire to Paradise: 25 minutes, 11 miles
- Paradise to Ohanapecosh: 45 minutes, 23 miles
- Ohanapecosh to Sunrise: 1 hour, 32 miles
- Sunrise to Mowich Lake: 2 hours 50 minutes, 84 miles
I’ve organized the best hikes by region to help you make the most of your time in the park.
Top Trails in Mount Rainier National Park
Mount Rainier National Park offers an abundance of remarkable trails, each with its own charm and stunning scenery. This guide organizes the top hikes by region to help you plan your adventure:
- Top Hikes in Paradise at Mount Rainier
- Top Hikes in the Sunrise Area of Mount Rainier
- Top Ohanapecosh Hikes at Mount Rainier
- Top Hikes Around Mowich Lake and Carbon River in Mount Rainier
- Top Hikes in the Longmire Area of Mount Rainier
Top Hikes in Paradise at Mount Rainier
Paradise is the most frequented part of Mount Rainier National Park, and it’s easy to see why! This region boasts excellent views of the mountain, vibrant wildflower meadows in the summer, and some of the park’s most memorable hiking routes.
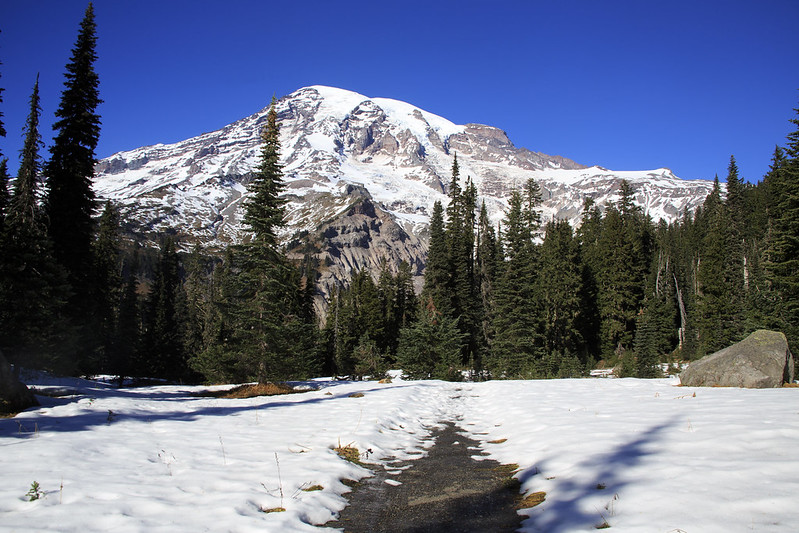
Expect some snow on these trails, even into mid-July. For optimal hiking conditions, plan your trip between late July and September.
1. Skyline Loop Trail
- Distance: 5.6 miles
- Elevation Gain: 1,771 feet
- Difficulty: Moderate
- Time to Hike: 3-5 hours
- Trailhead: Henry M. Jackson Memorial Visitor Center
The Skyline Trail is the park’s favorite hike, delivering 5.6 miles of vistas galore! The meadows full of wildflowers, glaciers and surrounding peaks make this hike on the Paradise side (it starts right by Paradise Visitor Center) a highly recommended one.
Back at the visitor center again, while going counter clockwise to follow this popular route around Mount Rainier. About halfway there you meet Panorama point, a stunning overlook with views of Mount Adams, St. Helens and Hood
Because of its popularity, it best to get an early start. preferably before 8 AM in the summer months!
2. Myrtle Falls Trail
- Distance: 0.7 miles
- Elevation Gain: 154 feet
- Difficulty: Easy
- Time to Hike: 30 minutes
- Trailhead: Henry M. Jackson Memorial Visitor Center
The Myrtle Falls Trail is a short but sweet stage, perfect for folks streching their legs or looking to easy stroll. Just over half a mile long, this short trail leads to Myrtle Falls in 0.6 miles; the falls plunge under cascading snow melt more than seventy feet tall with an amazing ambiance for such a close-by experience!
Begin walking east from the Henry M. Jackson Visitor Center down a paved path Continuous views of Mount Rainier accompany the mostly gradual climb.
Up at the waterfall, there is an overlook that allows for some great photos especially in late summer July and August when falls are full force and snow free.
Since the trail is accessible and offers iconic views, it can also become crowded. We recommend you start your ascent early in the evening when it is going to be much more quieter. A fully-paved trail, the Otter Exhibit pathway is ADA compliant and open to visitors of all abilities.
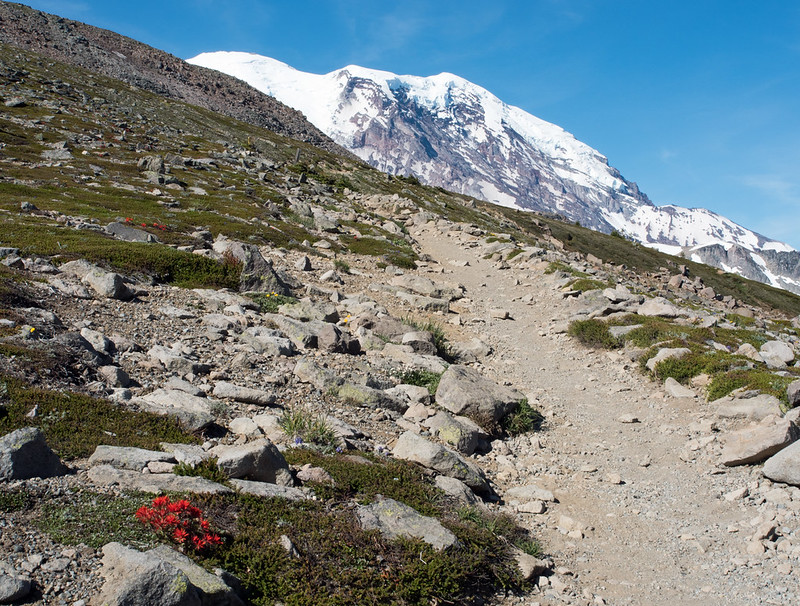
3. Camp Muir Trail
- Distance: 8.8 miles
- Elevation Gain: 4,665 feet
- Difficulty: Strenuous
- Time to Hike: 8 to 10 hours
- Trailhead: Henry M. Jackson Memorial Visitor Center
This is a challenging hike best-suited to those with experience, but the stunning views from it are incredible. Maple Pass — A version of the Wolverine Peak hike without requiring technical climbing skills, this nearly 9-mile trail is about as high up you can get on Rainier when not clearing a rock wall.
The hike sets off by traversing the Skyline Trail in a clockwise order, taking you to an uphill climb of 4,665 feet before reaching anywhere near the Camp Muir base camp.
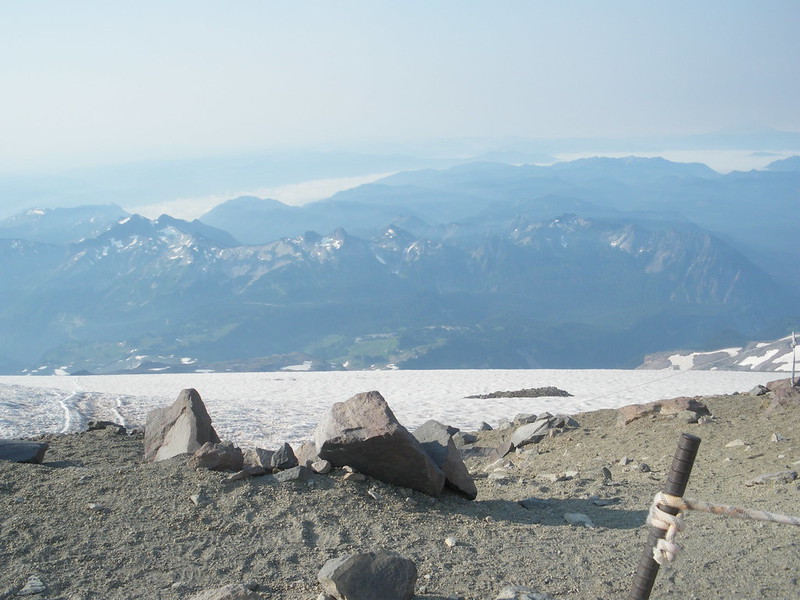
On the way, you will pass by spectacular views, including Nisqually Glacier and on clear days Mount St. Helens and Mount Adams in the distance You will reach Camp Muir and witness an unmatched view of the Cowlitz Glaciar and Little Tahoma.
Intermediate Hike With the top elevation being 10,188 feet at Camp Muir this route is for elite climbers only that have specific gear like crampons and ice axes needed for FInal sections. What to Expect: Big climb, but oh so worth it for that view of Mount Rainier closing in on 14er status.
4. Nisqually Vista Trail
- Distance: 1.1 miles
- Elevation Gain: 180 feet
- Difficulty: Easy
- Time to Hike: 30 minutes to 1 hour
- Trailhead: Paradise Lower Parking Lot
Nisqually Vista Trail is an ideal hike for the entire family to experience views of majestic Mount Rainier up close. Starting close to the Paradise region, this 1 mile circle is only a short head out from the Henry M. Jackson Visitor Center.
This trail is famous for having views of the Nisqually Glacier that’s easy to see.
From here, follow the signposted path through meadows awash with colourful August wildflowers. Then a trail takes you to the viewpoint which provides this stunning view of mount Rainier and its glacier.
This is a family-friendly, easy paved trail. It gets less crowded than some of the more popular trails, but in good weather and on a sunny weekend watch for lines at key crossings best to go early or run this one during midweek hours.
5. Bench and Snow Lakes Trail
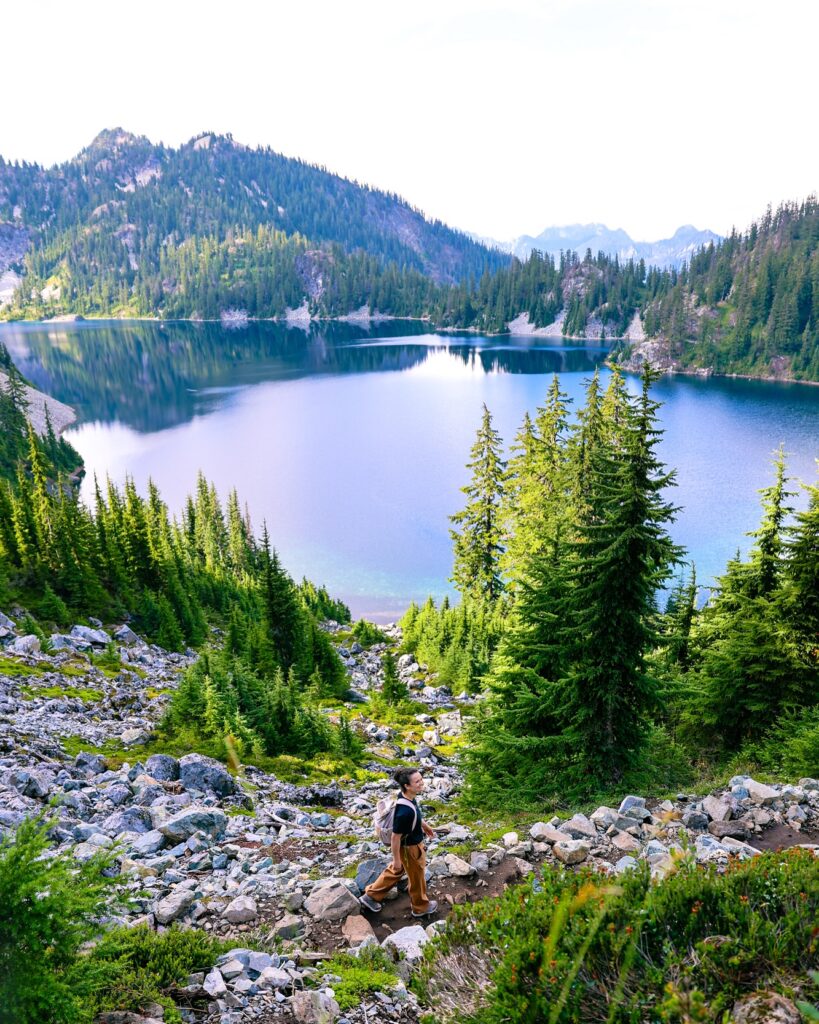
- Distance: 2.2 miles
- Elevation Gain: 449 feet
- Difficulty: Moderate
- Time to Hike: 1 hour
- Trailhead: Bench and Snow Lake Trailhead on Stevens Canyon Road
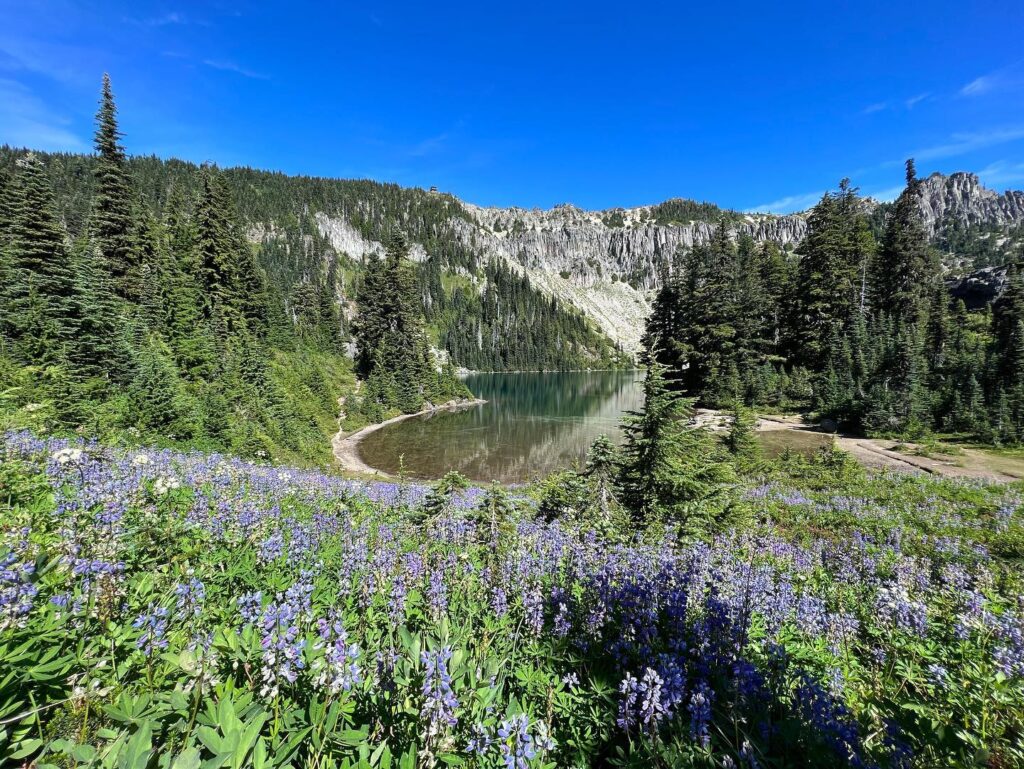
Bench and Snow Lakes Trail (easy, 2 miles) — A tranquil hike to two stunning alpine lakes nestled among the rolling meadows of Mount Rainier.
After a short descent through the forest, with little effort you come to an impressive viewpoint of Bench Lake. Mount Rainier is reflected in the mirror glass of its lake on fine days. Another half mile up the trail leads to Snow Lake, and beautiful wildflower-filled meadows in season
Snow typically disappears by June (conditions are good throughout until October or November); check beforehand, as deadfall sometimes necessitates some route-finding. A little known trail, this offers a less crowded option compared to the more popular routes in the Paradise area.
Remember bug spray (especially in summer)?
6. Pinnacle Peak Trail
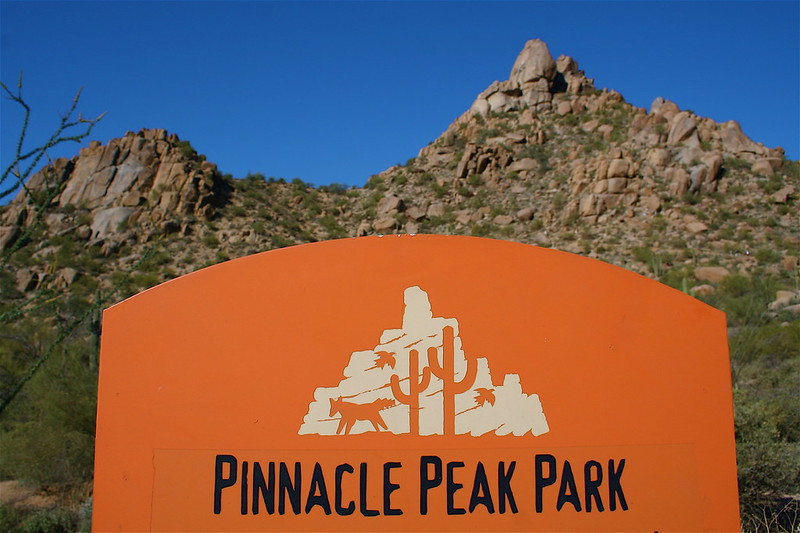
- Distance: 2.9 miles
- Elevation Gain: 1,584 feet
- Difficulty: Strenuous
- Time to Hike: 2 to 3 hours
- Trailhead: Pinnacle Peak Trailhead across from Reflection Lakes
A Tough But Rewarding Hike This hike may be short in distance, but the elevation gain is no joke.
The trail begins at the Reflection Lakes parking area in the Tatoosh Range, just south of Paradise and changes elevation fast as it winds up subalpine meadows and rugged terrain. There are a lot of mountains along the way, including some beautiful look out to Mount Rainier and nearby peaks.
This is where the hike ends at a saddle that offers grandiose views of Mount Adams, Louise Lake and Pinnacle Glacier. With a little rock scrambling, the brave can continue another 0.2 miles to Summit proper but saddle is end of official trail.
This trail is not as popular as some of the other classic hikes in the area due to how difficult it can be, but I would recomend getting there early as parking fills up fast.
7. Alta Vista Trail
- Distance: 1.6 miles
- Elevation Gain: 567 feet
- Difficulty: Moderate
- Time to Hike: 1 hour
- Trailhead: Henry M. Jackson Memorial Visitor Center
The Alta Vista Trail in the Paradise area of Mount Rainier National Park is a popular 1.6-mile hike offering sweeping vistas. The trail leads hikers through vibrant wildflower meadows and provides stunning views of Mount Rainier and the surrounding Tatoosh Range.
Starting near the Henry M. Jackson Visitor Center, the trail ascends and follows part of the Skyline Trail before reaching the summit of Alta Vista. Here, you’ll enjoy 360-degree views of the landscape.
Along the way, keep an eye out for wildlife, including the charming brown marmots that frequent the area. For those wanting a taste of the Skyline Trail without committing to a longer hike, this shorter route offers a rewarding alternative.
Top Hikes in the Sunrise Area of Mount Rainier
The Sunrise area is a fantastic spot for hiking, offering some of the best views of Mount Rainier. Located on the northeastern side, Sunrise is the highest point accessible by car, bringing you closer to the mountain than any other part of the park.
Due to lingering snow, plan to visit from late July to September for the best hiking conditions.
8. Mount Fremont Lookout Trail

- Distance: 5.6 miles
- Elevation Gain: 1,108 feet
- Difficulty: Moderate
- Time to Hike: 3 to 4 hours
- Trailhead: Behind Sunrise Day Lodge
This 5.6-mile round-trip hike delivers some of the grandest views in all Mount Rainier National Park!!
The trail begins at the Sunrise Visitor Center and takes you through beautiful subalpine meadows, then follows the Sourdough Ridge Trail to Frozen Lake. The trek ends at a rustic lakeside fire lookout constructed in the ’30s, with panoramic views of Mount Rainier and Grand Park spread out below (on clear days you can even catch glimpses of distant Mount Baker).
Watch for wildlife, mountain goats and marmots are typically spotted on the trail.
Likewise, while not the hardest trail on this list, it is a popular choice for sunrise & sunset hikes. Don’t forget the sunblock and some extra water with you as it’s pretty open in few part of trail lot shades are available.
9. Burroughs Mountain Trail
- Distance: 9.5 miles
- Elevation Gain: 2,601 feet
- Difficulty: Strenuous
- Time to Hike: 6 to 8 hours
- Trailhead: Behind Sunrise Day Lodge
The Burroughs Mountain Loop Trail is nearly 10 miles long with some of the closest views to Mount Rainer on this side of paradise.
The trek begins at the Sunrise Visitor Center on Sourdough Ridge Trail, moseying through vibrant meadows flecked with wildflowers and remarkable sights of Mount Rainier’s north face and the Emmons Glacier.
The First Burroughs, Second Burroughs and Third Burroughs each offer new panoramas of the adjacent valleys as you make your way across. It ascends to the Third Burroughs, where one can enjoy 360-degree views hikers on other trails cannot experience.
This allows you to do the full loop and takes part of that trail back by Sunrise Camp. If you are in the mood for a bit of adventure, this trail can be combined with Mount Fremont Lookout to make your hike longer.
10. Sourdough Ridge Trail to Frozen Lake
- Distance: 2.8 miles
- Elevation Gain: 534 feet
- Difficulty: Moderate
- Time to Hike: 2 hours
- Trailhead: Behind Sunrise Day Lodge
Sourdough Ridge Trail to Frozen Lake: This 2.8-mile round-trip hike is a great option for families or those looking for something shorter and more manageable.
This trail starts at the Sunrise Visitor Center and leads you through lush, wildflower-filled meadows with expansive views of Mount Rainier and nearby peaks.
The trail gradually climbs up to the ridge and then down toward Frozen Lake, a tiny but significant body of water that is one of Sunrise’s potable sources.
With this trailhead being the starting location for both the Mount Fremont Lookout hike and Burroughs Mountain hike, it can get quite packed, so if you want to avoid large crowds then start early!
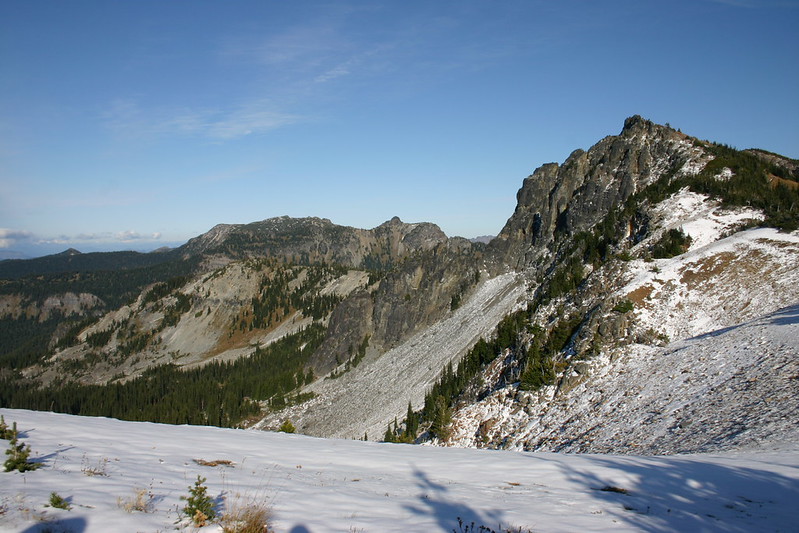
11. Naches Peak Loop
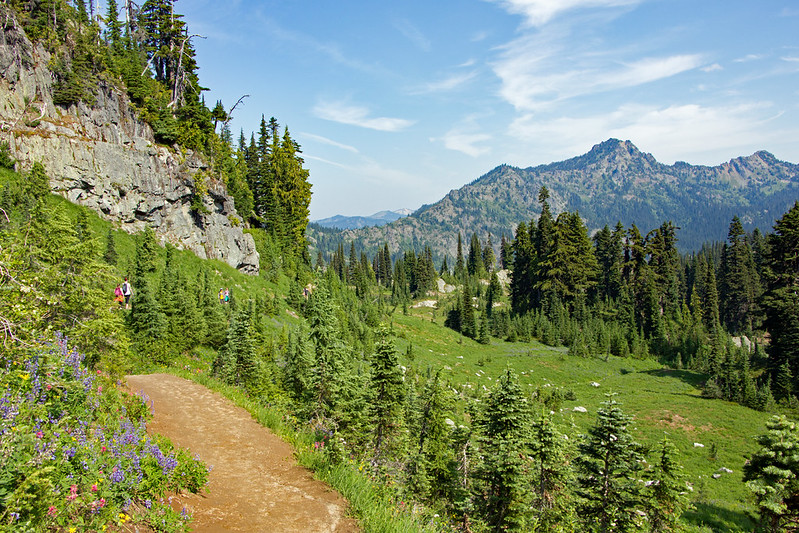
- Distance: 3.5 miles
- Elevation Gain: 659 feet
- Difficulty: Moderate
- Time to Hike: 2 to 3 hours
- Trailhead: Naches Peak Loop Trailhead off Highway 410 at Chinook Pass
This scenic 3.5-mile trail with breathtaking views of Mount Rainier circles Naches Peak Starting at the Tipsoo Lake picnic area, this trail loops around Naches Peak with some amazing views of Mount Rainier as well alpine flower meadows and Dewey Lake.
It also crosses over the popular Pacific Crest National Scenic Trail, so you may encounter a few thru-hikers on their journey. For the best Mount Rainier views, it is recommended to hike this trail in a clockwise reteurning manner.
Designed for those wanting to enjoy alpine beauty without the push of an ascent, this is a wee bit better than your standard beginner hike.
12. Tipsoo Lake Loop Trail

- Distance: 0.7 miles
- Elevation Gain: 19 feet
- Difficulty: Easy
- Time to Hike: 30 minutes
- Trailhead: Tipsoo Lake Parking Area
Catch a peaceful 0.7 mile long lap around the Tipsoo Lake Loop Trail, one of Mount Rainier National Park’s most accessible and scenic lakeside walks.
Near the Chinook Pass Entrance, this short loop trail surrounds peaceful Tipsoo Lake and offers beautiful views of Mount Rainier reflected in its calm waters on a clear day.
The wheelchair-accessible path leading away from the parking area. In the summer, there is an explosion of wildflowers which only adds more color to this already picturesque location making it heaven for photography lovers.
A short, easy family hike is perfect for a scenic trip to Mount Rainier National Park.
13. The Summerland Trail
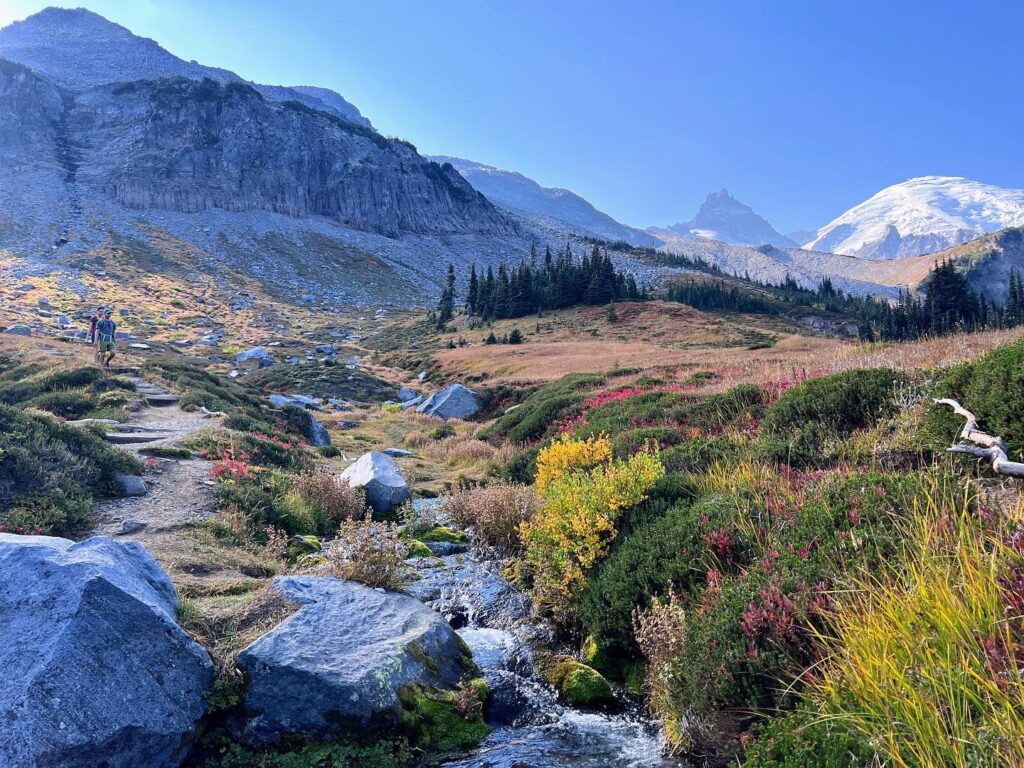
- Distance: 8.4 miles to Camp Summerland, 11.4 miles to Panhandle Gap
- Elevation Gain: 2,132 feet to Camp Summerland, 2,972 feet to Panhandle Gap
- Difficulty: Strenuous
- Time to Hike: 5 to 9 hours, depending on how far you hike
- Trailhead: Frying Pan Creek Trailhead off Sunrise Park Road
The Tipsoo Lake Loop Trail is a gentle, 0.7-mile loop hike featuring one of Mt Rainier National Park’s easiest and most scenic lakeside walks.
This short trail circles the sparkling waters of Tipsoo Lake, where clear days can offer stunning reflections of Mount Rainier; located near the Chinook Pass Entrance.
From the car park turn right and take wheelchair friendly path. Over the summer months, an array of wildflowers bloom on a mass scale brightening up this beautiful location attracting photographers from far and wide throughout Australia.
An easy, family friendly nature trail in Mount Rainier National Park. Summerland Trail, 3 miles round trip: Difficult but rewarding hike that totals between eight to eleven miles depending on how far you want to go. Several miles before this—near the top of Sunrise Park Road—the trail starts.
The trail winds up through old growth forests, subalpine meadows and rugged terrain. For a shorter trip, hikers have the option of turning around at Camp Summerland while more adventurous travelers can trek an additional 1.5 miles to Panhandle Gap — high point on Wonderland Trail (6,750 feet).
At the top of Panhandle Gap, hikers are treated to views that include Mount Rainier and its glaciers below while affording a massive view out over much the Ohanapecosh River Valley with surrounding peaks.
Higher altitudes are often snow and ice-covered well into the summer months. Some sections can be tricky to travel, so verify trail conditions ahead.
14. Glacier Basin Trail
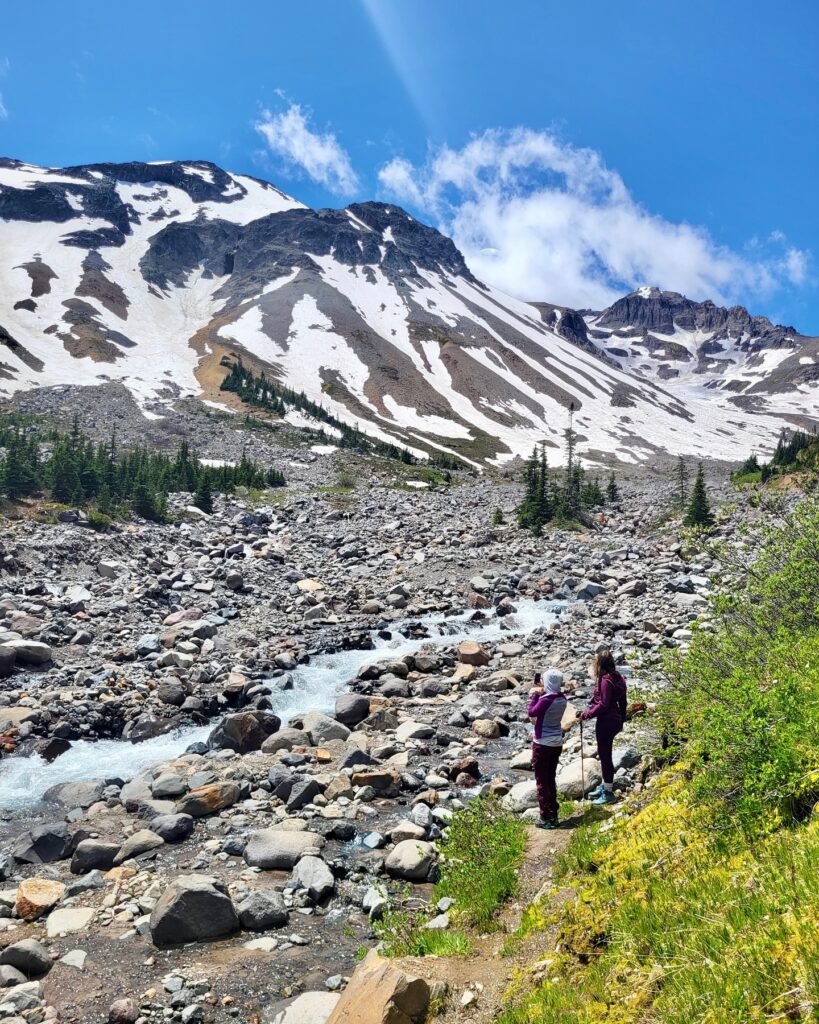
- Distance: 8.1 miles
- Elevation Gain: 2,345 feet
- Difficulty: Moderate
- Time to Hike: 5 to 6 hours
- Trailhead: Glacier Basin Trailhead at White River Campground
Glacier Basin Trail — 6.2 miles, difficult This is a forested trail with lots of wildflowers in meadows along the Inter Fork of White River. The trail ends at Glacier Basin Campground, where you can get beautiful views of Mount Rainier and see the Emmons glacier – which is the biggest glacier on this mountain.
Near White River Campground, this trail is great for wilderness views and possible wildlife sightings like elk or black bears.
Despite being rated as an intermediate hike, there are some rocky portions of the trail so it would be best to wear good hiking shoes. It also tends to get less attention and therefore there are fewer people hanging out here than in other areas of the park so if you like a little privacy on your hike, this one is recommended.
Be sure to pack bug spray, too; the water can mean a lot of mosquitoes in summer.
15. Sunrise Nature Trail
- Distance: 1.5 miles
- Elevation Gain: 370 feet
- Difficulty: Moderate
- Time to Hike: 1 hour
- Trailhead: Behind Sunrise Day Lodge
The Sunrise Nature Trail is a nice, moderate family loop located in the Sunrise district of Mount Rainier National Park. A fine option for those seeking a less strenuous hike than Mount Fremont Lookout or Burroughs Mountain.
A self-guided nature trail that meanders among subalpine wildflowers, with signs alerting the hiker to unique natural features of this pristine ecosystem. The footpath is well maintained and offers hikers fantastic views of Mount Rainier as well Emmons Glacier.
Top Ohanapecosh Hikes at Mount Rainier
The Ohanapecosh region of Mount Rainier National Park offers a distinct contrast to the Paradise and Sunrise areas. Here, you’ll find towering, ancient forests more akin to the lush landscapes of the Pacific Northwest.
Due to lighter snowfall, trails in Ohanapecosh tend to open earlier, making it an excellent destination for spring and early summer hikes. The best time to explore this area is from May through October.
16. Grove of the Patriarchs
- Distance: 1.1 miles
- Elevation Gain: 52 feet
- Difficulty: Easy
- Time to Hike: 30 minutes
- Trailhead: Grove of the Patriarchs Trailhead
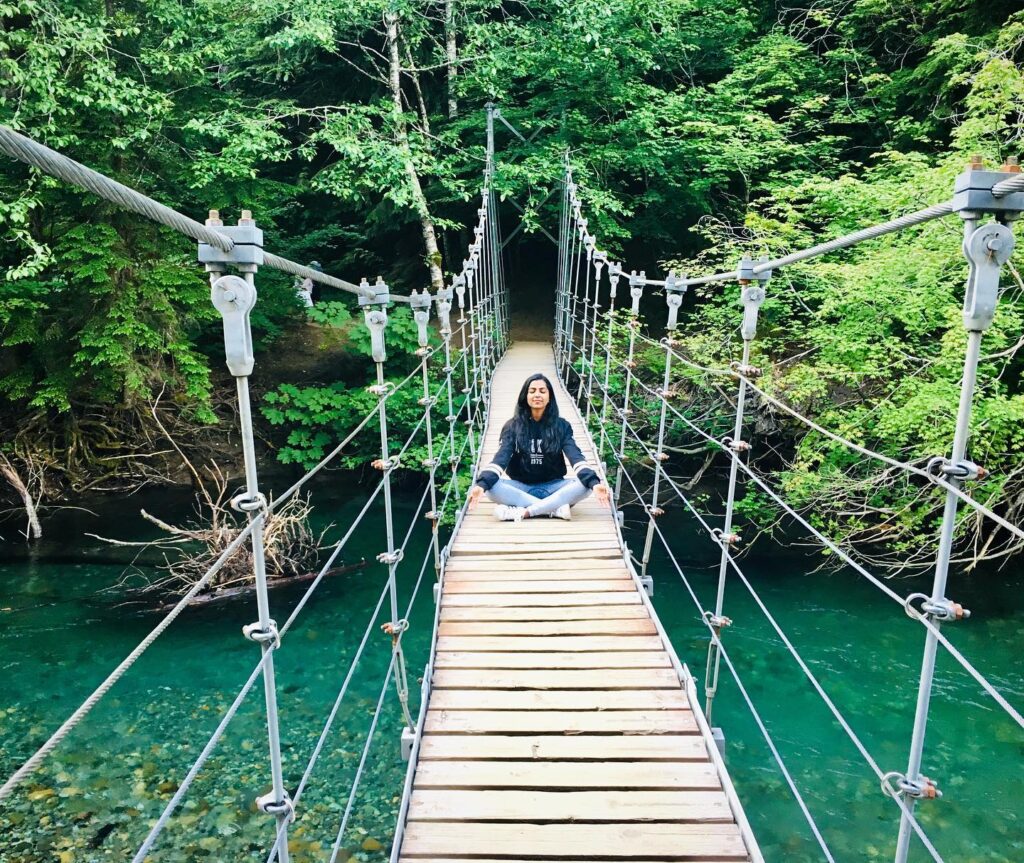
Located in the southeastern sector of the park, The Grove of the Patriarchs Trail is a serene 1-mile loop transportse hikers into an awe-inspiring old-growth forest.
The island, made up primarily of enormous Western red cedars and Douglas firs over 1,000 years old is reached by a suspension bridge that crosses the Ohanapecosh River.
This 2.5 mile trail begins near the Stevens Canyon Entrance, is flat and easy to navigate — perfect for all ages and skill levels! For those looking for a quiet, easy hike then I recommend this as it was really humbling to walk amongst these ancient giants.
17. Silver Falls Loop
- Distance: 2.9 miles
- Elevation Gain: 521 feet
- Difficulty: Easy
- Time to Hike: 2 hours
- Trailhead: Silver Falls Loop Trailhead at Ohanapecosh Campground
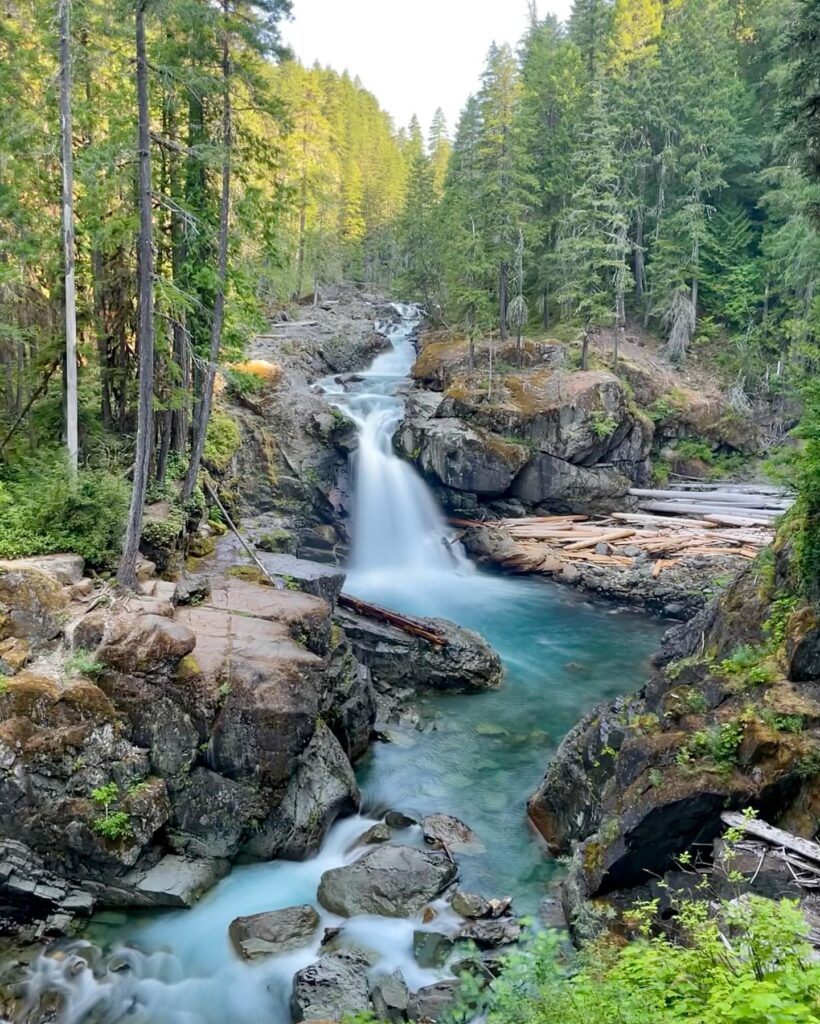
Enjoy a beautiful 2.9 mile loop in the Silver Falls Boundary Area of Mount Rainier National Park. A path through rich, old-growth woodland within compass of the Ohanapecosh River.
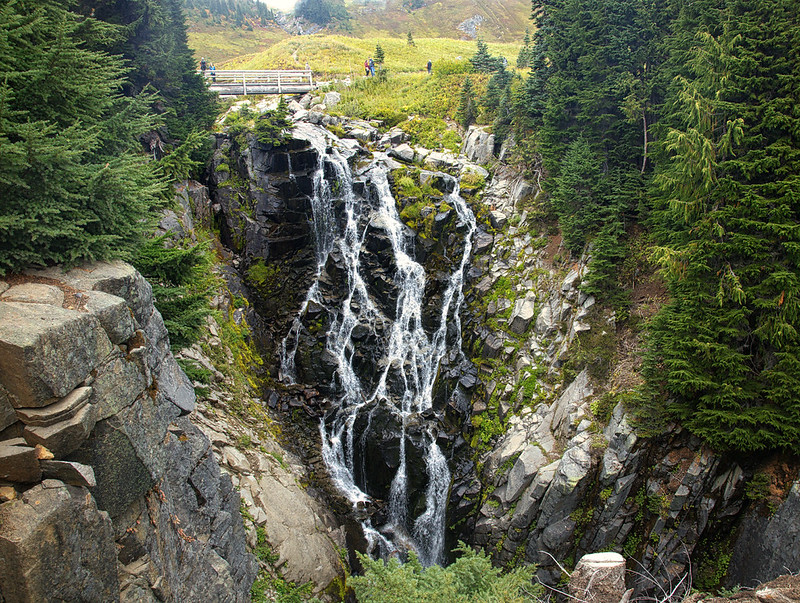
But the heart of this hike is Silver Falls, a 40-foot waterfall tumbling over an outcrop in the rock.
Simple, start your trek a short walk from the Ohanapecosh Visitor Center. Look out for the wide variety of birds that make their home in this tranquil area along the way.
Potential For Cooling Mist Of Waterfall As It Falls Into Deep Gorge; silver falls The rocks next to the falls will get slippery.
This trail is a loop so can be hiked clockwise or counter-clockwise for several options to travel through the beautiful meadow.
18. Shriner Peak Lookout Trail
- Distance: 8.2 miles
- Elevation Gain: 3,408 feet
- Difficulty: Strenuous
- Time to Hike: 6 to 8 hours
- Trailhead: Shriner Peak Trailhead off Highway 123
Shriner Peak Lookout Trail is an 8.2 mile out and back hike that takes you along the northern edge of Ohanapecosh in to Mt Rainier’s eastern side fair past where most people go on their limited visits, but at a moderate fitness level with well spaced effort over distance. Challenging, but rewarding one with 360˚ views of Mt. Rainier to the south, and Mount Adams far away southeast on top fire lookout at summit also unveils entire valleys around!
You will start the trail on an incline through thick woodland and you’ll emerge among a field of wildflowers as you make your way up to the lookout. There are wildlife that you may see along the way, such as mountain goats and black bears.
This trail can hold snow well into July because of how high up it is, so keep that in mind. Late July to September is the prime time for hiking.
Top Hikes Around Mowich Lake and Carbon River in Mount Rainier
The Mowich Lake and Carbon River regions of Mount Rainier National Park are some of the park’s most secluded areas. Accessing these sections involves navigating unpaved gravel roads, but those who make the journey are rewarded with unparalleled solitude. Due to seasonal access, plan your visit between late July and October when the roads are open.
19. Tolmie Peak Fire Lookout
- Distance: 5.6 miles
- Elevation Gain: 1,555 feet
- Difficulty: Moderate
- Time to Hike: 3 to 5 hours
- Trailhead: Near Mowich Lake Campground off Mowich Lake Road
The Tolmie Peak Fire Lookout hike is a lesser-known trail located in the northwest corner of Mount Rainier National Park. Though it sees fewer visitors, the route offers some of the most breathtaking views in the park.
This hike takes you through ancient forests and past the scenic Eunice Lake, leading to the Tolmie Peak Lookout. From the top, you’ll be rewarded with panoramic views of Mount Rainier, the surrounding valleys, and the picturesque landscape below.
Starting at Mowich Lake, the trail offers opportunities to spot colorful wildflowers and observe local wildlife, adding an extra layer of charm to your journey. As you make your way towards the final ascent, the trail becomes steeper and more challenging. The climb is demanding, so pace yourself and make sure to carry plenty of water. Additionally, be mindful of road conditions, as the access road to the trailhead is unpaved and can be rough.
20. Spray Park Trail
- Distance: 6.9 miles
- Elevation Gain: 2,198 feet
- Difficulty: Moderate
- Time to Hike: 4 to 6 hours
- Trailhead: Mowich Lake Campground
Spray Park Trail — 7 miles round trip, out and back The Spray Park Trail is a fabulous hike in the northwestern area of Mount Rainier National Park. It meanders through forests and colorful meadows, past waterfalls, until reaching the alpine grandeur of Spray Park.
Starting at the Mowich Lake Campground, this trail follows part of Tolmie Peak Trail before branching off to Spray Park. Take in amazing views of Mount Rainier, Echo Rock, Observation Rock and most likely Spray Falls on July 1st along with fields full of wildflowers at peak season.
The hike is listed as being of moderate difficulty but parts are still a bit steep and plenty muddy so wear some good shoes. One of the most important things about this hike is to make sure you stay on the path because these meadows are very fragile and bug spray galore for those summer months.
Top Hikes in the Longmire Area of Mount Rainier
The Longmire area holds a significant place in the history of Mount Rainier National Park. In 1899, it served as the park’s headquarters when Mount Rainier was officially designated a national park. Today, it remains an essential part of the park, offering a mix of historic landmarks, forested trails, and beautiful waterfalls.
Due to its relatively lower elevation, Longmire is one of the best regions to visit early in the summer. The snow melts faster here compared to higher elevations, making the trails accessible much earlier in the season. If you’re looking to avoid snow-covered paths while enjoying serene hikes and scenic views, Longmire is the perfect spot to start your exploration of the park.
21. Comet and Christine Falls Trail
- Distance: 3.5 miles
- Elevation Gain: 1,286 feet
- Difficulty: Strenuous
- Time to Hike: 2 to 4 hours
- Trailhead: Comet Falls & Van Trump Park Trailhead
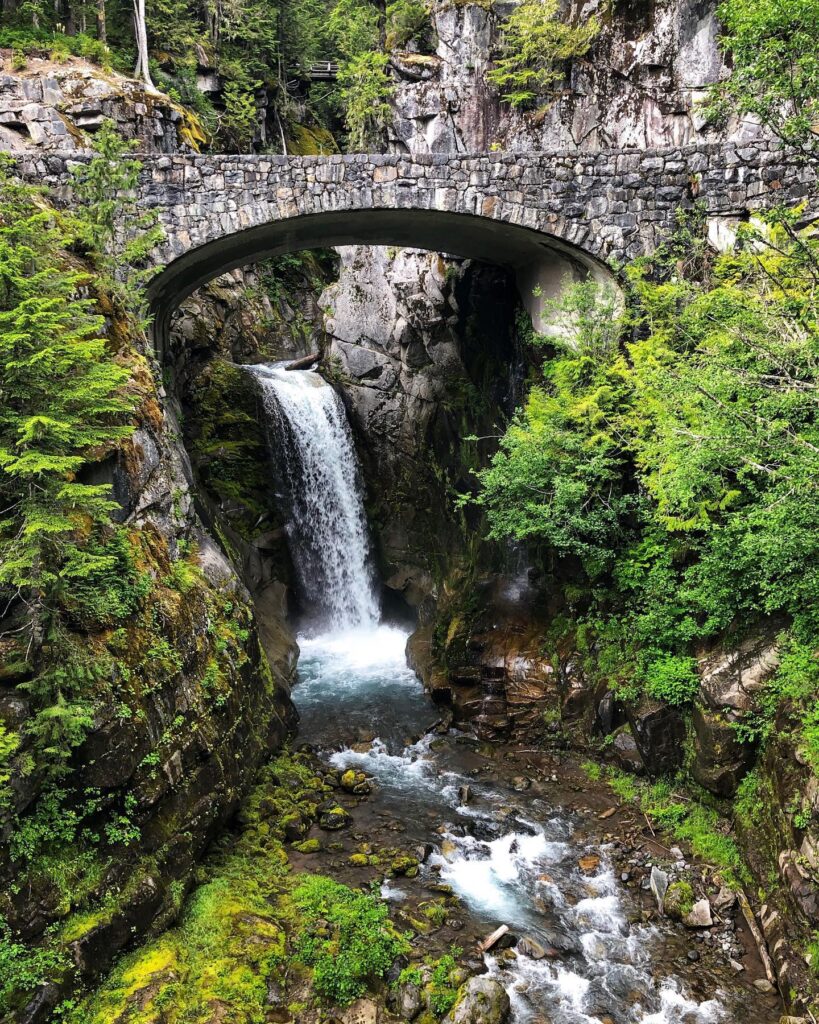
The 3.5-mile-round trip Comet and Christine Falls Trail is a sight to see, weaving you through old forests and along waterfalls such as the park’s spectacularly cascading namesake of Comet Falls — where you may even see remnants of snow year round on one side — just before reaching Christine Falls at endearingly noted spot for photographers in the Park!
Enjoy the view of Christine FallsFrom Paradise Valley Road, which is a great way to frame the waterfall — as it cascades beneath an old stone bridge.
Admire the view, and start hiking at the trailhead The trail proceeds through lush old-growth forest beside Van Trump Creek before ending at the impressive 320-foot tall Comet Falls—among the tallest and most dramatic waterfalls in all of Mount Rainier National Park.
Parking at the trailhead is limited so arrive early, or in the afternoon for more of a quiet hike.
22. Van Trump Park Trail
- Distance: 7.8 miles
- Elevation Gain: 3,339 feet
- Difficulty: Strenuous
- Time to Hike: 6 to 8 hours
- Trailhead: Comet Falls & Van Trump Park Trailhead
The van Conservation Park Trail The seven site route is the same path that starts Comet Falls trail with a steep ascent. From here, after crossing the impressive Comet Falls, you will climb higher into an enormous meadow known as Van Trump Park.
Hikers accessing this portion of the trail and its junction with Tatoosh Ridge can look forward to incredible views northward over Mount Rainier, Kautz Glacier, as well as down into valleys below. You might even see far off peaks Mt. St. Helen, Mt Adams and in the distance show up when they are not cloud-cloaked — majestic Mr Hood!
You climb, a lot of elevation gain on this ride and slightly technical in some portions. Pro-tip: Hike it early to avoid crowds and snag a spot in the minimal number of trailhead parking spots available.
23. Narada Falls Trail
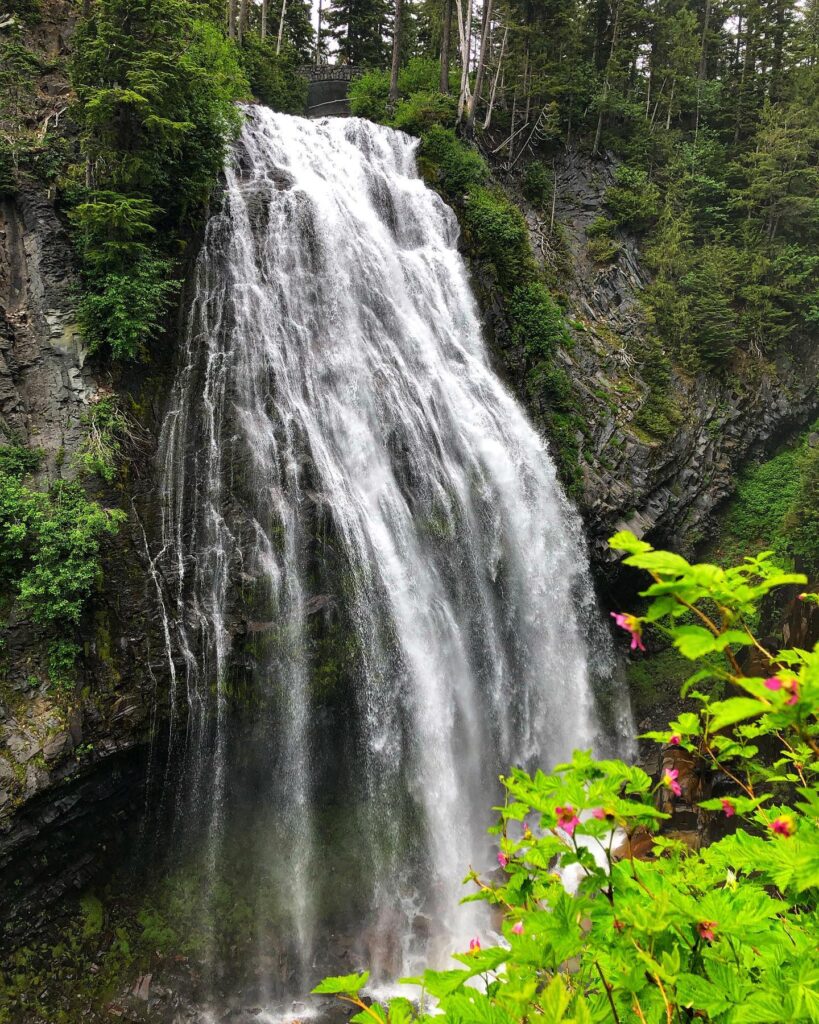
- Distance: 0.2 miles
- Elevation Gain: 59 feet
- Difficulty: Easy
- Time to Hike: 15 minutes
- Trailhead: Narada Falls Parking Area
Although the Kautz Creek Trail was officially closed, access to Comet Falls and this stunning 7.8-mile round-trip trail started on the same path as its companion up Mt.reactivex (the side-by-side suspension bridges leading over Allen Creek). Beyond Comet Falls, the trail travels on into Van Trump meadows.
Hikers will be rewarded with stunning vistas of Mount Rainier and Kautz Glacier, as well as valleys beyond. The best part is you can see Mount St. Helens, Mount Adams and even the Tip of Mount Hood from here on clear day!
The incline rugged at times to ascend. Be ready for some hard climbing and elevation gain along with a rocky road traileea like! One of the critical Juno Gulch hiking tips is beginning your hike as early as possible so you can avoid closing and chaos at trailheads, but first ensure all parking spots are still accessible. The pickup point for the bus was packed, but we hopped a shuttle to picnic and take an easy 0.2-mile stroll on Narada Falls Trail that plummets steeply; it is paved with railings so all visitors including barking dogs can safely take this hike. Narada Falls Viewpoint This brief hike leads from the parking area down to a viewpoint for Narada Falls, which plummets 168 feet off of an overhanging ledge.
The trail can get busy as it’s right next to the main park road, so a visit early or late in the day is advisable. After rainy weather and during the winter months this may be slippery so wear good walking shoes.
This hike is short, yet it provides an unforgettable view at Narada Falls and therefore a good stopover while transitioning from Longmire to Paradise.
24. Trail of the Shadows
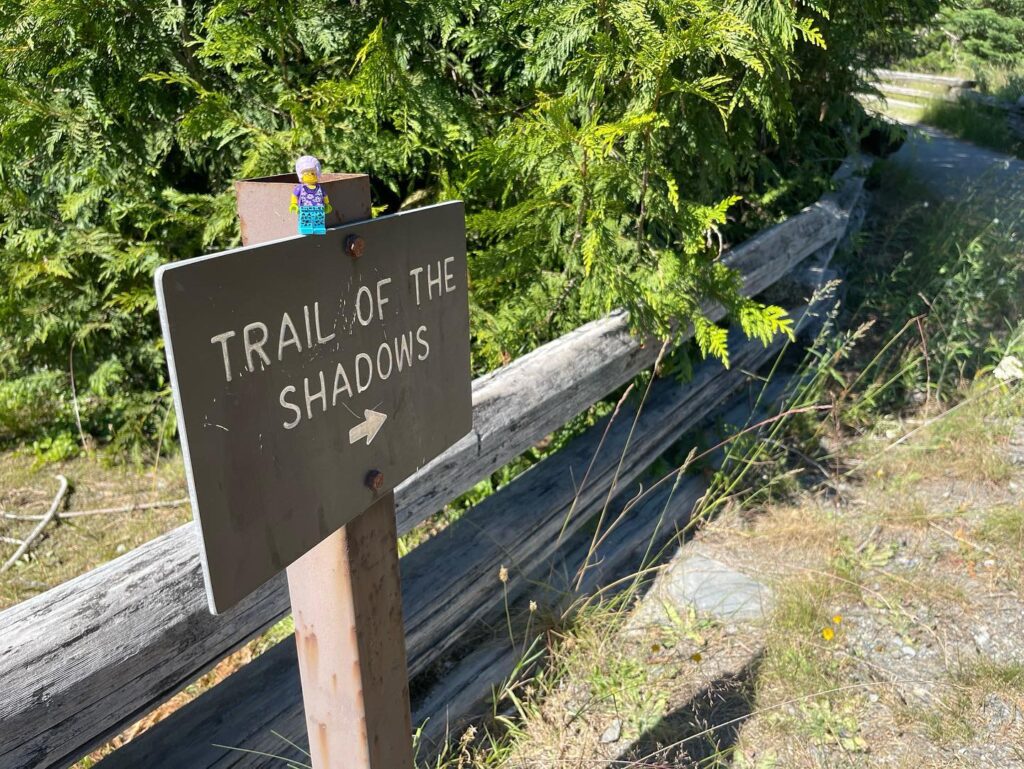
- Distance: 0.7 miles
- Elevation Gain: 39 feet
- Difficulty: Easy
- Time to Hike: 30 minutes
- Trailhead: Across from the National Park Inn
Trail of the Shadows 0.7 Mile Loop — Longmire This easy, gentle loop is located in Mount Rainier National Park’s Longmire Historic District. The easy walk explores a bit of the history in store as well, offering reminders of 19th-century homesteaders and signs that nature has begun to reclaim former holdings while exploring towering old-growth trees for which this park is known.
Beginning just across the road from National Park Inn, this easy-to-moderate trail is turquoise-arrowed and well maintained with interpretive signs detailing insights behind both natural world formations and human histories.
This trail is open all year round, and each season offers a different experience As it is also wheelchair accessible, the Scotland Street School Museum would be a great activity for any visitors… regardless of their age and energy level.
Backpacking in Mount Rainier
25. Wonderland Trail
- Distance: 93 miles
- Elevation Gain: 25,000 feet
- Difficulty: Strenuous
- Time to Hike: 5 to 13 days
- Trailhead: Various entry points, including Longmire and Mowich Lake
The Wonderland Trail is an incredible, difficult hike through some of the best scenery Mount Rainier National Park has to offer. The 93-mile loop that circumnavigates Mount Rainier, winding through prehistoric forests and across meadows carpeted with wildflowers.
This trail provided some of the best views in park, notably Indian Bar, Summerland and Sunrise. Spanning 93 miles with access points like Longmire and Mowich Lake, the Wonderland Trail is an expert-level endeavor that involves tons of prep as well as a backcountry camping permit.
While not snow-free until late July to September, this hike requires more effort in planning but offers the most unforgettable and remote experience out of any other trail.
Best Time to Visit Mount Rainier National Park
Choosing the right time to visit Mount Rainier is essential due to the heavy snowfall that affects the park for much of the year. A narrow window exists for hiking, so it’s important to plan your trip accordingly.
I suggest visiting between mid-July and mid-September. Before mid-July, trails may still be covered in snow, and some roads might remain closed due to lingering winter conditions. If you’re looking to avoid crowds, consider visiting the week after Labor Day. The weather remains pleasant, but fewer visitors mean a more peaceful experience.
Seasonal Breakdown of Mount Rainier
Summer: The summer months, especially mid-July through August, are the most popular for exploring the park. While the temperatures are mild—ranging from 60°F to 80°F during the day—snow can linger on the ground until late June, and even early July. If you want to hike snow-free trails and see wildflowers in bloom, aim to visit during this time.
Fall: September ushers in the fall season, and the foliage transforms into brilliant shades of gold, orange, and red. The temperatures drop to between 40°F and 70°F, creating a more relaxed atmosphere compared to summer’s busy crowds. Many trails remain open, and the stunning scenery can be enjoyed without the peak-season crowds.
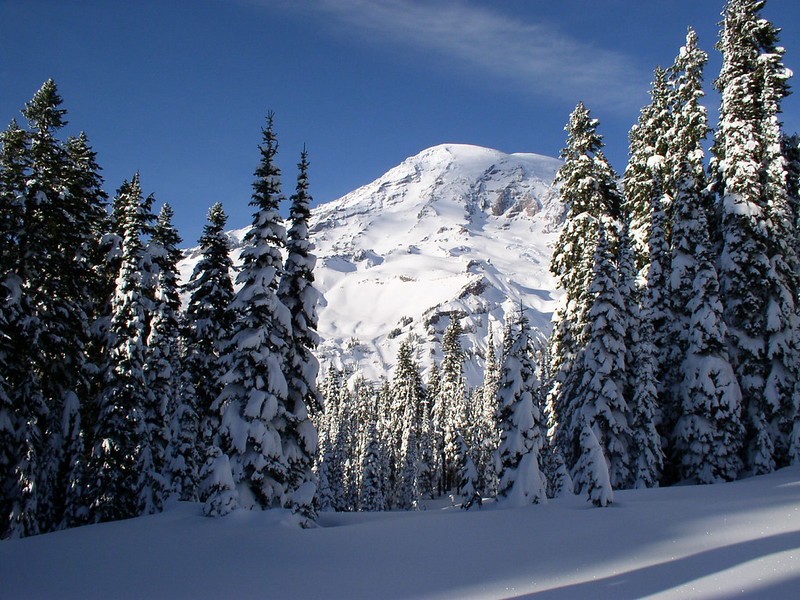
Winter: Winter brings heavy snowfall to the park, and many roads and facilities close during this period. However, Mount Rainier is an excellent destination for winter sports enthusiasts, offering activities such as snowshoeing and skiing in a beautiful snowy landscape.
Spring: As the snow begins to melt, much of the park, especially areas like Paradise and Sunrise, remains snow-covered well into spring. The weather is unpredictable, with late-season snowstorms and occasional road closures. It’s essential to check conditions before visiting, as temperatures range from 30°F to 60°F, so dressing in layers is key to staying comfortable.
Road openings and closings depend on weather and conditions, but here are some general timelines:
- Stevens Canyon Road: June to September
- SR 123 (Cayuse Pass): June to October
- SR 410 (Chinook Pass): June to October
- Sunrise Road: Early July to September
- Paradise Valley Road: Open year-round, with some restrictions
Before planning your trip, be sure to check the official park website for the latest updates on road conditions, trail access, and any closures or restrictions.
Packing Essentials for Hiking in Mount Rainier National Park
- Hiking poles: Trekking Poles are not always necessary but they can save you on a steep trail, especially if you have suspect descendum stability. A lightweight set is a worthwhile purchase.
- Layers: You may experience warmer and cooler temperatures throughout the day so pack accordingly. Begin with hiking shirts, that are moisture wicking as well and get your self some warm fleece layers for flexibility in the course of your hike.
- Rain Gear: Weather can change on a dime in the Pacific Northwest – Make sure you have some sort of rain jacket/poncho for random sprinkling
- Hiking Backpack & Safety Essentials: Pack the ten essentials for hiking and use an outdoor backpack such as Osprey Tempest (for women) or Osprey Talon (for men) to carry your supplies and water.
- Headlamp + Extra Batteries: Its very important to carry additional batteries with you so that in case the battery dies out in between your journey then. My Top Pick for Best Headlamp, Black Diamond I use the long-lasting battery feature of this model and my headlamps last forever doing so.
- Sun Hat & Sunscreen — Some trails have minimal shade so you want to make sure you are protected from the sun, hence having sunscreen and a sunhat is important.
- Insect Repellent: Especially moving towards the months of summer this is ideal as a result of mosquitoes. Put bug spray in your backpack. Keep bugs off you!
Key Tips for Hiking in Mount Rainier National Park
Mount Rainier National Park charges an entrance fee, and you have a couple of options to pay:
- Mount Rainier 7-Day Pass: Available at the entrance station, this pass costs $30 and is valid for seven days.
- America the Beautiful National Park Pass: This annual pass costs $80 and provides access to all 400+ national park sites, including Mount Rainier. If you’re visiting other parks in Washington, this pass can save you money. You can get it in advance here.
Preparation Tips for Your Hike :
- Start Early: During Mount Rainier’s peak season in July and August, crowds can be heavy. To avoid the rush, aim to arrive at popular trailheads like Paradise or Sunrise by 9 AM to secure parking and enjoy a quieter hike.
- Check Park Updates: Mount Rainier experiences heavy snow, often lasting into July. Before your visit, make sure to check the official park website for the latest updates on road and trail closures.
- Fill Up on Gas: There are no gas stations inside the park, so make sure you have a full tank before entering. The last gas stations are in Ashford (for Paradise) and Enumclaw (for Sunrise).
- Prepare for Limited Cell Service: Cell service is spotty inside the park, so download Google Maps offline and pick up a physical map at the entrance station to navigate without issues.
- Dress in Layers: Mount Rainier’s temperatures can fluctuate widely, depending on the time of day and elevation. Wear moisture-wicking base layers, fleece for warmth, and always carry a rain jacket to stay dry.
- Bring a Hiking Backpack and Essentials: It’s vital to pack the ten hiking essentials, including water, food, and first aid items. A spacious backpack is key for carrying everything comfortably.
- Stick to the Trail: Staying on marked paths helps protect the park’s delicate ecosystems. This is especially important early in the summer when trails are still snow-covered and could lead to unexpected hazards like water crossings or avalanche zones.
- Know the Pet Policy: Pets are not allowed on hiking trails and must never be left unattended in the park. Be sure to read the park’s pet policy before your visit.
- Hiking Boots with Strong Traction: I suggest choosing hiking boots that offer ankle support and reliable traction. At the very least, go for trail shoes with excellent grip (avoid sneakers!). My go-to hiking boots are the Columbia Newton Ridge, but for shorter 1-2 mile hikes, I sometimes prefer the Altra Lone Peaks. Be sure to wear Merino wool socks to keep your feet dry and reduce the risk of blisters!
By following these tips, you’ll be well-equipped to enjoy a safe and memorable hiking experience in Mount Rainier National Park.
Final Thoughts on the Best Hikes in Mount Rainier National Park
Mount Rainier National Park offers a wealth of amazing hiking trails, but if you’re short on time, focusing on a few top hikes is essential.
Here are the top 10 hikes in Mount Rainier National Park:
- Skyline Loop Trail (Paradise)
- Myrtle Falls (Paradise)
- Bench and Snow Lakes Trail (Paradise)
- Mount Fremont Lookout (Sunrise)
- Burroughs Mountain Trail (Sunrise)
- Naches Peak Loop (Sunrise)
- Grove of the Patriarchs (Ohanapecosh)
- Tolmie Peak Lookout (Mowich Lake)
- Comet Falls Trail (Longmire)
- Trail of the Shadows (Longmire)
Keep in mind that Mount Rainier’s hiking season is brief due to the region’s heavy snowfall. For the best conditions, plan your visit between late July and September to fully enjoy the trails and stunning scenery.
Looking for more inspiration for Mount Rainier National Park adventure?Explore these posts: