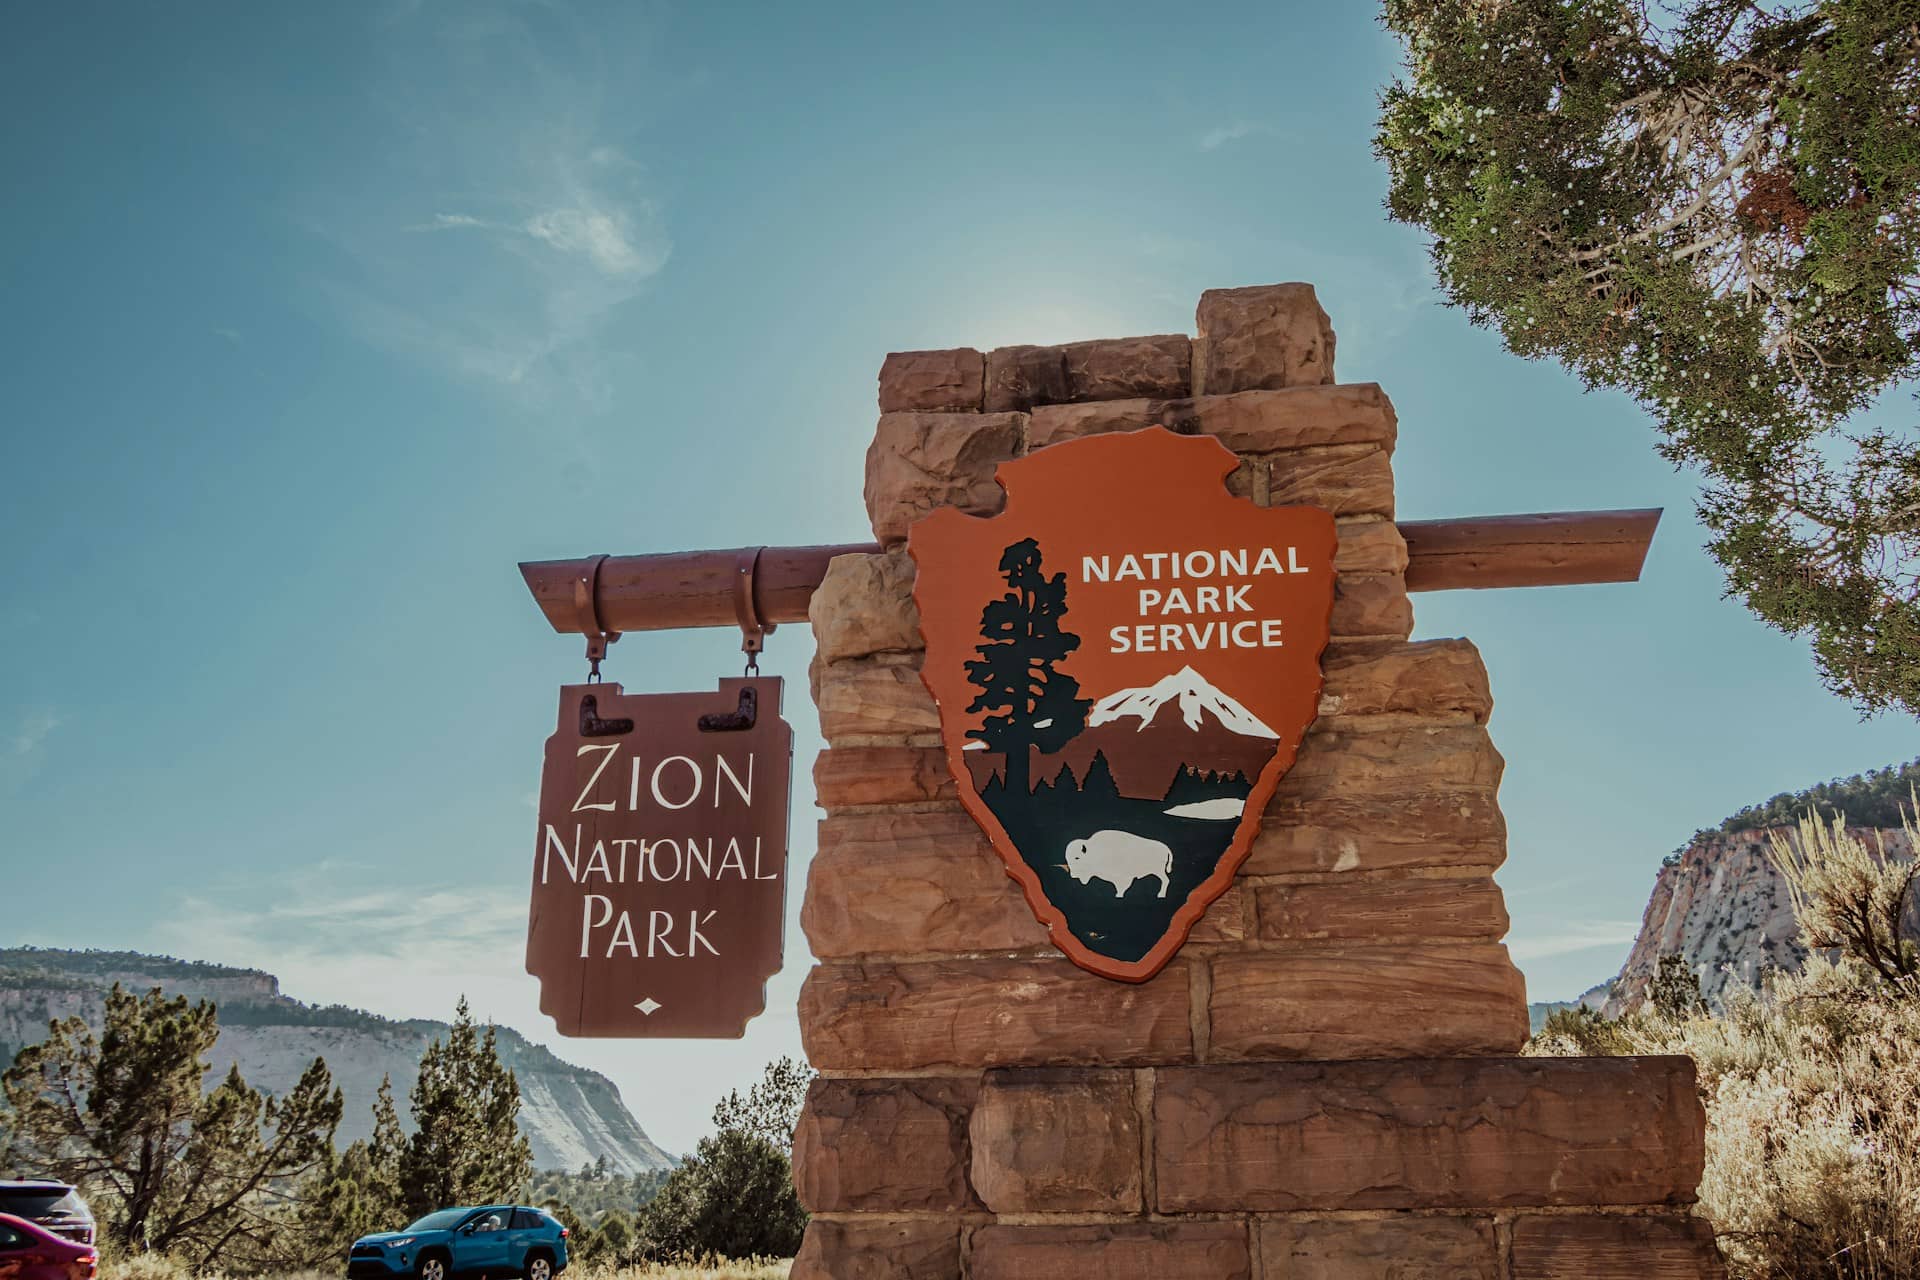
Zion National Park, located in Utah, offers breathtaking scenery and exciting adventures for those who love the outdoors. But with its popularity, planning a visit to Zion can feel overwhelming at times.
What hikes should you prioritize? How do you reach the trailheads? What key information do you need before hitting the trails? This guide will answer these questions to help you make the most of your Zion experience.
Our guest writer, Dani James from Misfit Wanders, has hiked many of Zion’s trails and is here to share her top picks. With her expertise, this article offers helpful tips and insights for navigating Zion’s trails, ensuring a smooth and enjoyable hike.
In this post, you’ll find a list of must-try hikes and a map showing the main trailheads. Along with that, we’ve included practical advice for hiking in Zion. As you read on, you’ll also find detailed descriptions of each hike to help you decide which ones to explore next!
Read more: 10 Top Accommodations Near Zion National Park for Nature Enthusiasts
Exploring Zion National Park: Utah’s Iconic Wilderness
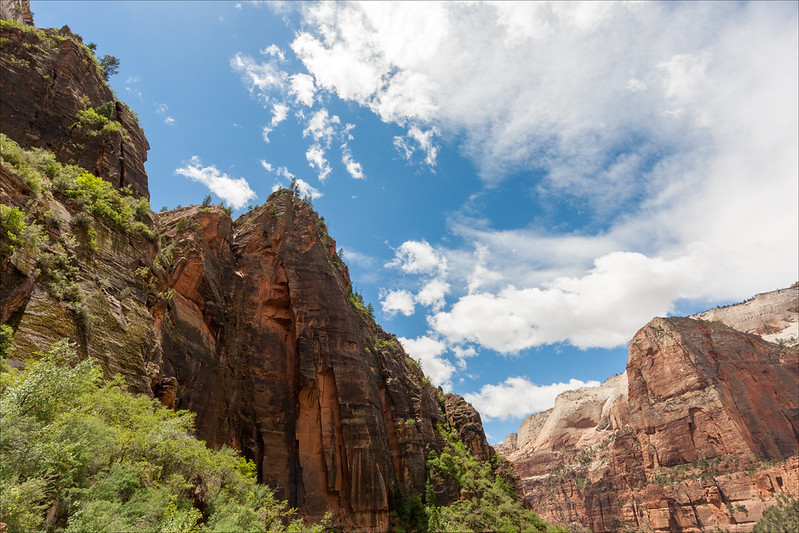
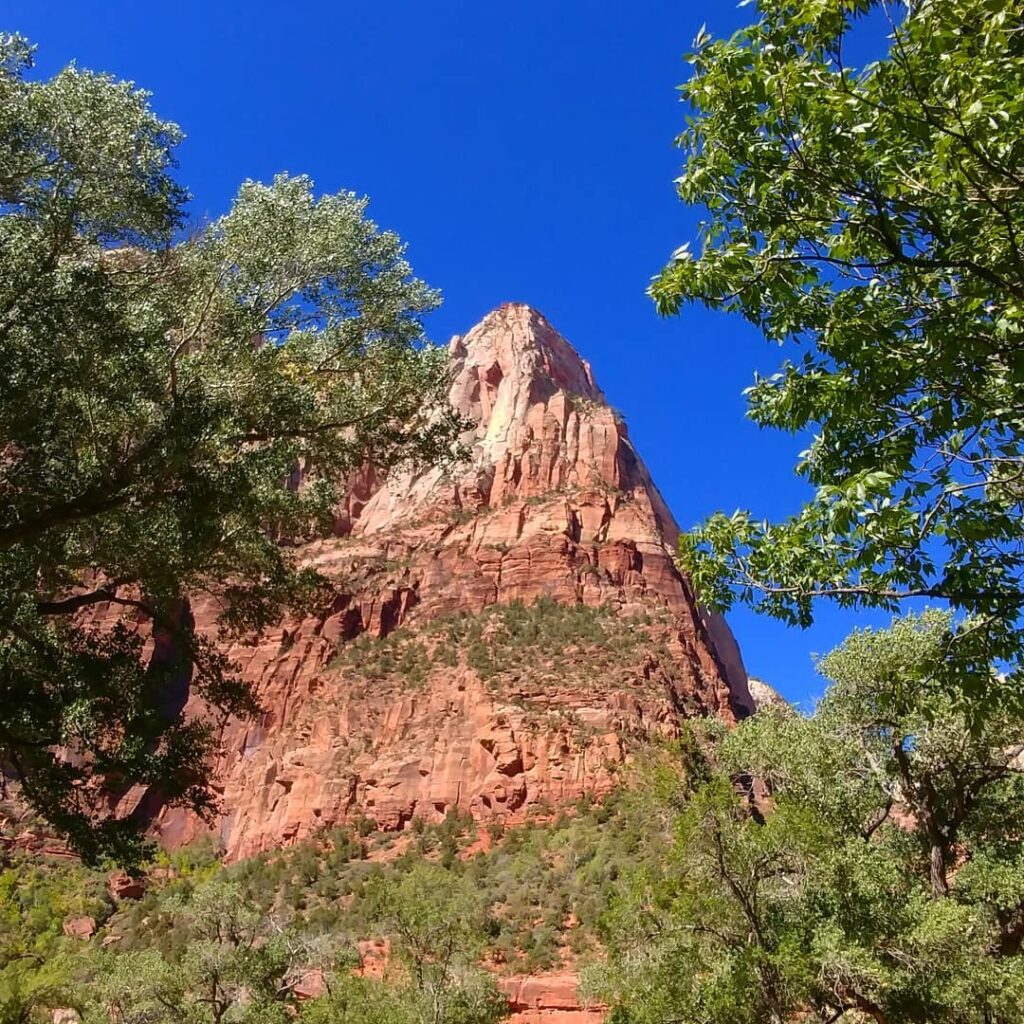
Zion National Park, Utah’s first designated National Park, is defined by its towering sandstone formations and the rich hues of its canyons. It’s a destination that lets you walk in the footsteps of pioneers and native peoples who once traversed these lands.
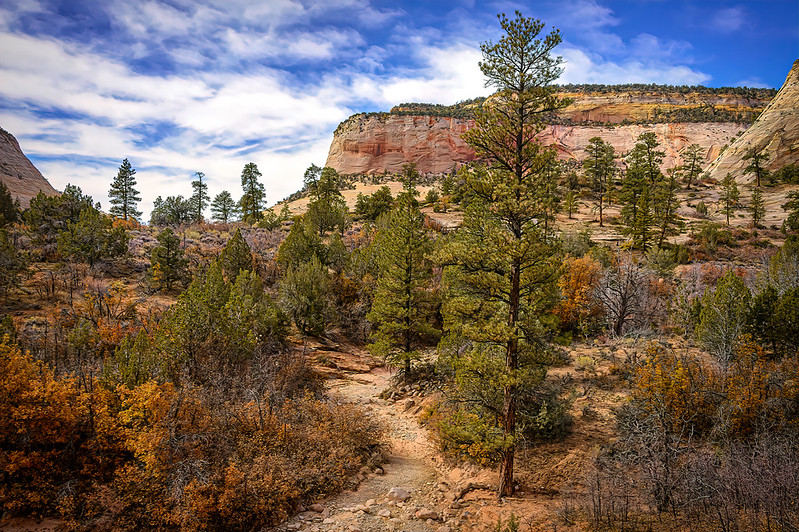
Covering over 124,000 acres, Zion offers vast protected wilderness, with roughly 84% of the park dedicated to preservation. It’s important to stick to the marked trails to help protect this natural environment. Fortunately, visitors can enjoy over 90 miles of hiking paths and several designated camping areas throughout the park.
Zion’s hiking trails range from simple walks to challenging, multi-day adventures. You’ll encounter breathtaking sights, including waterfalls tumbling down rocky cliffs, winding through narrow canyons, and hiking past Juniper and Aspen forests. With more than 1,000 plant species thriving in the park, Zion offers a remarkable variety of ecosystems in one place. It didn’t take long for me to fall in love with this park—it’s diverse in both landscape and experience.
Zion remains open year-round, with many trails accessible in any season, weather permitting. This makes it an ideal location for year-round outdoor exploration.
Pro Tip: If you plan to visit multiple National Parks, consider getting the America the Beautiful Pass. This $80 pass covers entry for a whole family in one vehicle and grants access to all National Parks and 2,000 federal recreation sites in the U.S. for a full year. If you’re also planning to visit Bryce Canyon or other parks within the year, this pass can quickly save you money.
Top Hikes in Zion National Park
- Canyon Overlook Trail (Easy/Moderate)
- Angels Landing (Strenuous)
- Lower Emerald Pool Trail (Easy)
- Upper Emerald Pool Trail (Moderate)
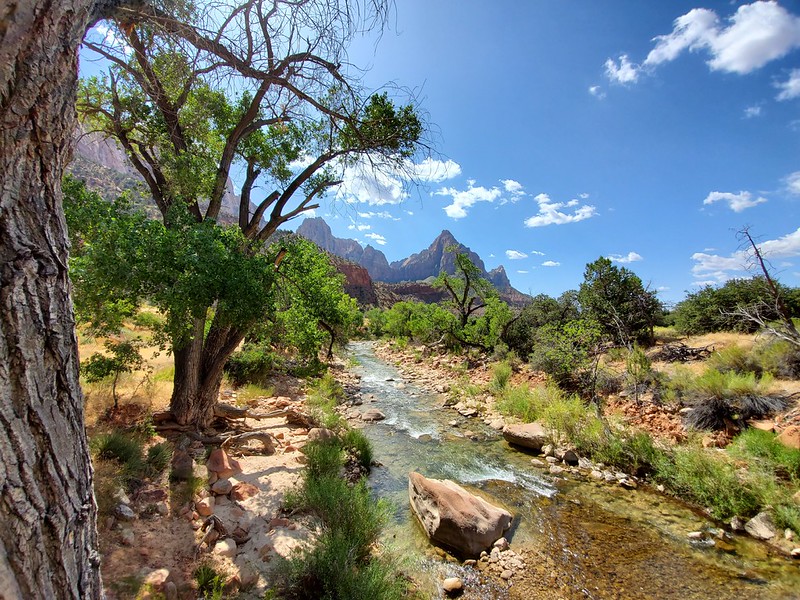
- Riverside Walk (Easy)
- Pa’rus Trail (Easy)
- Observation Point (Strenuous)
- The Narrows (Moderate – Strenuous)
- Hidden Canyon (Moderate – Strenuous)
- Watchman Trail (Easy/Moderate)
- Weeping Rock (Easy)
- West Rim Trail (Strenuous)
- East Rim Trail (Strenuous)
- Grotto Trail (Easy)
- Lady Mountain Trail (Strenuous/Climbing)
Below, you’ll find detailed descriptions of each hike. But first, some helpful information and a map to give you a clearer picture of what to anticipate.
TIP: For a more secluded experience, consider this highly recommended UTV and hiking tour to a slot canyon. Though short, this tour offers an extraordinary way to enhance your Zion adventure!
Getting Around Zion: Shuttle Service Tips for Your Visit

If you’re planning a trip to Zion National Park, keep in mind that Zion Canyon Scenic Drive is closed to private vehicles during peak season, from March to November. During this time, Zion offers a highly efficient and free shuttle service with two main routes: the Springdale Shuttle and the Zion Canyon Shuttle.
The Springdale Shuttle takes you from the nearby town of Springdale directly to the park’s entrance, making it an easy and convenient option to start your visit.
Once inside, the Zion Canyon Shuttle offers 9 stops along the scenic drive, allowing easy access to popular hiking trails. With these shuttle routes, you’ll be able to explore Zion without worrying about parking or traffic. You can find more detailed information about the shuttle system here.
Tip: Consider staying in Springdale. The town offers the best combination of value and comfort for those looking to explore Zion, with a variety of accommodations that suit different budgets.
Trailhead Map for Zion Hikes
To make it easier for you to plan your Zion hikes, I’ve created a map marking the trailheads for all the hikes mentioned in this guide. The hikes are color-coded: easy hikes are in green, moderate hikes in yellow, and strenuous hikes in red.
It’s important to note that not all hikes are loops. Some easier trails are directly along the Zion shuttle route, so you can start and finish wherever is most convenient for you. For other trails, the route is simpler when done in one direction (e.g., downhill vs. uphill). In these cases, I’ve indicated the trailhead for the easier route.
Parking: For most hikes, it’s best to park your car in Springdale or at the Zion NP Visitor Center and take the free shuttle for easy access to the trailheads.
Pro Tip: There are also longer or more strenuous hikes where you’ll need to arrange transportation to the starting point. Many local companies offer this service, but it’s crucial to book in advance. Booking a shuttle to your trailhead gives you more flexibility, as you’ll have the freedom to return at your own pace. All the hikes mentioned in this guide finish along the Zion shuttle route, making it simple to return to your car after a long hike.
To use this map, zoom in or out with your mouse or fingers, and click on the icons for more details about each location. Access the map index by clicking the arrow in the top left corner, and click the star next to the title to save it to your Google Maps account. To view your saved map, open Google Maps, go to the menu, and select ‘Your Places’ > ‘Maps.’ For printing or a larger view, click ‘View larger map’ in the top right corner.
Key Information for Hiking in Zion
These are some tips to help you check trail conditions in Zion before you start your hike. Beside recent landslides and rockfalls that led to closure or partial closing along popular trails. Weeping Rock, Hidden Canyon and Observation Point are currently closed until further notice following several large rockfalls.
Also very important not forgetting is to check the weather forecast, especially for longer hiking. The canyons are so narrow that they could flood in a flash, so this is when the latest information comes into play.
Be sure weather and trail conditions can change quickly, check the official site for up to date info. And if you plan to hike in the park overnight, don’t forget your permit.
Top Hikes in Zion National Park
1. Canyon Overlook Trail: A Short But Rewarding Hike
- Level of Difficulty: Easy to Moderate
- Total Distance: 1 mile (1.6 km) roundtrip
- Estimated Duration: Around 1 hour
- Starting Point: East of Mount Carmel Tunnel, Highway 9
Canyon Overlook Trail is a quick, accessible hike that offers a breathtaking view at the end. This trail is perfect for hikers of all ages and skill levels. Most of the route is flat, with only occasional tree roots and a set of stairs to navigate. It’s surprising how fast you reach the viewpoint, and once you arrive, you’ll feel like you’ve experienced one of Zion’s best panoramas.
With its combination of easy terrain and spectacular views, it’s one of the park’s top hikes. However, a few drawbacks to consider: this trail is not serviced by the shuttle, so you’ll need to drive to the trailhead. Additionally, parking is limited, so it’s best to arrive early in the morning. After passing through the Zion-Mt Carmel Tunnel, you’ll find a small parking lot on your right. The trailhead is just across the road on the left side (see the map above for more details).
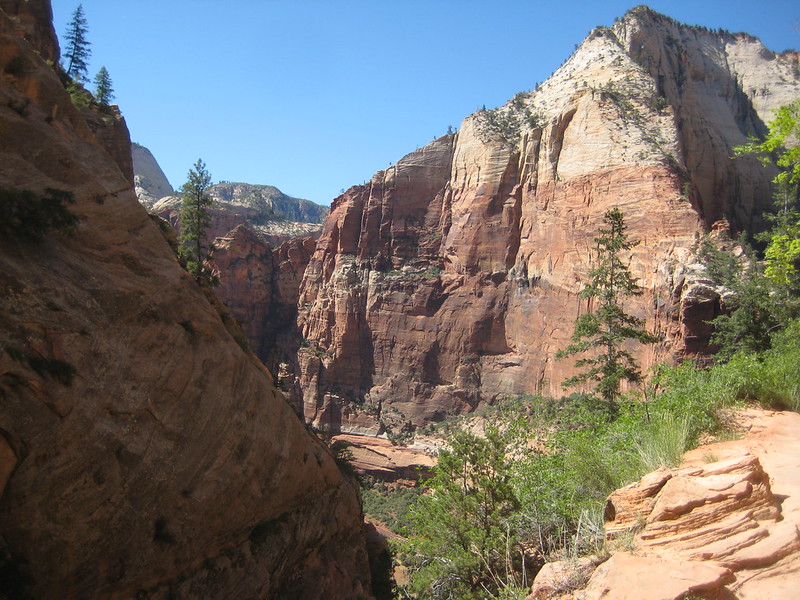
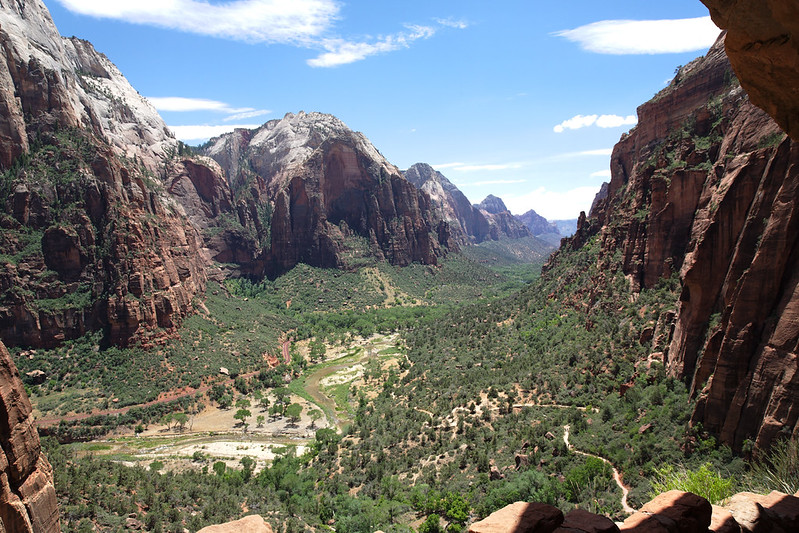
2. Angels Landing: A Challenging Zion Hike
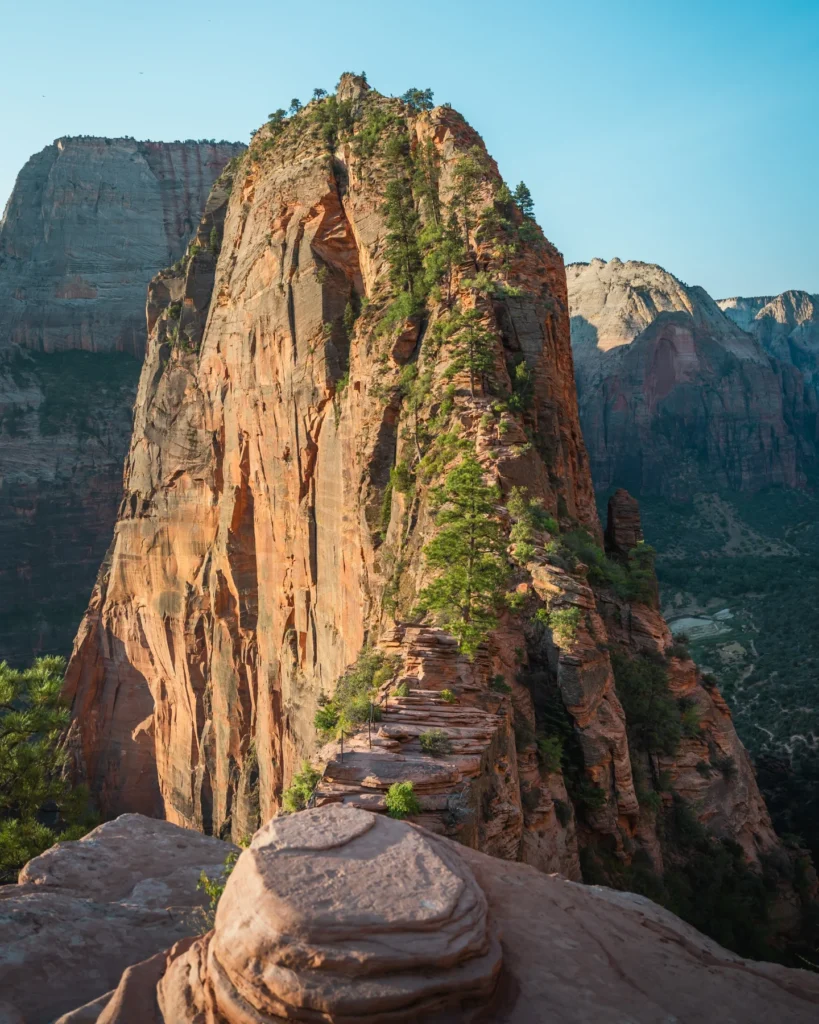
- Level of Difficulty: Strenuous
- Total Distance: 5.4 miles (8.7 km) roundtrip
- Estimated Duration: 3-5 hours
- Starting Point: The Grotto. Shuttle stop #6
The Angels Landing hike now requires a permit. There are several options available, including a lottery system held the day before. For the latest information, be sure to check the official website.
Angels Landing is Zion’s most famous and heavily trafficked hike, especially during peak seasons. If you’re someone who loves a thrilling adventure, this trail should be on your list. However, if you’re uncomfortable with heights, it may not be the best fit. You can always stop at Scout Lookout for great views without going further.
To tackle this hike, you’ll need to be in good physical shape, though fitness alone isn’t enough. The narrow sections of the trail and steep drop-offs make this hike challenging. Plus, weather conditions are a critical factor—at times, you’ll be holding onto a chain bolted into the side of a cliff! If winds are too strong, the trail may close for safety.
TIP : For the most enjoyable experience, aim for early mornings in the spring or summer. The crowds can get overwhelming, so plan ahead and check the permit situation early. For an even earlier start, take the first shuttle or rent a bike in Springdale to reach the trailhead. If you’re staying at Zion Lodge, it’s also a short walk to the start.
PRO TIP: If you’re unable to secure a permit for the full hike, you can still go up to Scout Lookout without one. The views from here are spectacular, offering an excellent alternative for those who don’t have the time or ability to complete the entire trail.
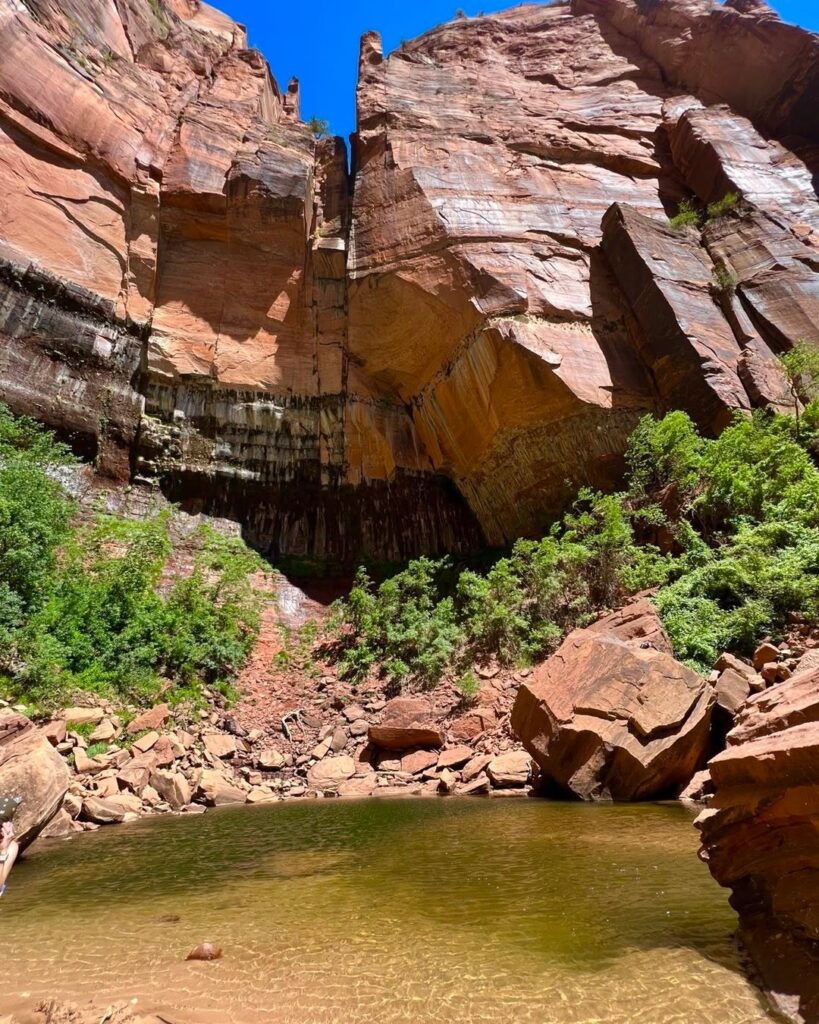
3. Lower Emerald Pool: A Family-Friendly Zion Trail
- Level of Difficulty: Easy
- Total Distance: 1.2 miles (2 km) roundtrip
- Estimated Duration: 1 hour
- Starting Point: Zion Lodge. Shuttle stop #5
The Lower Emerald Pool Trail is the simplest of the two Emerald Pool routes. It’s accessible for those with mobility challenges, and it’s a fantastic option for families. Even with a baby stroller, this trail is an easy path to follow.
Along the way, you’ll be immersed in nature, with beautiful waterfalls and sparkling pools waiting at the end. The view of the pools and surrounding scenery makes this trail one of Zion’s most pleasant spots to visit.
We hiked this trail on a rainy day, and it only enhanced the experience. The waterfalls were even more stunning with the extra water flow, and as we reached the Emerald Pool, the rain eased off and the fog began to lift. It was a truly enchanting moment. So, if you happen to visit Zion during less-than-ideal weather, this trail is a great choice to explore.
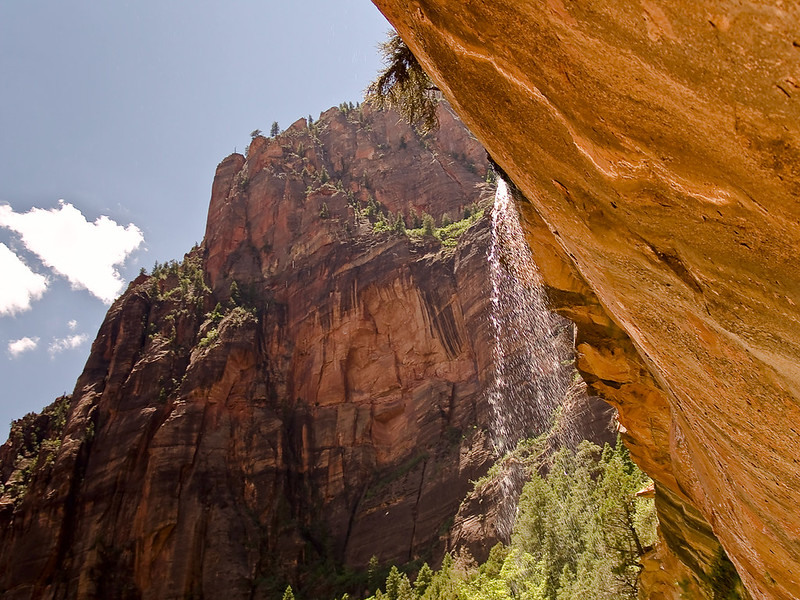
4. Upper Emerald Pool: A Steeper Path to Stunning Views
- Level of Difficulty: Moderate
- Total Distance: 3 miles (4.8 km) roundtrip
- Estimated Duration: 2-3 hours
- Starting Point: Zion Lodge. Shuttle stop #5
To reach the Upper Emerald Pool, you’ll first need to hike through the Lower and Middle Emerald Pools. Once you reach the beginning of the Upper Emerald Trail, the difficulty level increases. The trail becomes steeper, with some rock climbing required. While the path can be challenging, the reward is well worth it once you reach the top.
We hiked this trail on a rainy day, and the sight of the waterfalls left us in awe. The water flowed with incredible force, cascading down the cliffside in a powerful display. It was a mesmerizing sight, and one that made the effort of the hike more than worthwhile.
If you’re ready for a moderate challenge, this trail offers one of the most memorable views in Zion.
5. Riverside Walk: A Relaxing Family-Friendly Zion Trail
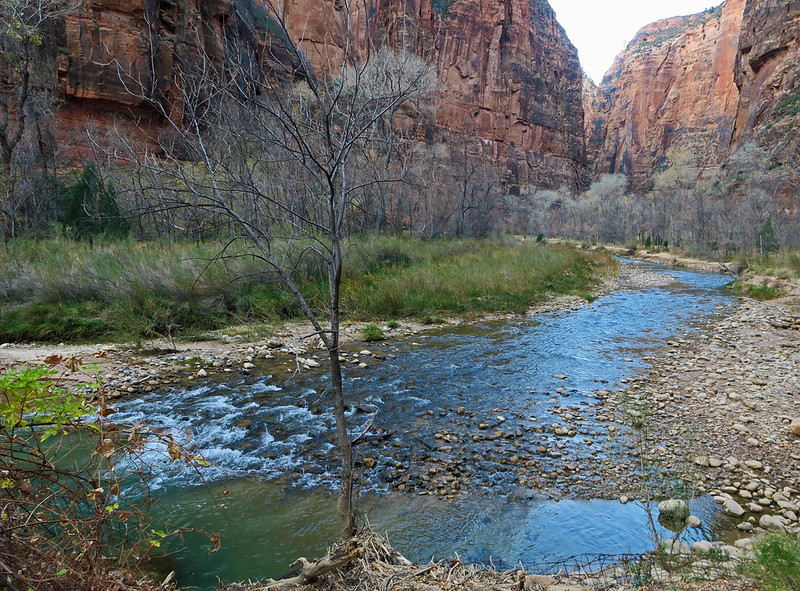
- Level of Difficulty: Easy
- Total Distance: 2.2 miles (3.5 km) roundtrip
- Estimated Duration: 1.5 hours
- Starting Point: Temple of Sinawava. Shuttle stop #9
Riverside Walk is a simple trail that’s perfect for families and beginners. The path is lined with lush hanging gardens and offers stunning views of the Virgin River, making it a scenic and peaceful hike. We were so impressed by the surroundings that this quickly became one of our favorite trails in Zion!
One of the highlights of this trail is the Weeping Walls, where water constantly drips down the rock faces, creating a soothing and dramatic effect. If you arrive early in the morning, you may also have the chance to see some local wildlife along the way.
The first 0.4 miles of the trail is paved and wheelchair accessible, making it easy for everyone to enjoy. The remainder of the hike is a sandy path, but still an easy walk with fantastic views. Given its popularity, it’s best to visit early or later in the day to avoid the crowds.
6. Pa’rus Trail: A Family-Friendly Zion Walk
- Level of Difficulty: Easy
- Total Distance: 1.7 miles (2.7 km) one way
- Estimated Duration: 1-2 hours
- Starting Point: Zion Visitor Center, shuttle stop #1
Pa’rus Trail is a newer addition to Zion National Park, offering a relaxed and enjoyable hike for all visitors. The trail follows the Virgin River, providing plenty of opportunities to get close to the water. With its name meaning “bubbling water,” it’s easy to see why this trail offers a refreshing experience for hikers.
The trail is paved and mostly flat, making it one of the easiest and most accessible hikes in Zion. It’s also the only trail where dogs and bicycles are allowed, so you can bring along your furry friends or enjoy a bike ride. The family-friendly nature of Pa’rus Trail makes it a great option for any season.
As you walk, you’ll be surrounded by Zion’s natural beauty, and the trail offers a fantastic view of the mountains, especially at sunset. Wildlife sightings are frequent, but to catch a glimpse, it’s best to visit early in the morning or during the off-season when fewer people are around.
TIP: Don’t miss the view from the Canyon Junction bridge at the end of the trail. It offers one of the most iconic views in Zion, and if you prefer not to hike the entire trail, you can easily reach this viewpoint by shuttle.
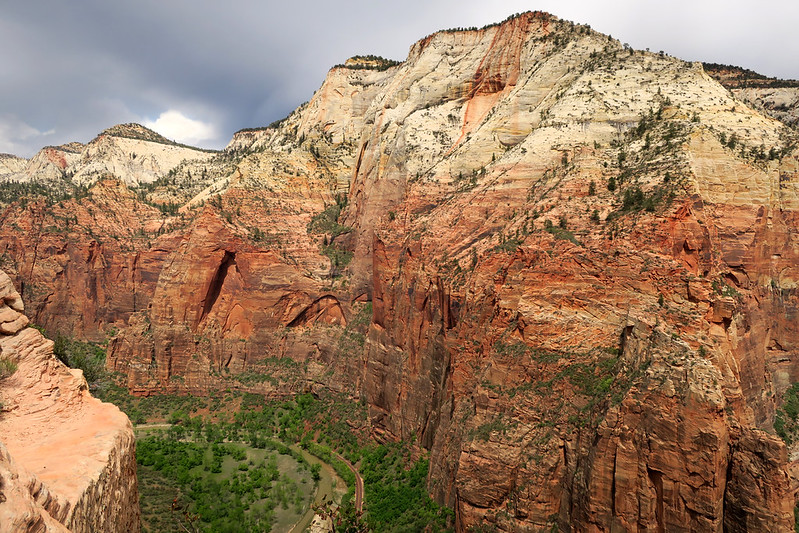
7. Observation Point: The Ultimate Zion Hike
- Level of Difficulty: Strenuous
- Total Distance: 8 miles (12.8 km) roundtrip
- Estimated Duration: 4-6 hours
- Starting Point: Weeping Rock. Shuttle stop #7
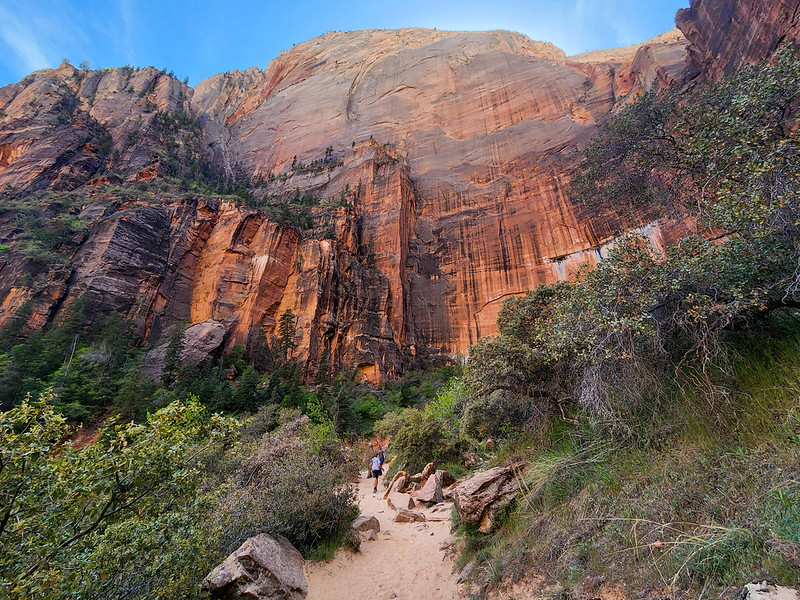
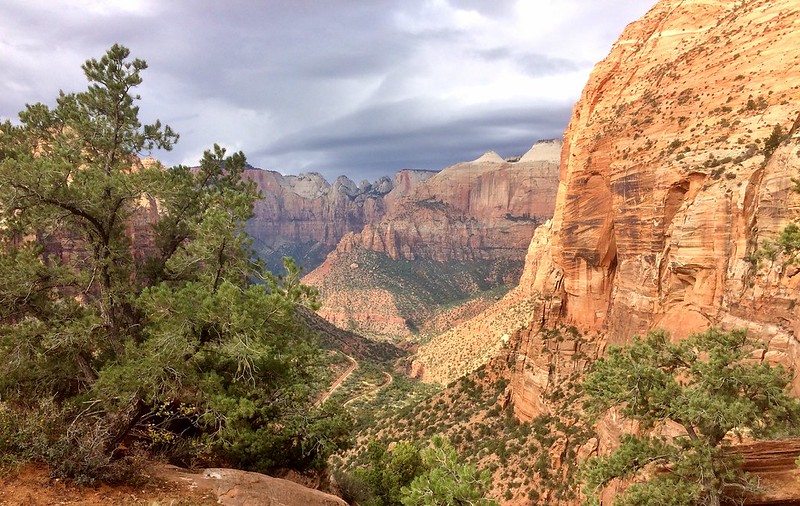
Observation Point is Zion National Park’s most iconic trail, offering a view unlike any other. From the top, you’ll be able to see Angels Landing and the winding Virgin River far below, making the effort of this hike absolutely worthwhile.
This trail is challenging and one of the most strenuous in Zion. Most of it is an intense uphill climb, with parts of the path carved into the canyon walls. Unlike Angels Landing, which can trigger a fear of heights, Observation Point’s difficulty lies in its significant elevation gain of over 2,100 feet (640 meters). If you can push through the tough ascent, the reward at the top is a panoramic view that is truly breathtaking.
As you make your way up, you’ll pass through Echo Canyon, known for its striking white cliffs and winding canyon shapes. Some hikers prefer using walking sticks, though they are not required for the journey.
Good to Know: Observation Point can be accessed from two routes: one from Weeping Rock and another from the East Mesa Trailhead. The Weeping Rock trailhead is easier to reach by shuttle, making it the more popular starting point. The East Mesa Trailhead, while offering a smoother descent, requires a longer drive and is harder to find. If you’re able to arrange a transfer to East Mesa, starting there for an easier downhill hike is a great option, allowing you to experience the best of both routes.
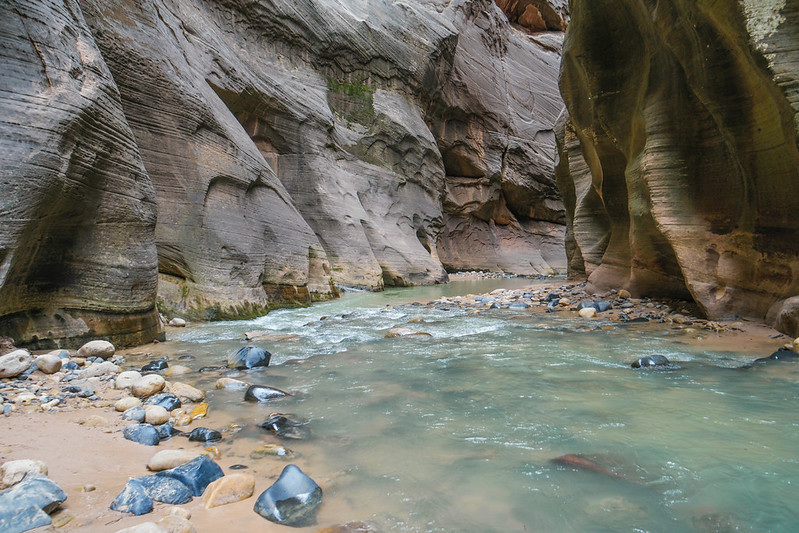
8. The Narrows: Exploring Zion’s Iconic Canyon
The Narrows from the Top Down
- Level of Difficulty: Strenuous
- Total Distance: 16 miles (25.7 km) one way
- Estimated Duration: 12 hours (more relaxed over 2 days)
- Starting Point: Chamberlain’s Ranch (private shuttle required)
- End of the Hike: Temple of Sinawava. Shuttle stop #9
- Important: A wilderness permit is required.
- Recommended Gear: Walking sticks, waterproof boots, waterproof gear
The Top Down hike of The Narrows is a true adventure, covering 16 miles of rugged terrain that takes most people an entire day to complete. Many opt to break it up into two days, camping halfway through for a more relaxed experience. The hike itself is challenging mainly due to the need to walk through the Virgin River for a significant portion of the trail. The length, combined with the water walking, makes this one of Zion’s most strenuous hikes.
Starting at Chamberlain’s Ranch, which is about a 1.5-hour drive from the Zion Visitor Center, requires arranging private transportation. Many shuttle services operate in Zion, and booking ahead is essential. You can also join a guided tour if you’d prefer to have everything arranged for you.
Following the Virgin River, the trail narrows as you approach the tightest section of Zion Canyon. The hike is demanding, as you’ll be wading through the river, so expect to get wet. The best time to tackle The Narrows is during late spring or summer when the water levels are lower, and the temperatures are warmer.
Always check the weather before your hike, as flash floods can occur unexpectedly. Waterproof boots and walking sticks are highly recommended, and make sure you’re prepared to get wet. As you make your way along the trail, you’ll be surrounded by towering stone walls that rise up to 1,000 feet (300 meters) on either side. The river at its widest point is about 30 feet (10 meters) across.
The Narrows from the Bottom Up
- Level of Difficulty: Moderate
- Total Distance: 10 miles (16 km) roundtrip
- Estimated Duration: 6-8 hours
- Starting Point: Temple of Sinawava. Shuttle stop #9
- Recommended Gear: Walking sticks, waterproof boots or water shoes, waterproof gear
If the Top Down route seems too challenging, the Bottom Up hike offers a more moderate experience, starting at the Riverside Walk. This trail is more popular and doesn’t require a permit, making it more accessible for those wanting to experience The Narrows without the full-day commitment.
The Bottom Up hike lets you explore some of the narrowest parts of the canyon and enjoy stunning views with less intensity than the Top Down trail.
TIP: You don’t have to complete the full 10-mile round trip to enjoy the scenery. Hiking for just an hour or two will still give you beautiful views and an unforgettable experience.
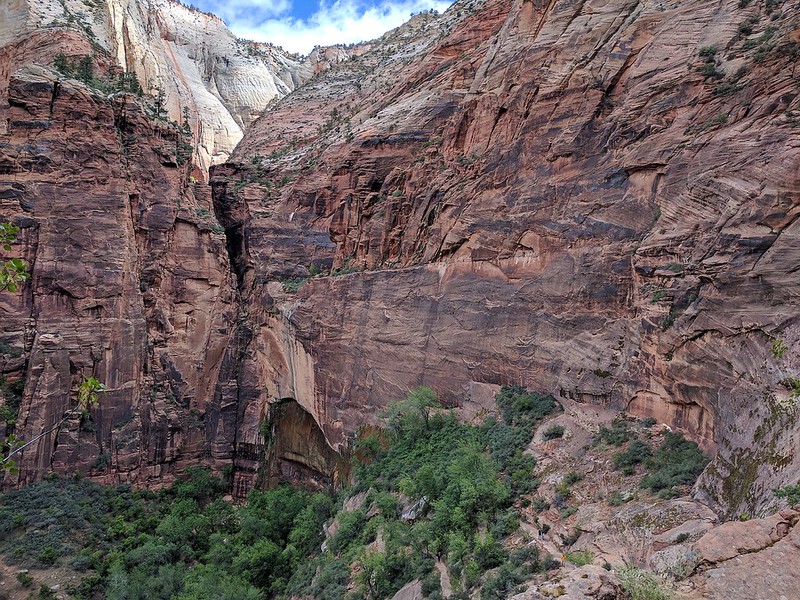
9. Hidden Canyon: A Challenging and Scenic Zion Hike
- Level of Difficulty: Moderate
- Total Distance: 3 miles (4.8 km) roundtrip
- Estimated Duration: 2-3 hours
- Starting Point: Weeping Rock. Shuttle stop #7
Hidden Canyon offers an adventurous hike with an elevation gain of over 1,000 feet (300 meters). It’s a trail that requires some effort, so be prepared for an uphill climb as you make your way through the canyon.
This “hanging canyon” features narrow passages that give the impression of stretching on indefinitely. As you hike, you’ll cross several ravines and at times need to scramble over rocky sections of the trail. Some areas have chains for extra support, though they aren’t necessary for most of the hike. A word of caution: be careful when crossing over the stream bed inside the canyon.
Starting at Weeping Rock, the trail initially follows the East Mesa Trail toward Observation Point. After a while, it branches off to the right, and you’ll find yourself zigzagging along the path. The switchbacks and varying terrain are part of what makes this hike so enjoyable and rewarding.
For more detailed information on Hidden Canyon, be sure to check out additional resources about the trail.
10. Watchman Trail: A Quiet Zion Hike with Stunning Views

- Level of Difficulty: Easy
- Total Distance: 3 miles (4.8 km) roundtrip
- Estimated Duration: 2-3 hours
- Starting Point: Canyon Visitor Center
Watchman Trail is often overlooked by those drawn to Zion’s more famous hikes, but it’s a fantastic, easy trail that rewards you with great views of the Springdale valley. The path takes you through a landscape of green shrubs, evergreens, and pear cactus, offering a quieter side of Zion.
While the trail has some uphill sections, it’s not overly strenuous and is well-marked, making it an excellent choice for beginners or families. If you’re seeking a peaceful yet scenic hike, Watchman Trail is a solid option.
TIP: This trail is a favorite for watching the sunrise. If you’re planning an early morning hike, be sure to bring a headlamp, as you’ll be navigating the trail in the dark. It’s also perfect for a sunset hike, allowing you to finish before the night sets in.
11. Weeping Rock: A Short but Rewarding Zion Trail
- Level of Difficulty: Easy
- Total Distance: 0.4 miles (0.6 km) roundtrip
- Estimated Duration: 0.5 hours
- Starting Point: Weeping Rock. Shuttle stop #7
Weeping Rock is one of the shortest hikes in Zion, yet it’s a must-see. While it can get crowded, the sight is well worth it. The name “Weeping Rock” comes from the constant dripping of water down the rock face, making it appear as though the rock is crying.
The viewpoint also offers a view of the Great White Throne to the left, adding even more beauty to the experience.
Though the trail is steep, it’s short and the effort is well-rewarded. With most of the path paved, it’s a great option for families looking for an easy but memorable hike.
12. West Rim Trail: A Long but Stunning Zion Hike
- Level of Difficulty: Strenuous
- Total Distance: 15 miles (24 km) one way
- Estimated Duration: 9-12 hours
- Starting Point: West Rim Trailhead or Lava Point Overlook (additional 1.5 miles)
- End of the Hike: The Grotto. Shuttle stop #6
- Important: A wilderness permit is required if you plan to complete the hike over two days.
The West Rim Trail is one of Zion’s most breathtaking long hikes, offering a variety of scenic views. You can tackle it as a one-day hike or break it into two days with an overnight stay, but the length of the hike makes it a strenuous journey. The good news is that much of the trail is either downhill or relatively flat, which makes the challenge more manageable.
The West Rim Trail is often referred to as the ‘top down’ hike because it leads you into Zion Canyon, with each new viewpoint offering an increasingly spectacular view. As you hike, it feels like you’ve stepped into a world of hidden wonders, each corner revealing something even more stunning than the last.
TIP: Along the West Rim Trail, you’ll pass the famous Angels Landing Trail. If you’re in good shape and have extra time, consider making the detour to this iconic viewpoint.
For more details on the West Rim Trail, you can check additional information from the official Zion resources.
13. East Rim Trail: A Challenging Yet Rewarding Zion Hike
- Level of Difficulty: Strenuous
- Total Distance: 11 miles (17.7 km) one way
- Estimated Duration: 5-9 hours
- Starting Point: East Entrance Ranger Station (private shuttle required)
- End of the Hike: Weeping Rock. Shuttle stop #7
The East Rim Trail is often considered the ‘little brother’ of the West Rim Trail, but it still offers plenty of adventure. Right from the start, you’ll be treated to impressive views of the colorful Navajo Sandstone mountains. Even if you don’t plan to hike far, the eastern side of Zion is worth exploring just for this incredible view.
While the views along the East Rim Trail might not be as dramatic as those on the West Rim, it compensates by offering a wider variety of scenery, making it a great option for those looking to experience more diversity in Zion’s landscapes.
The first part of the trail is relatively easy, though it does involve an uphill climb of about 1,000 feet (300 meters). For those not looking to complete the entire hike, you can walk the first few miles until you reach Jolley Gulch and then turn back. This offers a more manageable alternative without the need for additional transportation.
As you continue, the trail leads into Echo Canyon, where extra caution is needed due to potential slick rocks, especially after rain or snow. Further along, you’ll encounter a junction leading to Observation Point. This detour adds significant mileage, but if you start early, you can complete it before heading to the final stop at Weeping Rock.
14. Grotto Trail: A Short and Scenic Zion Walk
- Level of Difficulty: Easy
- Total Distance: 0.5 miles (0.8 km) one way
- Estimated Duration: 1-2 hours
- Starting Point: Zion Lodge. Shuttle stop #5
- End of the Hike: The Grotto. Shuttle stop #6
The Grotto Trail isn’t one of the most breathtaking hikes in Zion, but it’s a perfect option for those seeking a simple and relaxing walk. Whether you’re easing into the day before tackling more difficult trails or winding down in the evening, this trail offers a peaceful experience.
This short walk follows Fall of the Valley Road, connecting Zion Lodge to the Grotto Picnic Area. The path is mostly flat, leading you through a wooded area where you can enjoy the sounds of birds and take in the impressive stone formations in the distance. If you’re lucky, you may spot some wildlife along the way.
At the end of the trail, just across the river from the Grotto Picnic Area, you’ll find the Angels Landing trailhead. Even if you’re not planning to hike all the way to the top, crossing the river to take in the view of this iconic rock formation is worth the extra effort.
15. Lady Mountain: A Challenging Climb in Zion
- Level of Difficulty: Strenuous climb, rock climbing gear required
- Total Distance: 2 miles (3.2 km) one way (4 miles total)
- Estimated Duration: 6-10 hours
- Starting Point: Zion Lodge. Shuttle stop #5
- Required Equipment: 100-foot rope, harnesses, essential rock climbing gear
Lady Mountain is one of Zion’s more remote and quieter trails, offering stunning views for those who are up for the challenge. Unlike more popular hikes, this trail requires rock climbing gear, which limits the number of hikers who attempt it. The trailhead isn’t well-marked, and it’s recommended to go with a local guide who can provide the necessary gear and expertise.
If you decide to go on your own, make sure to research the exact directions carefully. Follow the painted arrows and take advantage of the carved steps when available. Stick to the trail and avoid straying from the path.
Throughout the hike, you’ll be climbing and following the ridges of large boulders. There’s a particularly tricky section where you’ll need to use a rope to ascend.
TIP: It’s a good idea to pull your pack—and a friend’s pack—up before climbing, to make the ascent smoother.
The best time to tackle Lady Mountain is in the fall, when the weather is cooler. Avoid winter, as snow can make the climb dangerous, and summer temperatures can be too intense for such a demanding trail.
Getting to Zion & Tours: Your Options for Exploring the Park
The most convenient way to reach Zion is by car. However, once you get to Springdale, a car becomes less necessary because you can rely on the park’s shuttle service (available in season). If you’re flying into Las Vegas, a shuttle transfer might be a better option. It could be more cost-effective than renting a car that you won’t be using for most of your stay in Zion.
Another option is to join an organized tour. Day tours from Las Vegas are available that cover both Zion and Bryce Canyon. While these tours don’t offer much hiking, they provide a great way to see the parks if you’re short on time.
For a deeper experience, consider a multi-day tour. A 3-day tour can help you explore all the key spots in and around Zion at a more leisurely pace, allowing you to truly immerse yourself in the area.
TIP: If you’re looking for outdoor adventures, consider some of the top tours in Springdale and East Zion. These include challenging hikes with a guide, horseback riding, biking in Zion Canyon, rock climbing, and canyoneering. A slot canyon tour is a fantastic and different experience if you’re seeking something beyond the typical Zion attractions.
Where to Stay: Zion Accommodations
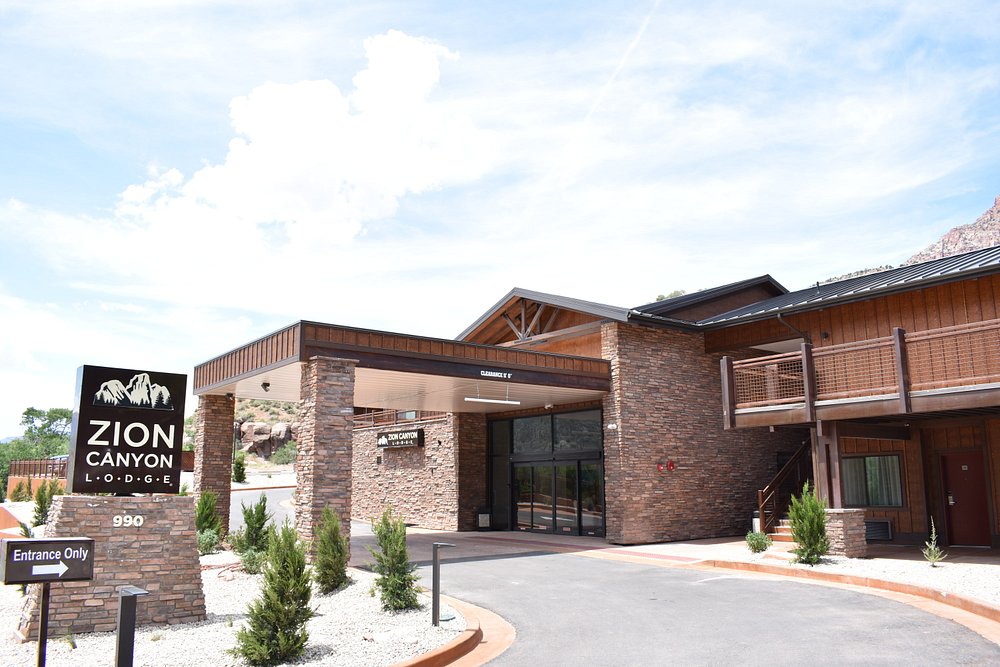
One of the top places to stay in Zion is Zion Lodge, which is located inside the National Park. While it offers a prime location, the lodge is quite expensive and rooms are hard to come by during peak season. Additionally, it lacks a pool, and the Wi-Fi connection is often unreliable.
For a more budget-friendly option, staying in Springdale is a great choice. This small town is just outside the park entrance, and depending on the hotel, you can either walk or take a free shuttle to the park entrance.
One of the best hotels in Springdale is Cable Mountain Lodge, which is only a 5-minute walk from the Zion Visitor Center.
TIP: Save this guide for future reference, share it with your friends, or pin it to Pinterest so you can easily access it when planning your Zion adventure.
You may also like :