In September, I found myself in Seattle for work, and I was able to extend my stay by adding a few vacation days before heading back to the Midwest.
I took the opportunity to embark on a 500-mile road trip around Washington’s Olympic Peninsula, marking my first-ever solo camping adventure. I had carefully mapped out a route that would cover all the key points, from hiking trails and well-known landmarks to lesser-visited spots. My goal was to fully immerse myself in everything the region had to offer.
However, within just five hours of starting my journey, I quickly realized I had underestimated the vastness and intricate nature of the peninsula. I lingered longer than planned at each stop, and by the end of day one, I had only crossed off a fraction of the destinations I had hoped to visit. By that evening, I had a change of heart and decided to adjust my plans. Instead of attempting a rush to see everything, I slowed my pace and opted to focus on a few select experiences each day.
This shift in strategy allowed me to truly appreciate the natural surroundings. Without the pressure to check off every box, I found a renewed sense of enjoyment in the little things—sipping morning coffee in the calm, taking in sweeping views, and marveling at the diverse ecosystems of the Pacific Northwest.
Reflecting on my trip, it became clear that the peninsula is much more than a quick stop. While my original thought of seeing it all in three days seemed doable, I now know that 5–7 days would be far more reasonable for anyone hoping to scratch the surface. Beyond the iconic spots, the Olympic Peninsula holds hidden gems—secret lakes, backcountry trails, and quiet beaches—that could take months to fully explore.
Not everyone has the luxury of time to dive into every corner of the peninsula. However, I’ve compiled my own 3-day itinerary to highlight some of the area’s must-see spots. It’s a great starting point for anyone looking to experience the best of the Olympic Peninsula during a short weekend trip.
Olympic Peninsula Road Trip Summary
- Total Distance Covered: Approximately 500 miles
- Time Spent on the Road: Around 15 hours
Olympic Peninsula Road Trip Route Overview
I chose to drive the Olympic Peninsula counter-clockwise, starting with the Bainbridge Ferry across the Puget Sound. This shortcut helped reduce my drive time and gave me a chance to enjoy the stunning views of the Seattle skyline from the water. It also made for a convenient return to Seattle, where I ended my trip by catching a red-eye flight from Seattle Tacoma Airport back to Milwaukee on Sunday night.
Transportation:
- Enterprise Rental Car (picked up from SEATAC)
- Bainbridge Car Ferry
Camping in Olympic National Park: A Solo Traveler’s Experience
As a solo traveler, I decided to stay at the campgrounds within Olympic National Park for added safety. While there are plenty of camping options in the area, from established campgrounds to more remote locations, I preferred the security that the park’s facilities provided. The Olympic Peninsula is home to free public lands, national forests, state parks, and Native American reservations, each offering various camping choices that are worth considering.
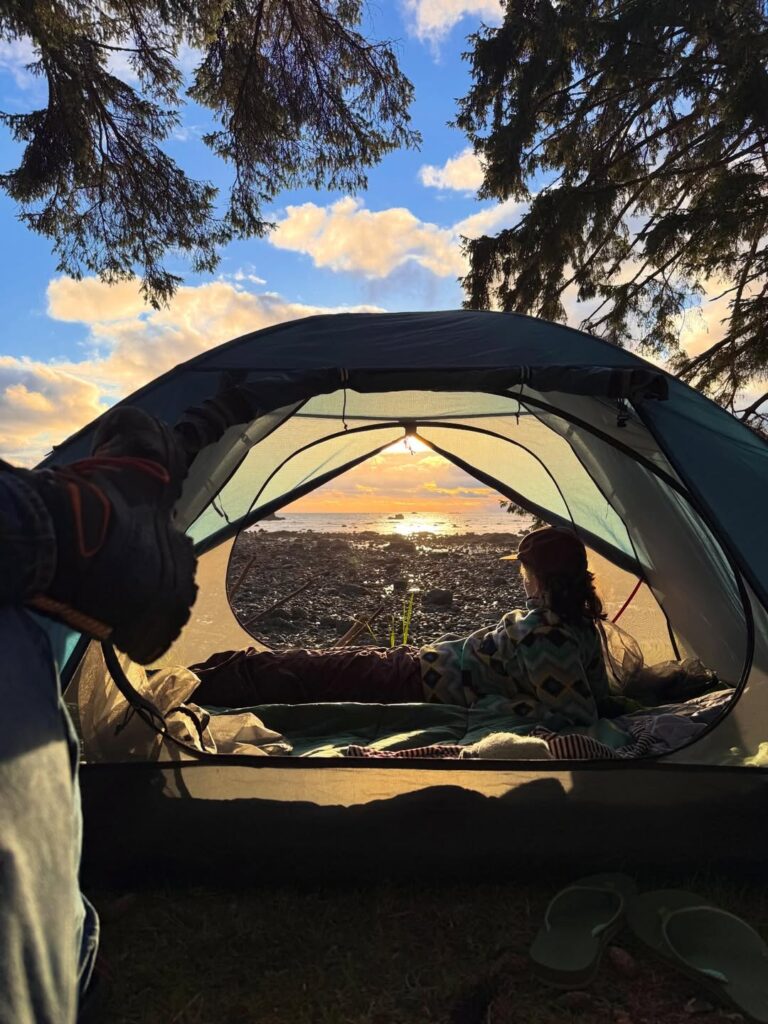
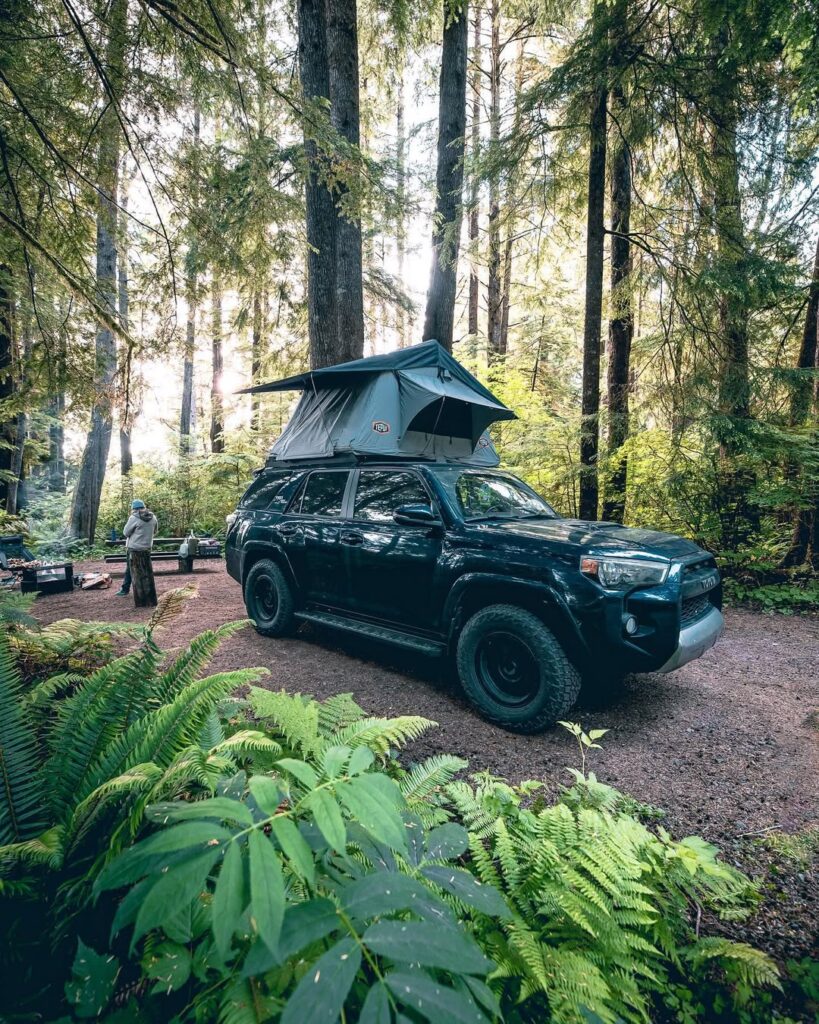
Rather than carrying a bulky tent in my luggage, I opted for my Eno Hammock System, complete with a rain fly to shield me from the frequent rainstorms. This lightweight setup was perfect for my needs—comfortable and easy to manage. It kept me off the damp ground, which was a relief during the nightly showers. While a hammock might not be the go-to for everyone, its portability and quick setup and takedown made it the ideal choice for my solo trip.
Camping Meals: Easy and Affordable Solutions
To keep my trip budget-friendly, I made a stop at a local Trader Joe’s in Seattle before heading out. I stocked up on all the essentials for my camping meals—pasta for dinners, instant oatmeal for breakfast, granola bars for lunch, and an assortment of snacks for the road. Preparing ahead of time saved both money and time while I was on the go.
While there are a few grocery stores and restaurants in the Olympic Peninsula’s larger towns, like Port Angeles and Forks, options along the way are limited due to the vast protected lands. Variety in groceries wasn’t abundant, and the available restaurants tended to be either pricey or not conveniently located.
Expense Breakdown:
- Total Cost: $313.68
- Park Fees: $0 (America the Beautiful Pass)
- Campsite Fees: $40 (2 nights)
- Groceries: $29.04 (7 meals + snacks)
- Car Ferry: $18.70 (Passenger + Car Fee)
- Rental Car: $125.00
- Gas: $100.94
3-Day Road Trip Itinerary: Exploring the Olympic Peninsula
Day 1: Departure and Ferry Ride
- Distance Traveled: Approximately 155 miles
- Total Time on the Road and Ferry: About 5 hours
Taking the Ferry: Seattle to Bainbridge Island
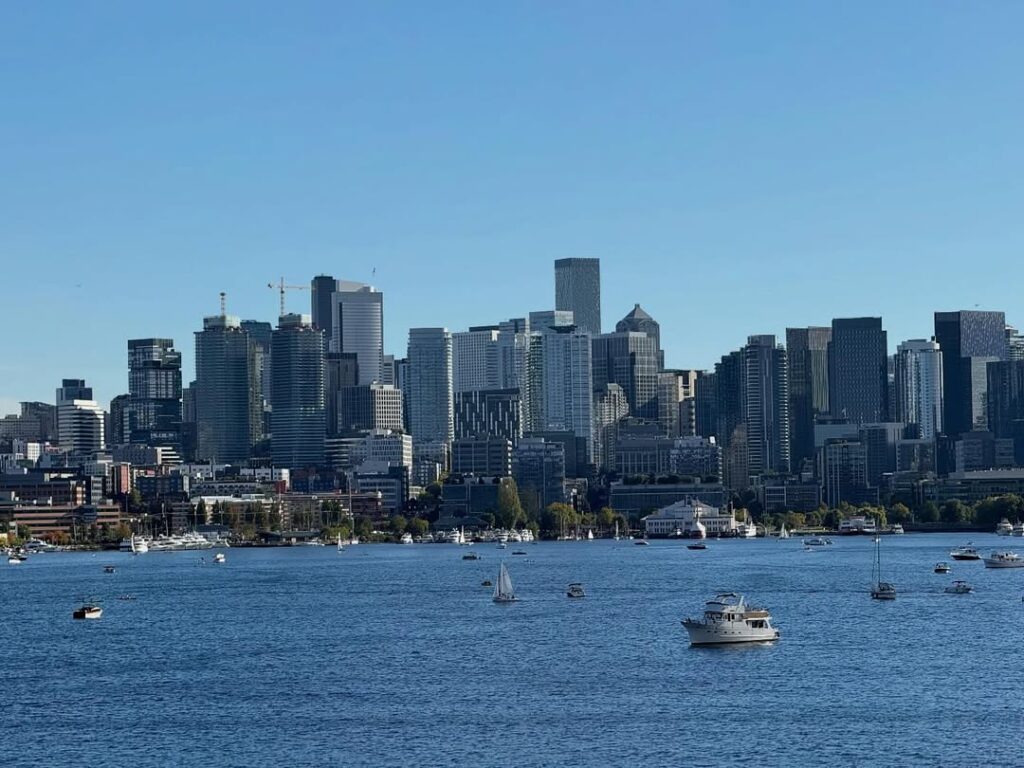
After spending time in downtown Seattle for work, I opted for the ferry ride across the Puget Sound as the ideal starting point for my journey. The ferry trip was not only effortless but also offered breathtaking views, making it the perfect introduction to the trip. Though driving a car onto a ferry might seem intimidating, it’s actually a very simple and safe process.
On the day before my trip, I wandered around Pioneer Square and stopped by the ferry terminal to ask a few questions and get myself oriented for the early morning departure. There’s no need for reservations; just show up 20-30 minutes before the scheduled departure, and you’ll find yourself in the car line ready to board.
The fee for taking a car on the ferry is reasonable—under $20—which also covers the cost of the driver. More info about the ferry ride can be found here!
Exploring the Sequim Region: Dungeness Spit & Wildlife Reserve
Dungeness Spit (State Park & Wildlife Reserve)
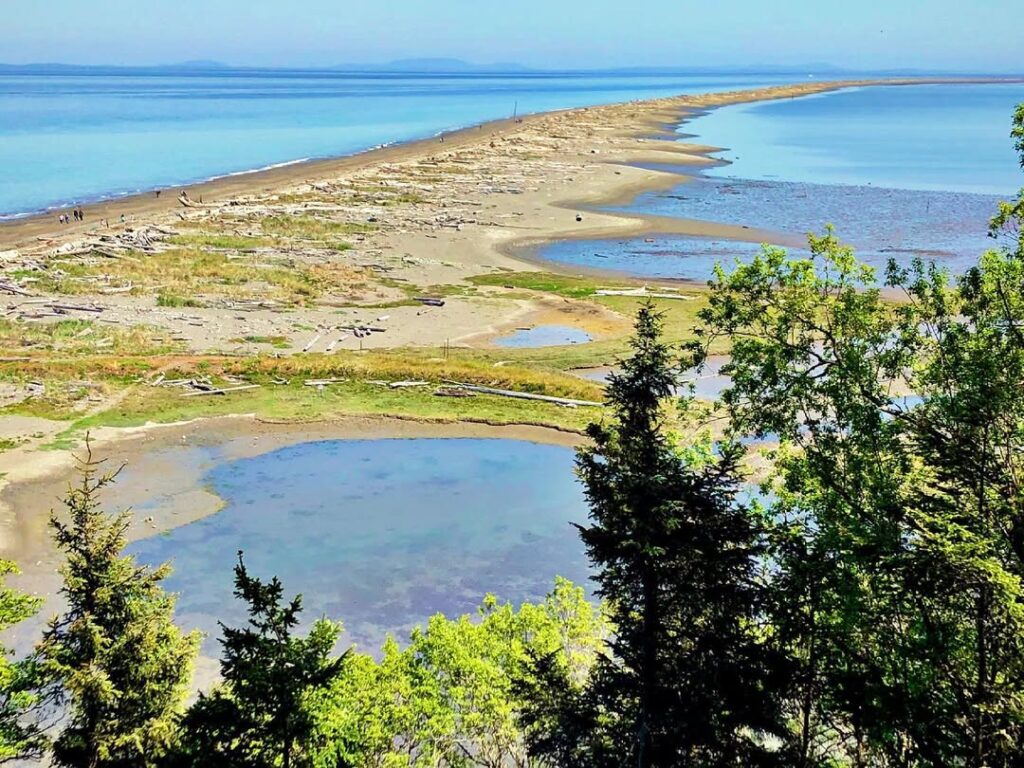
Located along the northern edge of the Olympic Peninsula, the Dungeness Spit is a fascinating natural feature stretching 6.8 miles. As the longest natural spit in the U.S., it is a constantly evolving landform, growing a few feet each year.
This spit plays an essential role in protecting the coastline from harsh winds and turbulent waters, creating a calm bay that serves as a safe haven for local wildlife. While some sections are designated exclusively for wildlife, visitors can walk the full length of the spit, which leads to the Dungeness Lighthouse about five miles in. It’s an ideal spot for birdwatching, beachcombing, and enjoying the coastline.
While entry to Dungeness State Park is free, there is a $3 fee to walk out onto the spit, which is part of the Dungeness Wildlife Refuge. This fee helps fund the preservation and upkeep of the spit and its surrounding environment. If walking the spit isn’t on your agenda, there are several vantage points within and outside the park where you can admire the spit without cost.
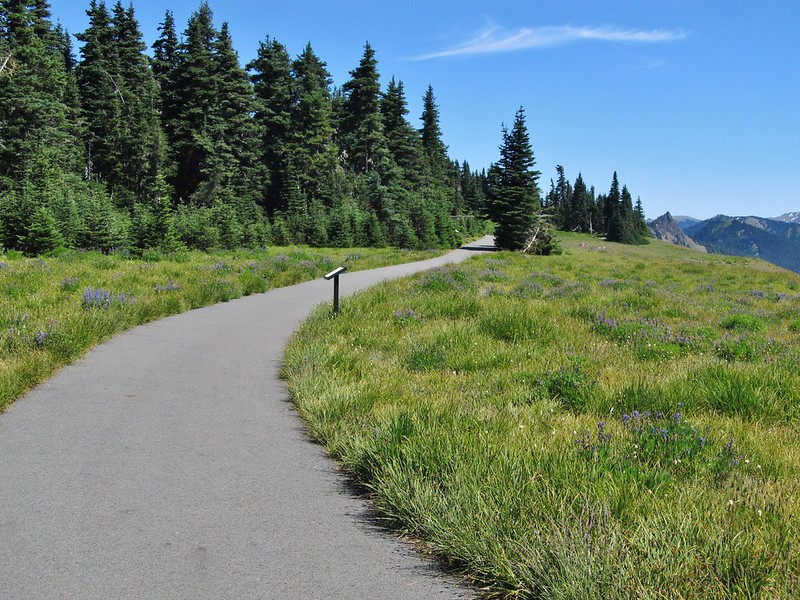
Hurricane Ridge Region: A Must-See in Olympic National Park
Hurricane Ridge – Olympic National Park
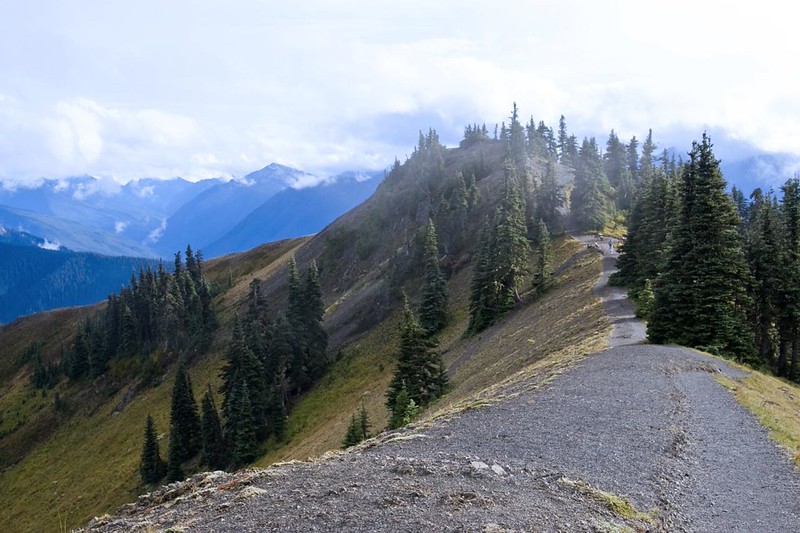
No visit to Olympic National Park is complete without making your way to Hurricane Ridge. After an 18-mile drive up to the ridge, you’ll be rewarded with breathtaking views of the Olympic Mountains to the south and the Strait of Juan de Fuca with Victoria Island to the north.
There are various hiking trails and lookout points along the ridge, including the well-known Klahhane Ridge and Hurricane Hill trails. However, I arrived too late in the day to tackle a long hike, so I chose to enjoy the scenic drive and take a short 1.5-mile hike along the Cirque Rim and Big Meadow loops. Both are excellent options for those with limited time (or energy!).
Lake Crescent Region: Scenic Hikes and Tranquil Camping
Marymere Falls
A short, easy 1.8-mile out-and-back hike (0.9 miles each way) takes you to the stunning Marymere Falls. The mostly flat trail winds through an ancient forest with a gentle climb toward the end, leading to the waterfall. It’s a perfect option for anyone seeking a quick nature walk without venturing too far off the beaten path.
Overnight – Fairholme Campground
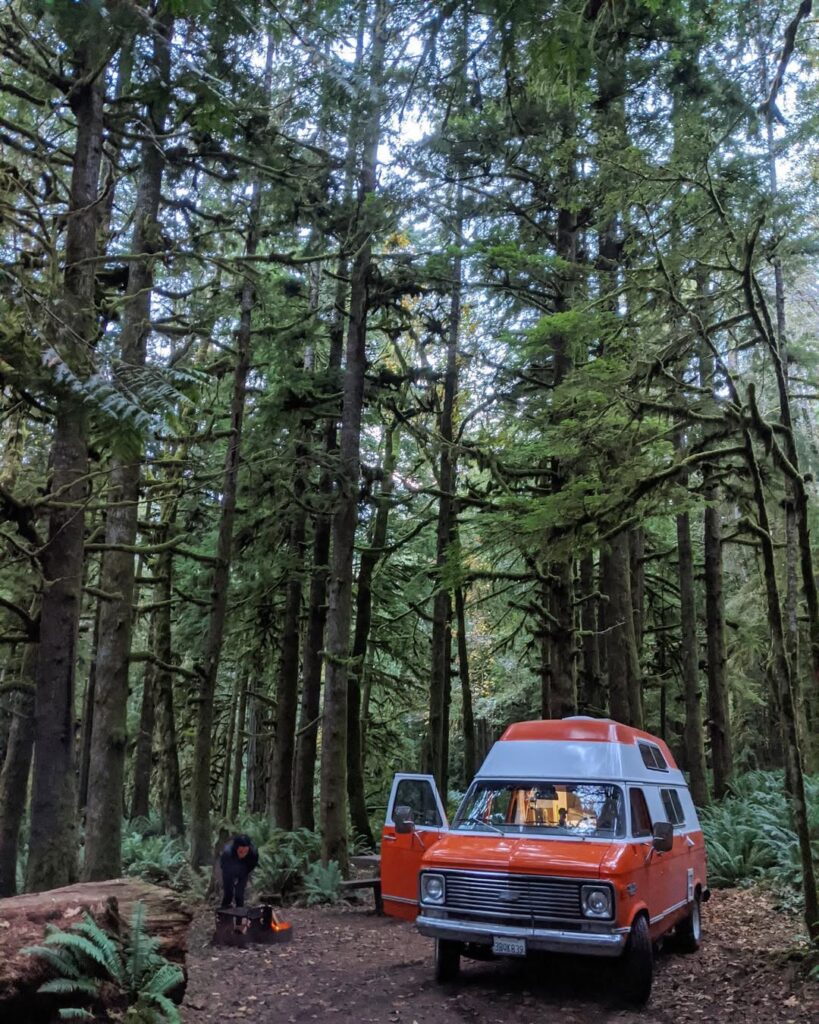
Conveniently located off Highway 101, the Fairholme Campground offers a peaceful stay on the shores of Lake Crescent. With all 87 campsites surrounded by lush greenery and draped in moss, it feels like an oasis in the forest.
The campground offers a mix of RV and tent sites, including a few walk-in spots right by the lake. Unfortunately, I arrived too late to snag one of the coveted waterfront sites, but I made do with a hilltop spot offering a view of the sparkling blue lake framed by towering trees. If you’re planning to stay here, I’d recommend arriving early to secure a lakeside spot—picture yourself sipping coffee with the lake at your feet in the morning!
Campsites are available on a first-come, first-served basis, with a fee of $20 per night. The campground provides potable water, bear boxes, and flush toilets, though there are no showers. Each site comes with a firepit and picnic table, making it a comfortable place to unwind after a day of exploration.
For up-to-date information on campsite availability, check the status of Fairholme Campground here.
Day 2: Exploring the Soleduck Valley Region
Miles Driven: 102 miles
Hours in Car: 2.5 hours
Sol Duc Valley Area
Salmon Cascades
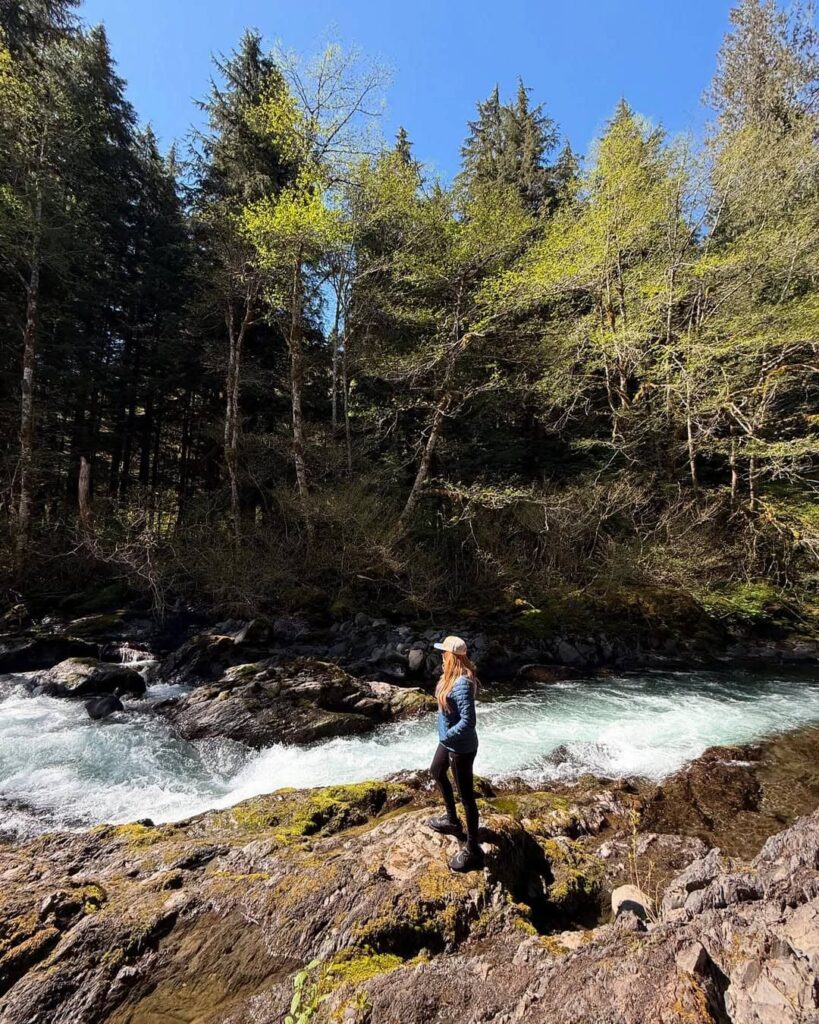
A quick roadside stop, Salmon Cascades offers a chance to witness coho salmon navigating upstream and leaping through waterfalls, tackling various obstacles along the way. The spawning season is limited to certain times of the year, so it’s a good idea to check in at the ranger station for updates on the salmon run during the summer and fall months. I was fortunate to catch the tail end of the run during my visit, which was a remarkable sight!
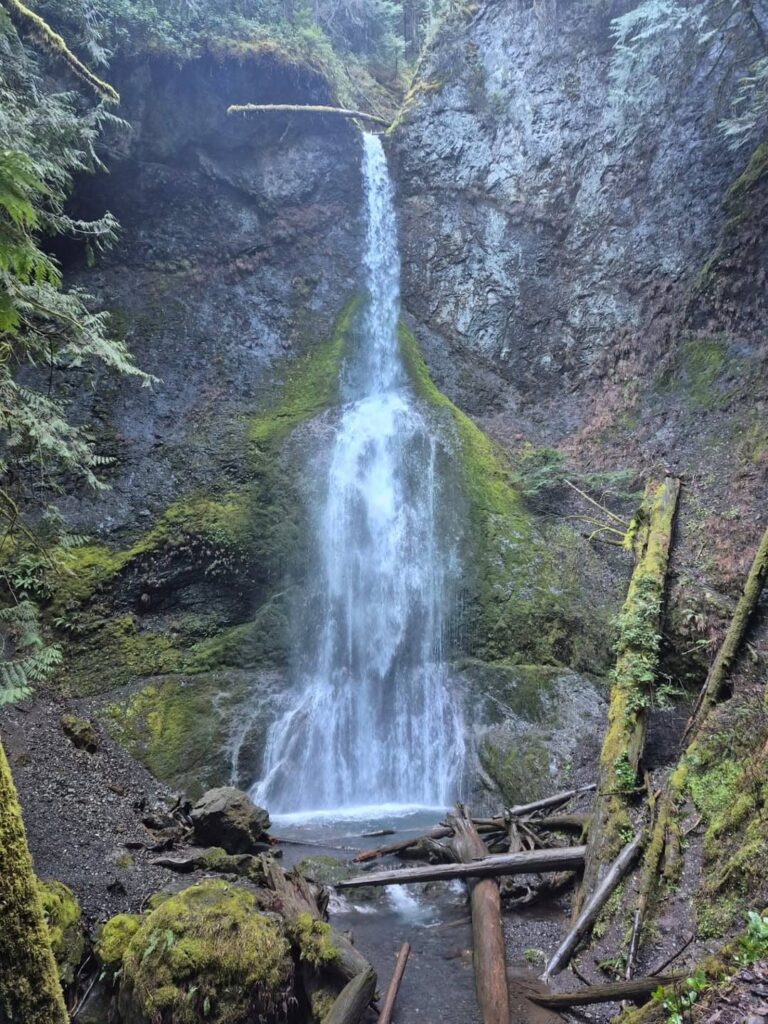
Sol Duc Falls
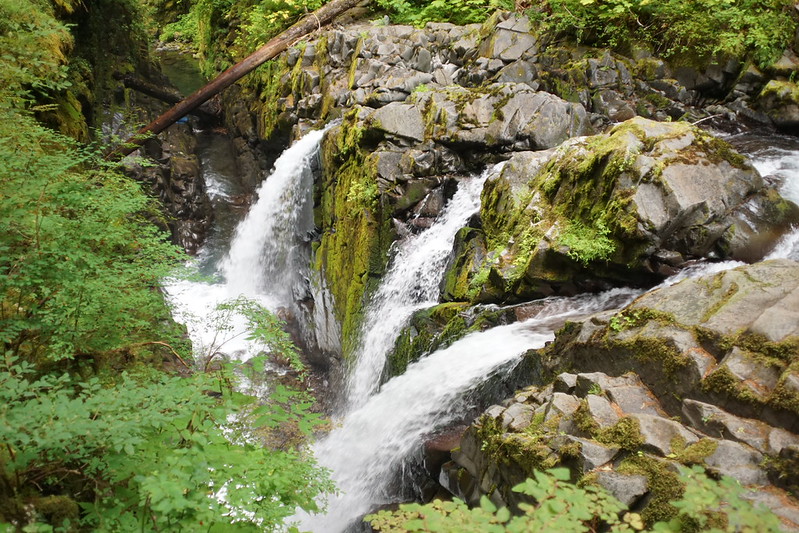
For a truly immersive experience, I recommend the 1.6-mile out-and-back hike (0.8 miles each way) to Sol Duc Falls, winding through lush temperate rainforest. This hike and waterfall stood out as my favorite of the entire trip. If you’re limited to just one waterfall hike, I would definitely choose Sol Duc Falls over Marymere Falls. The beauty of the falls and the surrounding forest make it well worth the effort.
La Push/Mora Region: A Coastal Adventure
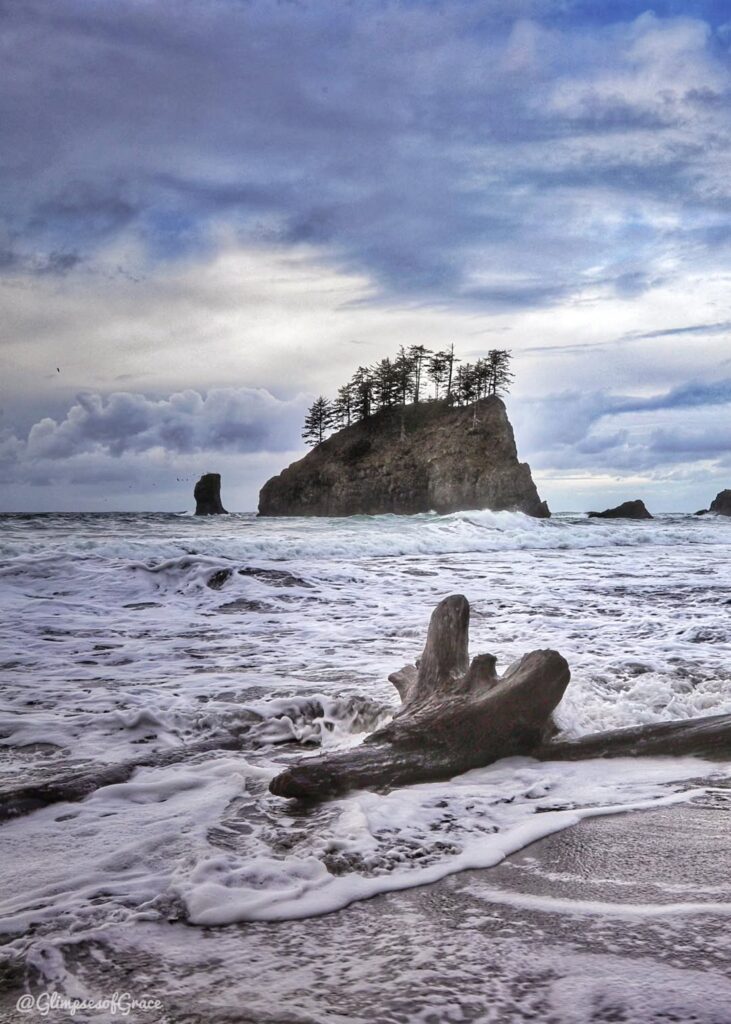
Rialto Beach
Rialto Beach, a rocky stretch on the western edge of the peninsula, is home to towering sea stacks that rise dramatically from either side of the beach. Though less visited than some of its neighboring beaches in La Push, it holds its own in beauty. I was so taken with Rialto Beach that I returned the following morning to cook breakfast and take in the scenery again.
La Push First Beach
Situated within the reservation town of La Push, First Beach is the most accessible, with the ability to drive directly up to the shore. Framed by sea stacks both close by and in the distance, it provides an ideal spot to appreciate the area’s natural beauty and capture stunning photos.
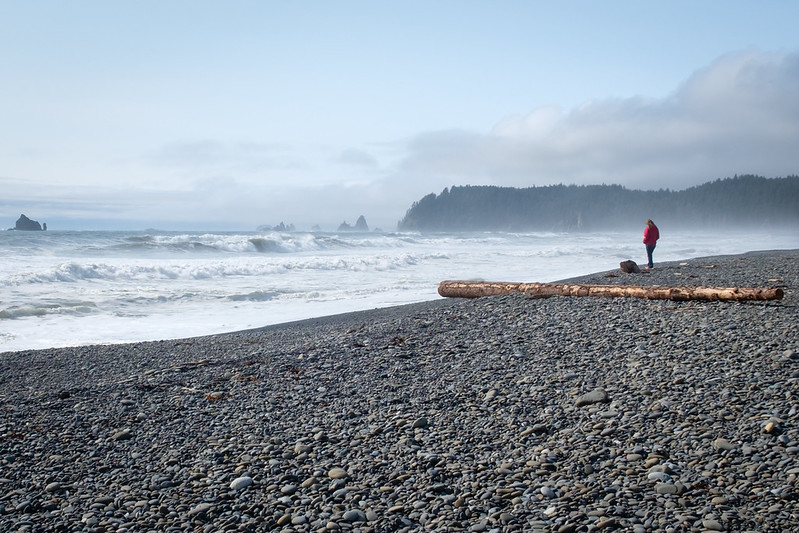
La Push Second Beach – High Tide
In my opinion, Second Beach is the most beautiful beach in the area. The coastline features large and medium-sized sea stacks, along with rocky tidepools scattered across the sand. Wherever you stand, you’re surrounded by magnificent views of crashing waves, soaring birds, and rock formations reflected in the wet sand.
I enjoyed my time on Second Beach so much that I visited twice – once during high tide and again at low tide. I preferred the photos from high tide but loved exploring the tidepools during low tide. Unlike First Beach, reaching Second Beach requires a 0.7-mile hike, which is all downhill on the way in, but naturally uphill on the way back.
La Push Third Beach
Third Beach is likely the least visited of the La Push beaches, mainly due to its 1.5-mile one-way access trail. Intrigued by this often-overlooked spot, I decided to commit to the 3-mile round trip and was rewarded with a sprawling, quiet coastline almost entirely to myself. Though the scenery was beautiful, it didn’t quite match the inspiration I felt at Second Beach. However, for those seeking solitude and a beach free of tourists, Third Beach is a perfect escape.
If you’re planning to camp on the beach, I recommend securing permits for Third Beach for a peaceful, natural experience. During my evening visit, I counted over 15 tents set up on Second Beach compared to just three on Third Beach.
Overnight – Mora Campground
Mora Campground, located just a short drive from many of the region’s top sights and trails, is an excellent base for exploring Olympic’s rugged coast. The campground is well-kept, positioned a few miles inland, which protects it from the strong ocean winds and surf.
The campground offers 94 first-come, first-served sites spread across five loops (A – E). Each site is drive-in accessible and equipped with a fire pit and picnic table. The campground also provides potable water and flush toilets, though there are no showers. Bear boxes are not necessary here due to the lack of bear activity.
Day 3: Final Exploration of the La Push/Mora Region
Miles Driven: 275 miles
Hours in Car: 5 hours
La Push and Mora Region
Rialto Beach
I woke up before the crack of dawn, packed up camp, and made my way back to Rialto Beach to enjoy a peaceful breakfast by the sea before anyone else arrived. The entire coast was mine for at least an hour, and I took full advantage of the solitude. I cooked up a simple breakfast of instant oatmeal while sipping hot coffee, watching the first light of the day break over the horizon. The combination of the cool morning air, the sound of the waves, and the quiet beauty of the beach made this one of the most serene moments of the trip. It was a perfect opportunity to relax, reflect, and appreciate the natural surroundings. The calmness was so soothing and therapeutic that I lingered, taking in the views and the quiet.
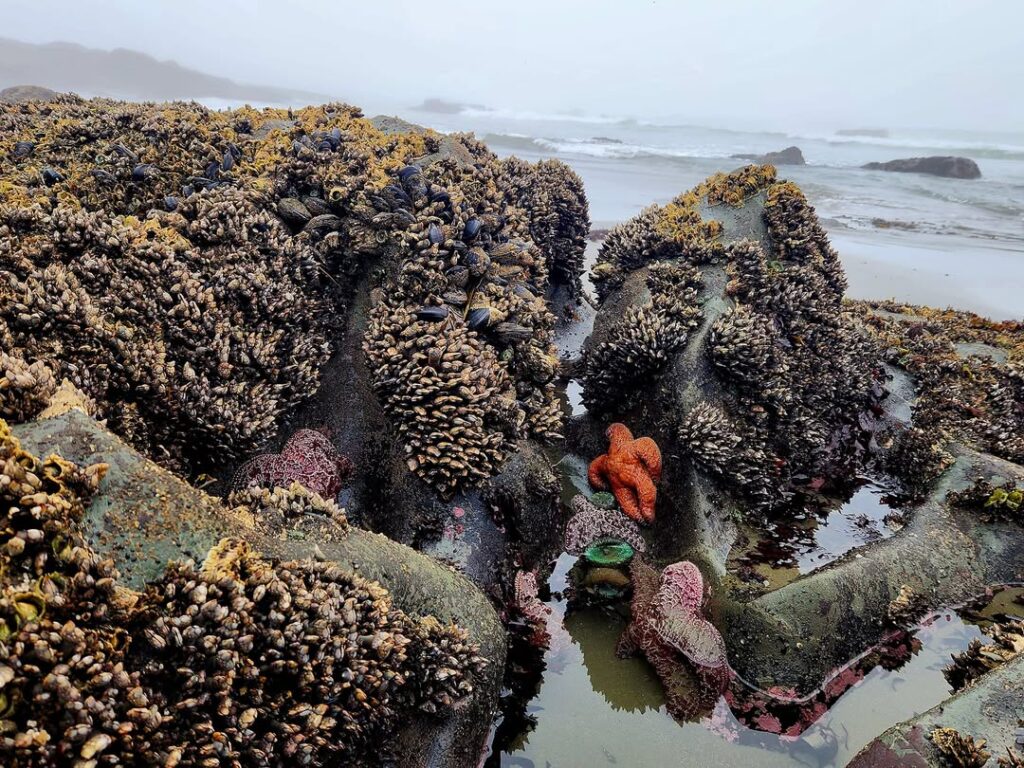
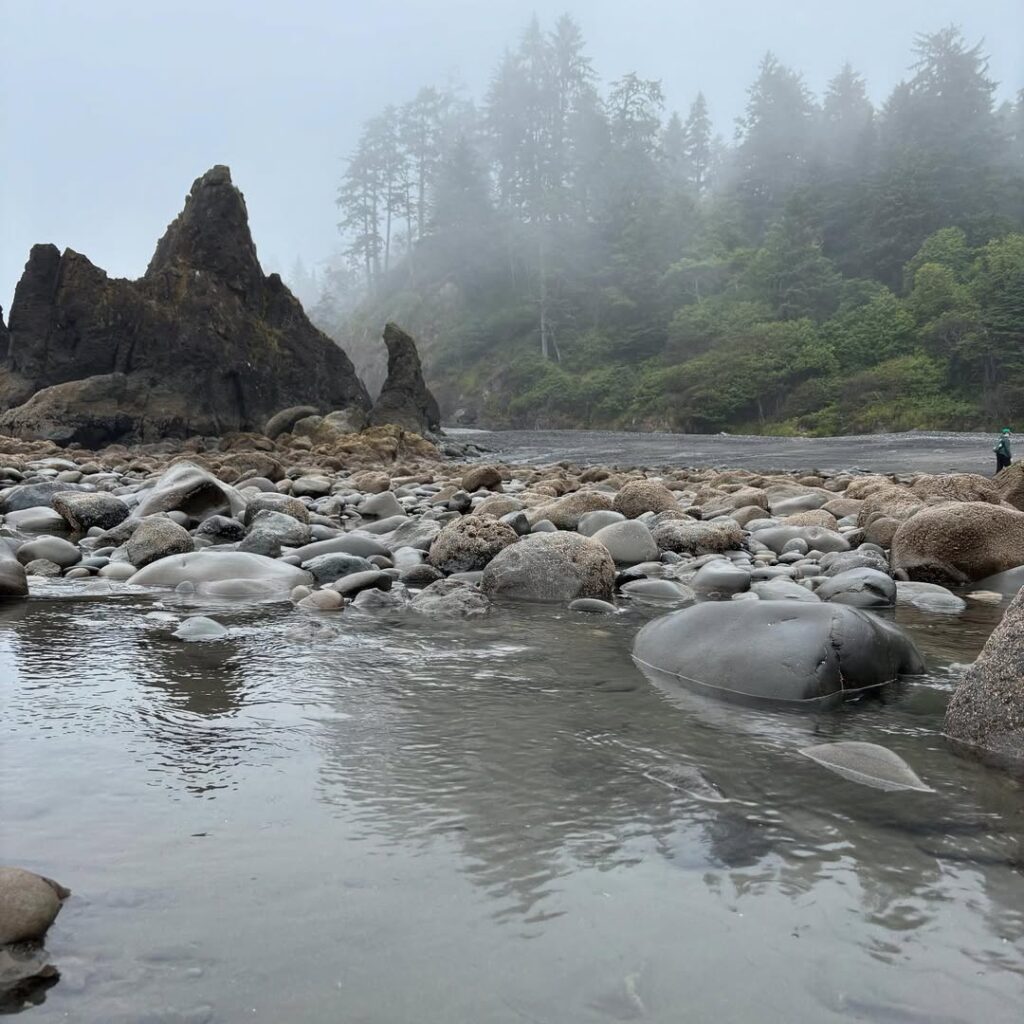
La Push Second Beach – Low Tide
My next stop was Second Beach, where I returned to catch the 9:30 AM low tide. The tides had receded dramatically, exposing more of the beach and revealing marine habitats that had been hidden earlier. To get to Second Beach, I embarked on a 1.4-mile round-trip hike, but the effort was well worth it. The scene had completely changed since my last visit—sea stacks loomed above, while tidepools appeared with their colorful marine life. I spent quite a bit of time examining the pools, filled with vibrant anemones, mussels, sea snails, and crabs. I had hoped to spot a starfish, but it wasn’t in the cards this time. Still, the tidepools were fascinating, and the beach felt like a magical place where the ocean meets the land in a display of life and beauty.
Ruby Beach
Next, I made my way to Ruby Beach, another easily accessible gem on the coast. This beach is popular for its panoramic views of the Pacific Ocean, and rightly so. The beach features massive sea stacks scattered across the shoreline, with piles of driftwood creating natural sculptures along the sand. It’s an incredible sight, whether you choose to view it from the parking lot or take the short trail down to the shore itself. The waves crashing against the sea stacks and the dramatic landscape made it feel like something out of a nature documentary. Even though I didn’t spend much time here, I thoroughly enjoyed the chance to take in the views, capture a few photos, and stretch my legs.
Kalaloch Beaches (Scenic Driving & Lookouts)
As I continued down the coast, I arrived at the Kalaloch Beaches, a series of five beaches that stretch along the coastline. These beaches are much flatter and sandier compared to the rocky terrain I’d explored earlier. While they didn’t offer the same dramatic scenery as the more rugged beaches, they still held their charm and would be perfect for a sunny summer day filled with swimming and sunbathing.
I stopped at Kalaloch Beach #1 for one last look at the ocean before heading inland. The view from the beach was magnificent, with the soft sands meeting the sparkling waves in a calm and peaceful scene.
Kalaloch Beach is also home to the Kalaloch Lodge and Campground, which makes for a good spot to stop for lunch or enjoy a picnic. The Lodge offers some cozy amenities, and it’s an excellent place to relax before continuing your journey.
Lake Quinault
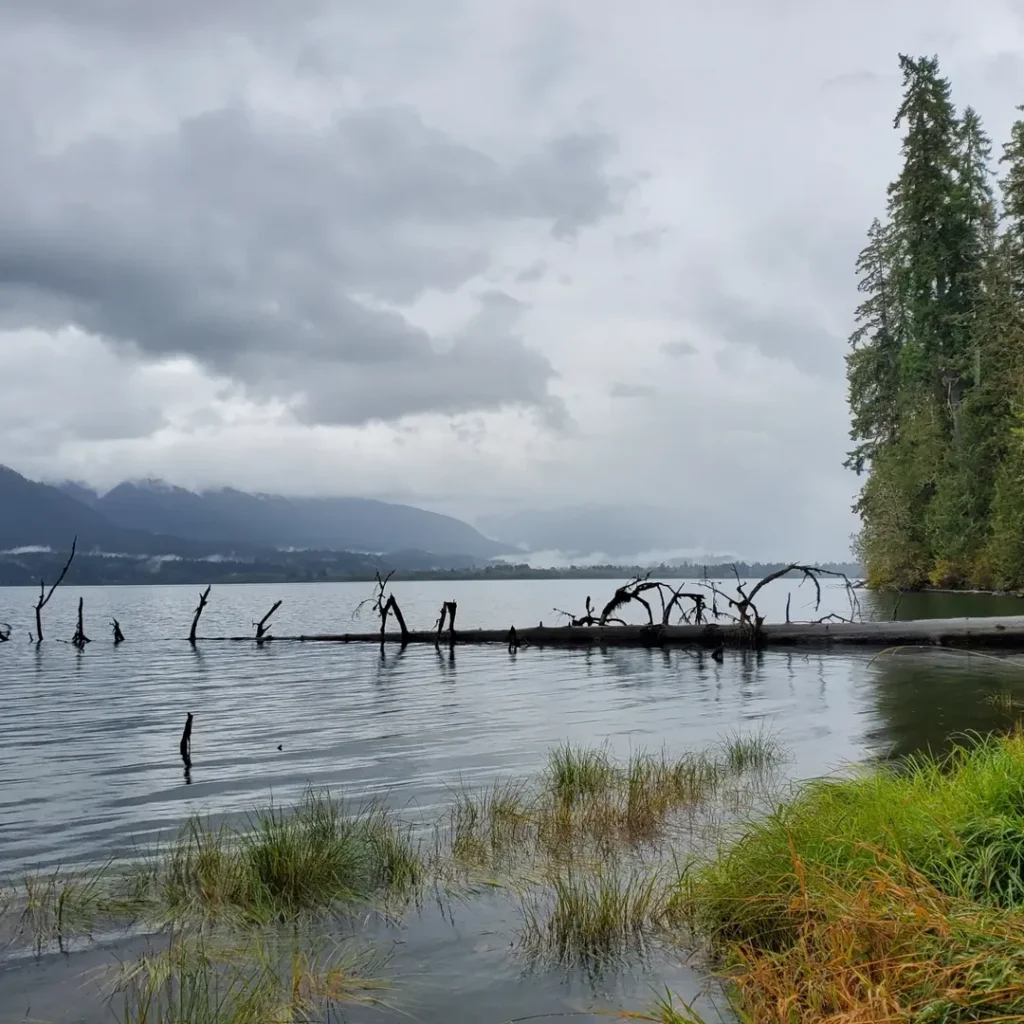
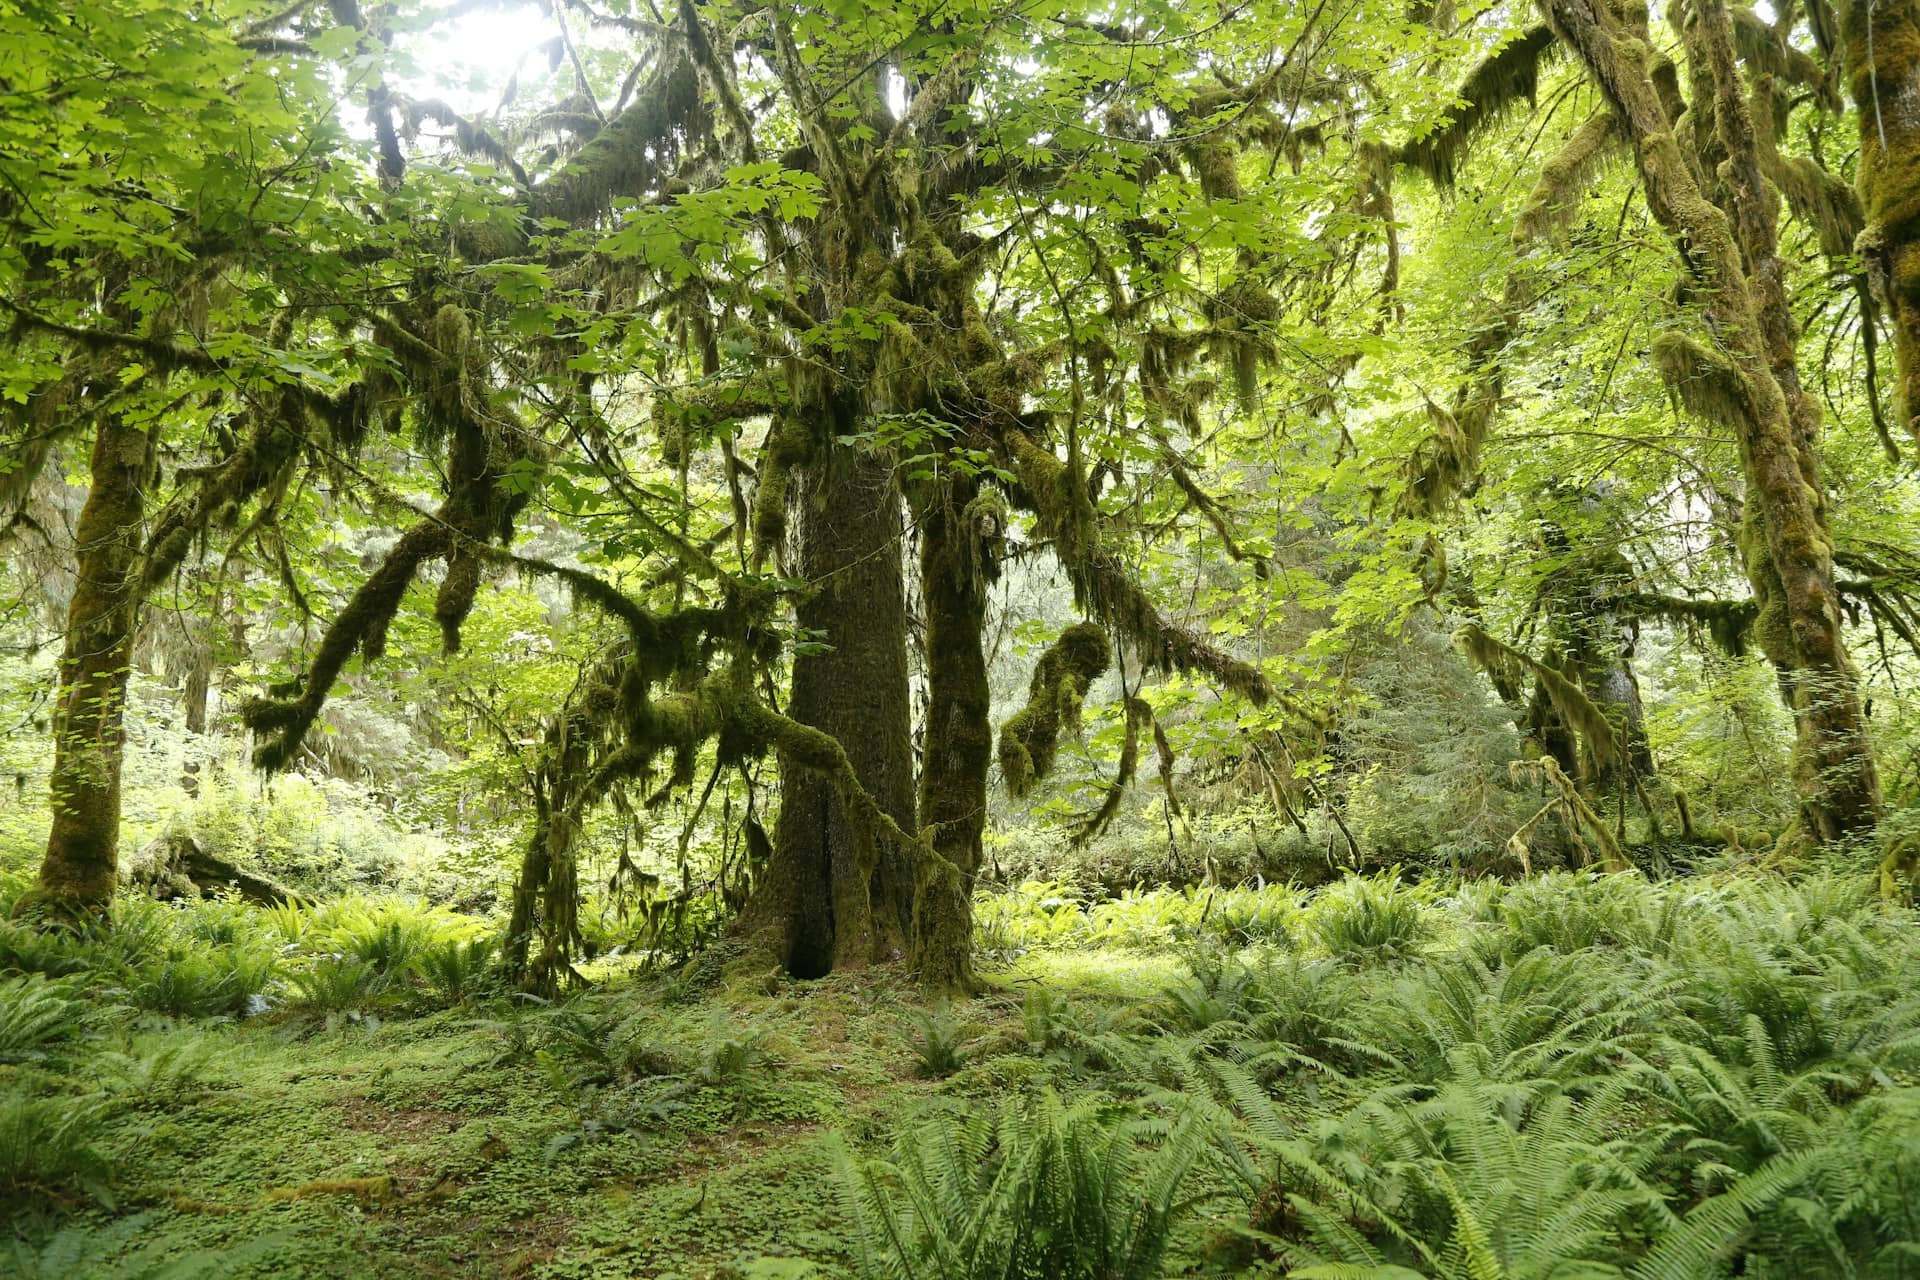
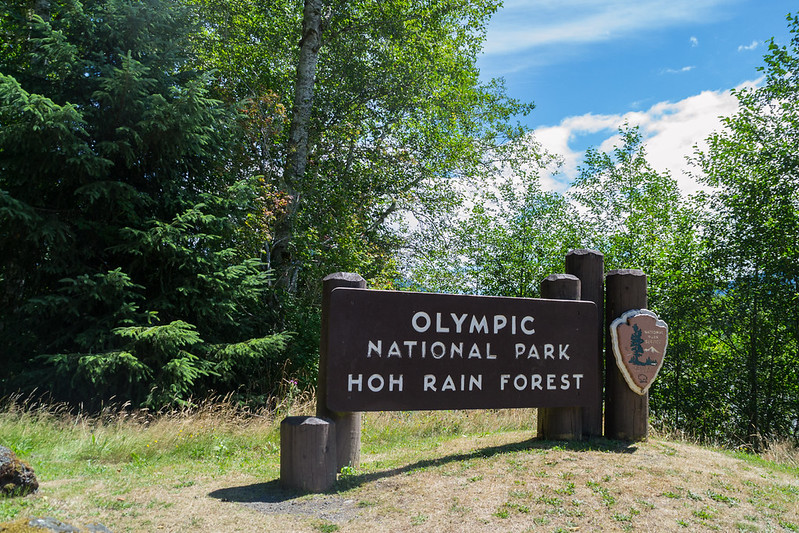
Lake Quinault was an unexpected highlight of my trip. Initially, I had planned to visit the Hoh Rainforest, but it was closed for maintenance during my visit. Instead, I decided to explore Lake Quinault, and I was pleasantly surprised by how beautiful and peaceful the area was. The region felt much more intimate and serene compared to the more tourist-heavy areas I had visited earlier. My favorite experience here was the rainforest walk—a 0.5-mile loop that takes you through a lush temperate rainforest filled with towering cedars, thick mosses, and ferns. As someone from Wisconsin, where the landscapes are vastly different, I found myself in awe of the environment. I spent nearly an hour wandering the trail, taking in the sights and sounds, and marveling at the plant life surrounding me.
To my delight, I also stumbled upon a hidden gem: a beautiful lakefront trail that led me from the rainforest to the shores of Lake Quinault. The trail meandered along the water’s edge, offering stunning views of the crystal-clear lake, with low-hanging clouds gently touching the surface of the water. It was a quiet, peaceful place, and I thoroughly enjoyed the solitude, allowing the beauty of nature to sink in. The lake itself was calm, and the views across the water were nothing short of breathtaking. Lake Quinault ended up being one of the most memorable places of the trip, a quiet retreat surrounded by the lushness of the rainforest and the stillness of the lake.
Big Trees
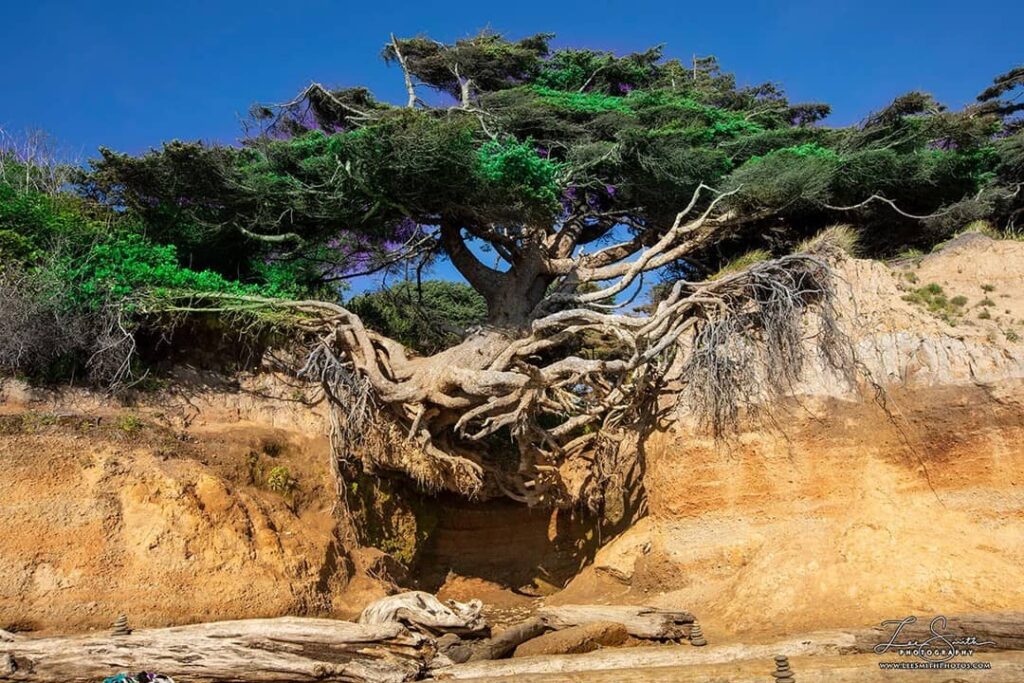
As I continued along Highway 101, I happened upon multiple signs marking “world record” trees, which turned out to be an unplanned but fascinating detour. I couldn’t resist stopping at each one, marveling at these massive trees that had stood for centuries. It was incredible to see these natural giants up close and to think about how long they had been around, weathering storms, fires, and everything else nature could throw at them.
Among the record-breakers I saw were:
- The world’s largest Cedar
- The largest Sitka Spruce
- The biggest Douglas Fir
It was awe-inspiring to stand beside trees that were hundreds, if not thousands, of years old and reflect on their enduring presence. These stops, though brief, were reminders of nature’s grandeur and how small we are in comparison.
Return Drive
From Lake Quinault, I began the drive back to Seattle, completing my loop through Aberdeen and Olympia on the way. I was headed back to catch my red-eye flight to Milwaukee, which marked the end of my solo journey.
As I returned the rental car and boarded my plane, I couldn’t help but feel a sense of accomplishment and gratitude. This trip had been a journey of exploration, discovery, and reflection, and I was already thinking about my next adventure.
For Those with More Time
If you’re fortunate enough to have more than three days, I recommend extending your stay to dive deeper into each part of the park. Spend time truly getting to know each area and let your personal interests guide you through the different regions. There’s so much to experience, and taking your time will let you appreciate it all more.
There are a few spots I wasn’t able to visit during my trip, but they’re on my list for next time. I’ve plotted these locations on my road trip Google Map to help with reference if you want to add them to your itinerary.
For Those with Limited Time
For those with less than three days to explore the peninsula, my advice is to choose one area that interests you the most and focus on that. Whether you’re drawn to the mountains, coastline, rainforest, or inland lakes, narrowing your focus will allow you to experience one or two regions thoroughly instead of trying to rush through the entire peninsula in a short time.
The Olympic Peninsula is larger than it might appear, and you definitely don’t want to spend all your time driving from one spot to the next.
Have you ever visited the Olympic Peninsula? Share your favorite destinations in the comments below!
More Related Articles :